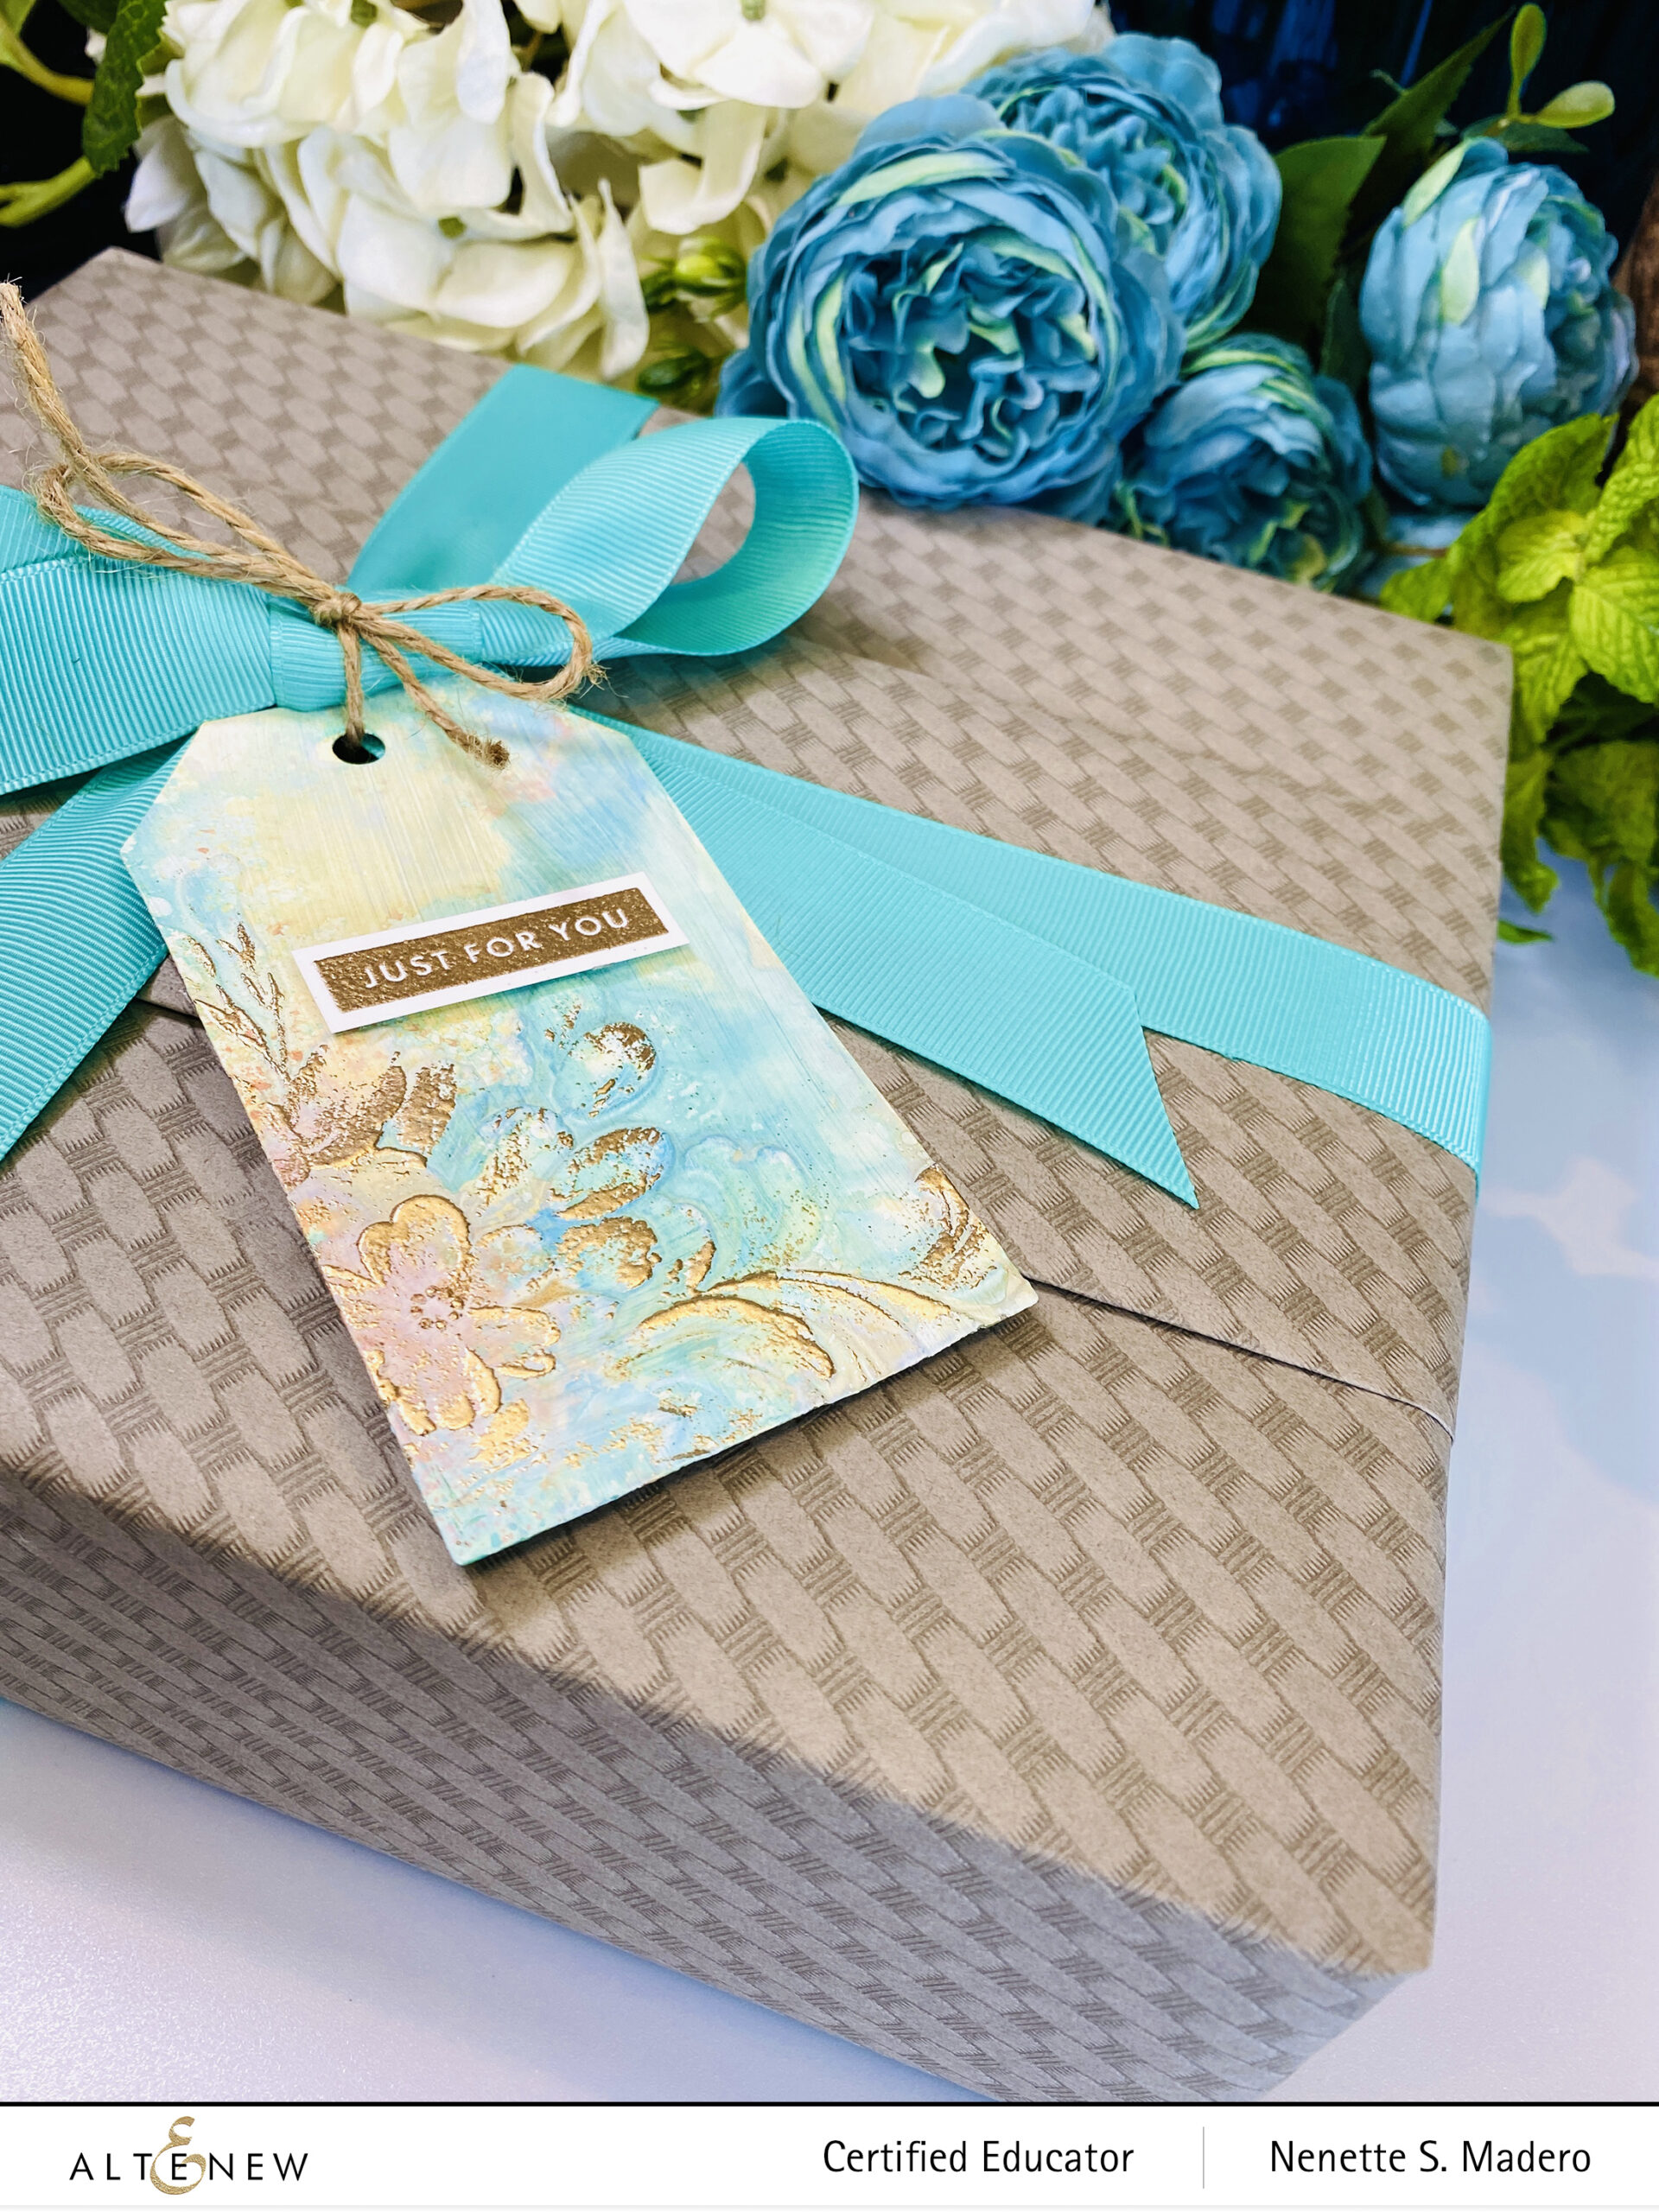
Hello, everyone! Welcome to my blog! I was invited to be a guest designer at Altenew’s mixed media blog, and I wanted to share with you what I made. I used 3D embossing folders to create these mixed media tags. For more info, check out the Altenew Mixed Media Blog for all the details.
I’m attaching a video on how I created these tags. Enjoy!
Hello, friends! Welcome to my blog! If you just came from Hussena Calcuttawala, you’re on the right track. I’m honored to be invited to be a part of Altenew’s Watercolors Blog Hop. This is the end of the hop list, so I hope you were inspired by all the projects the designers came up with. Full details can be found on Altenew’s blog.
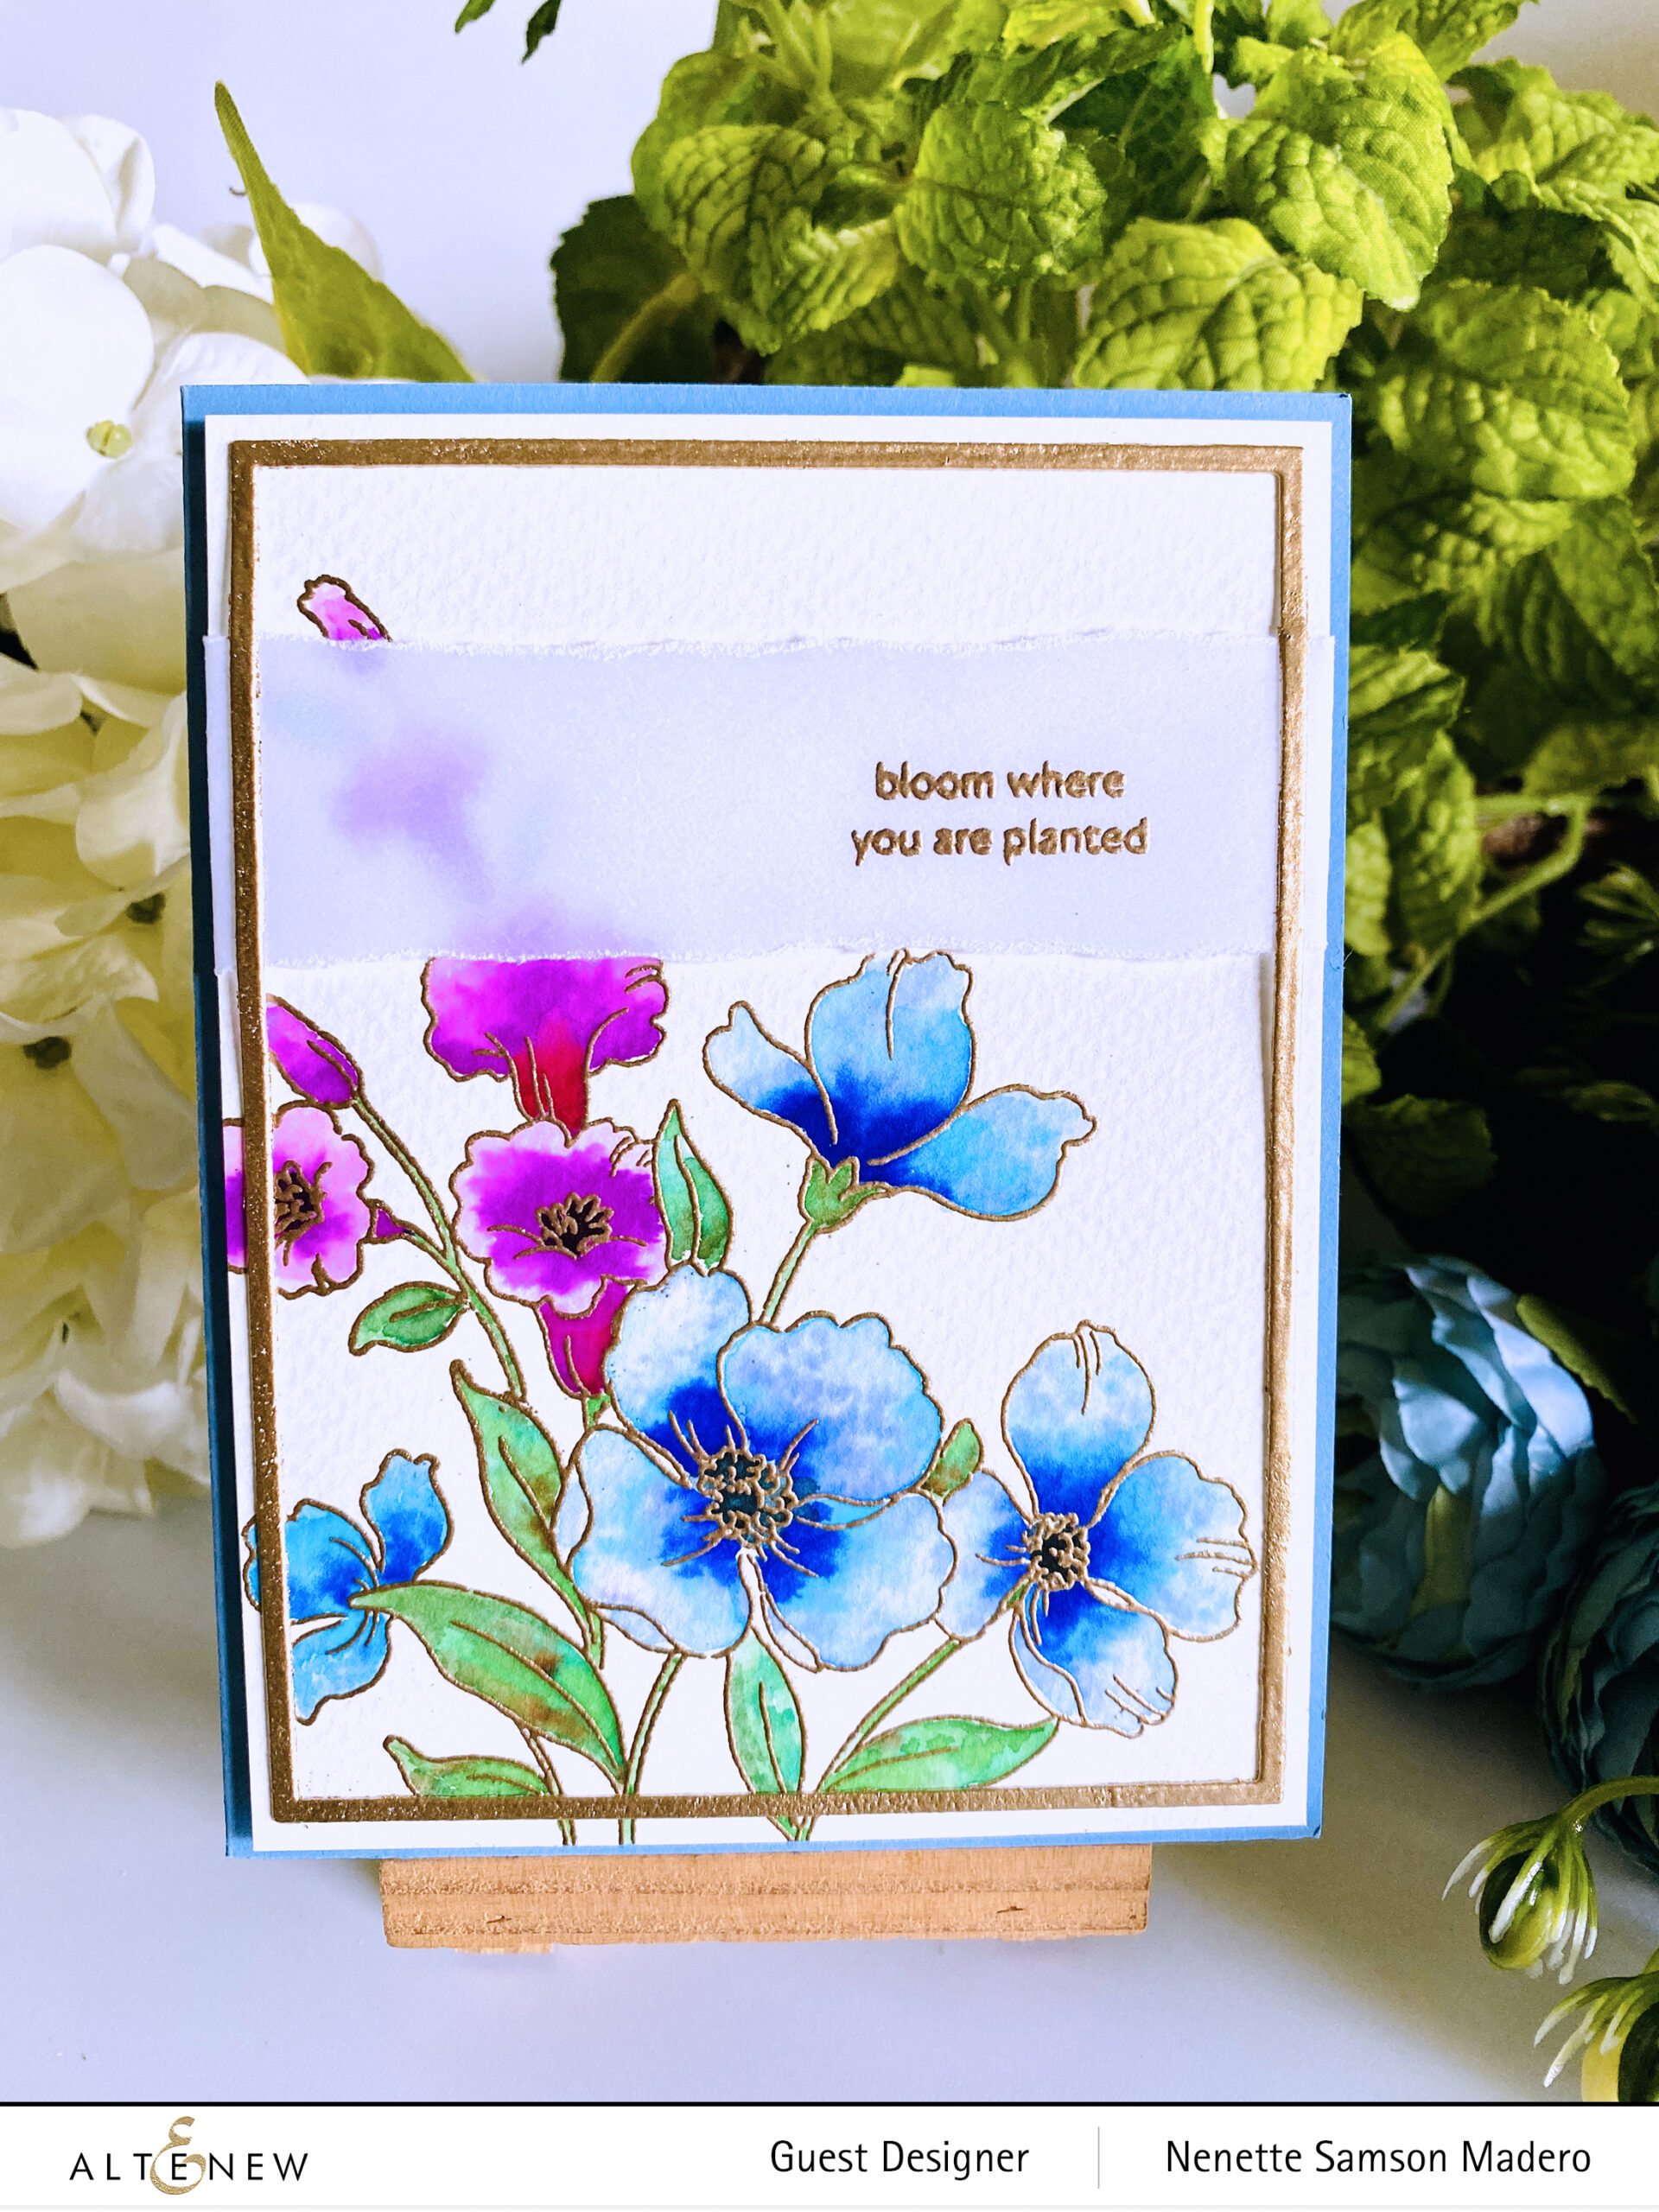
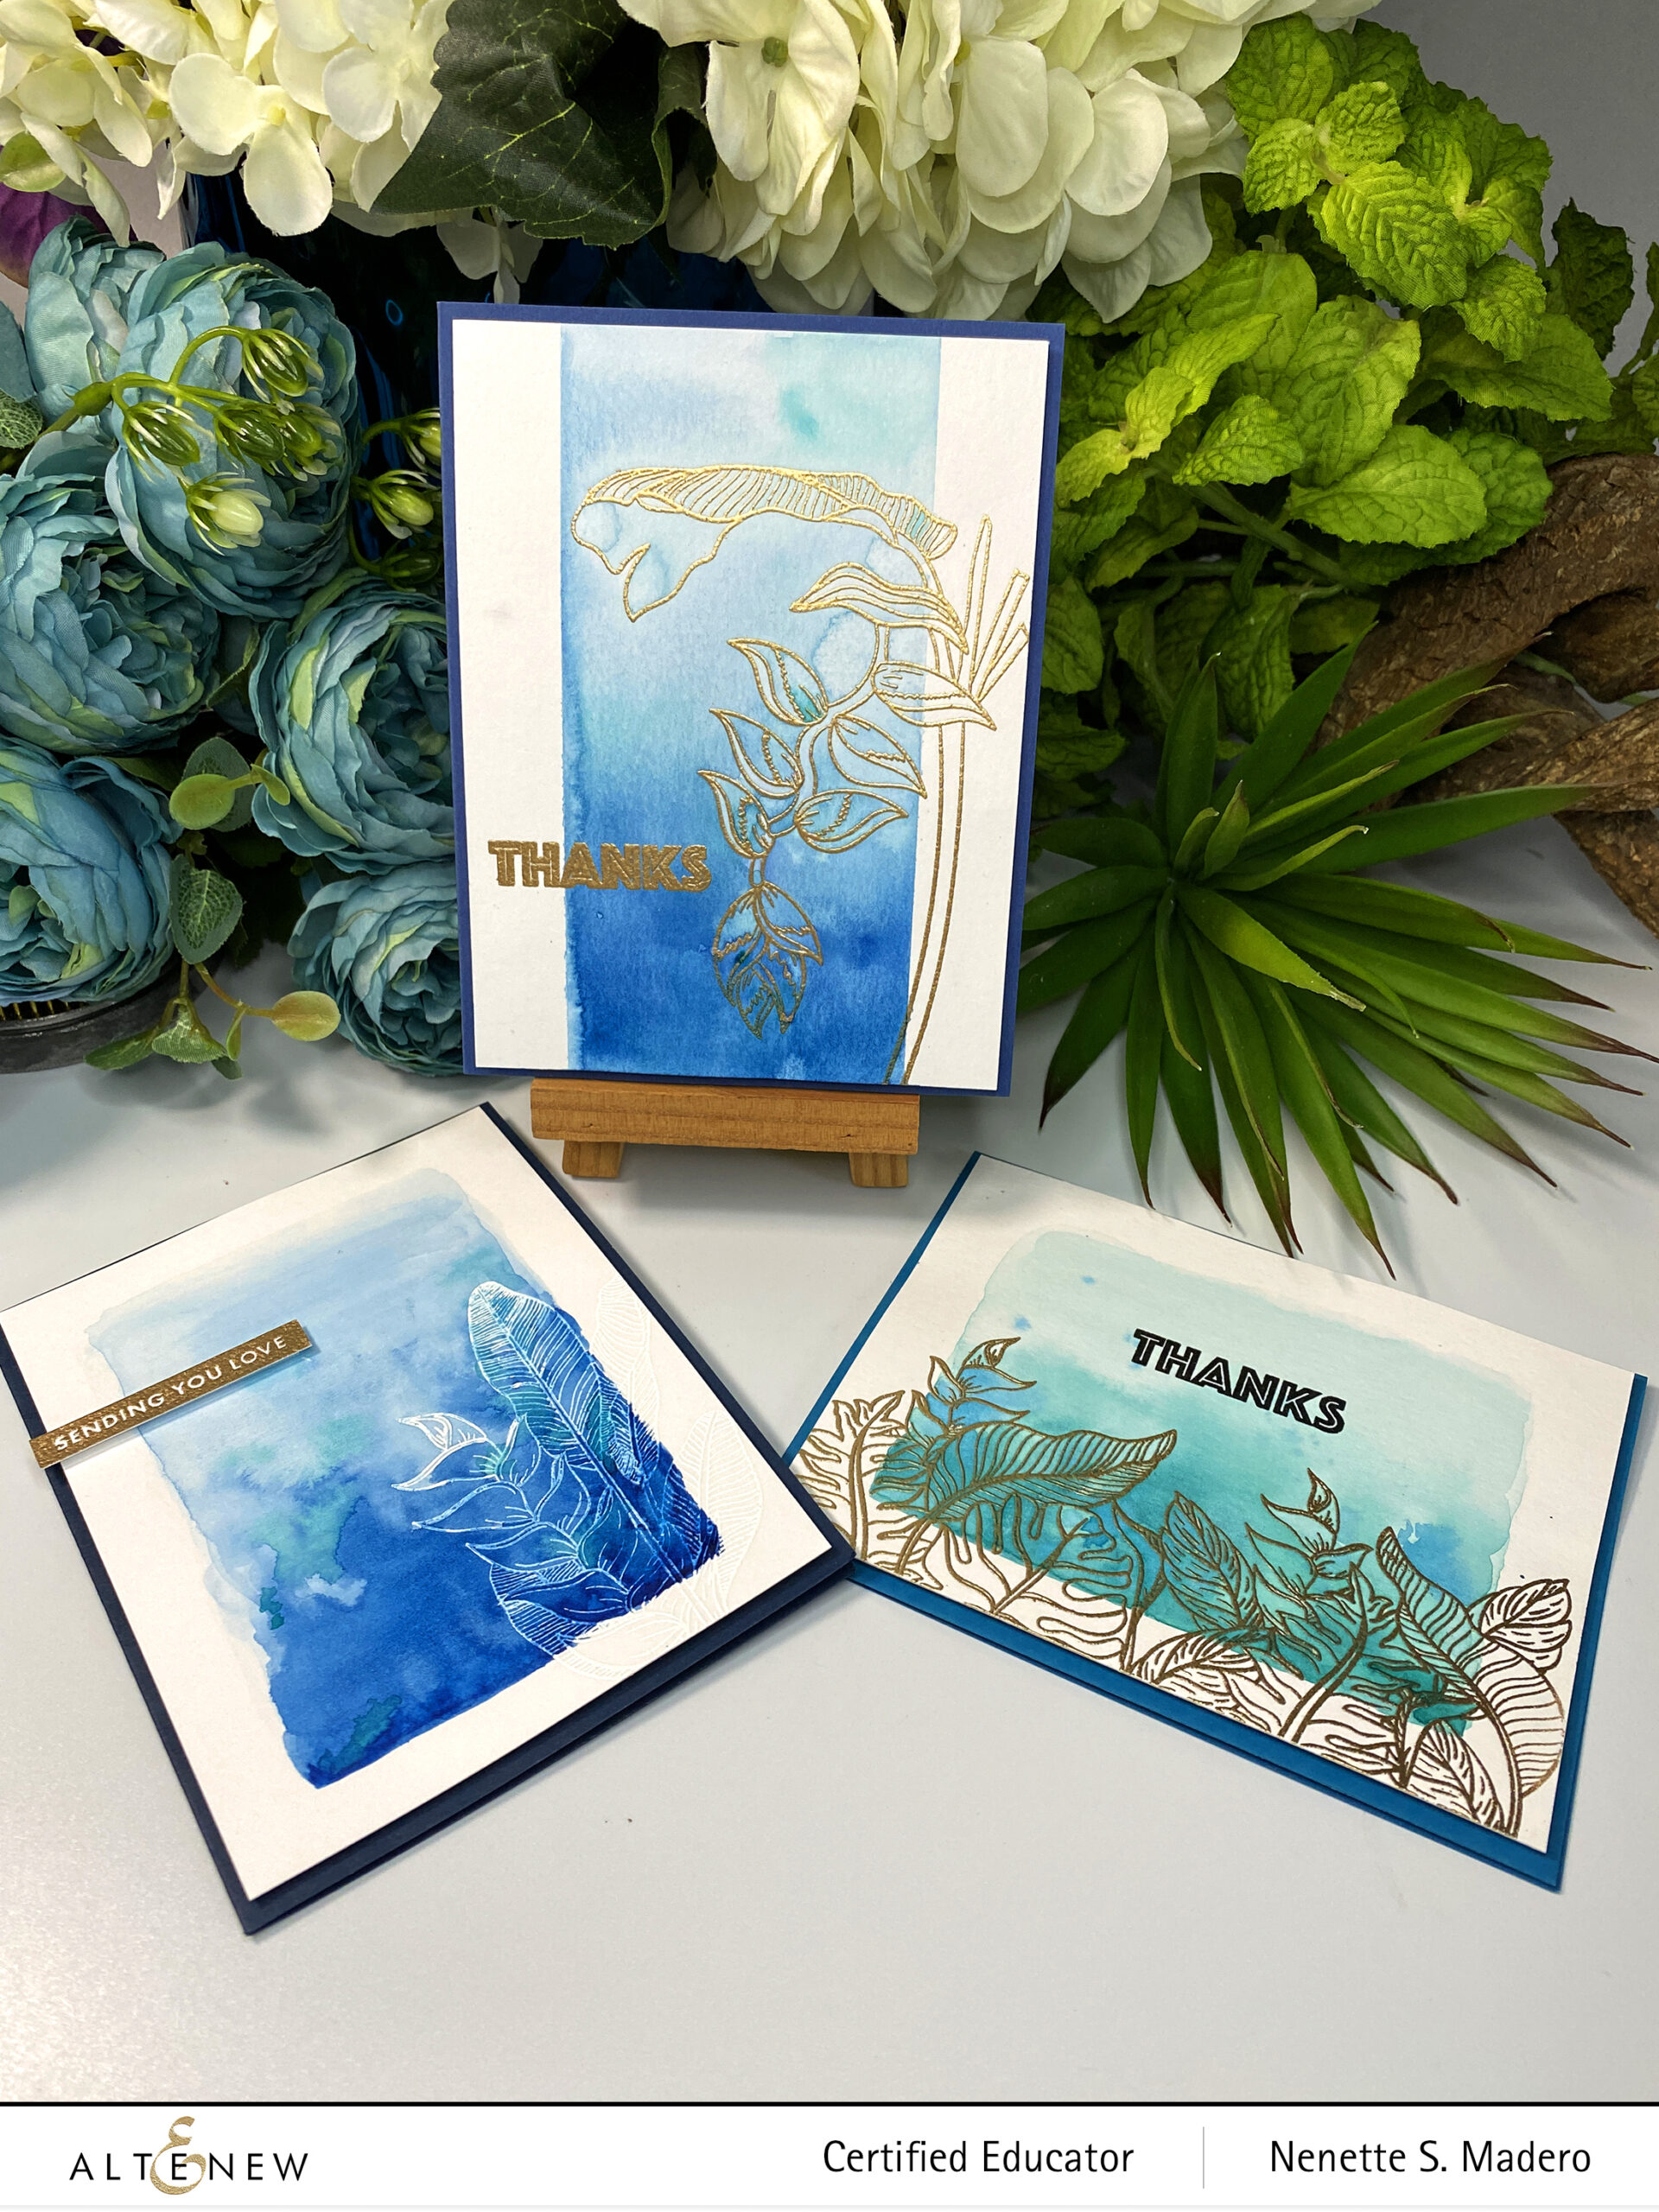
I fell in love with watercoloring several years ago and enjoy using them with my cards. Altenew has watercolor pans and liquid brush markers to choose from. You can find them here. I created a couple of cards using the Artist Watercolor Pan set, but I also included other older scrapbooking projects using Altenew’s Watercolor Brush markers. Here are the cards using the Artist Watercolor Pan set.
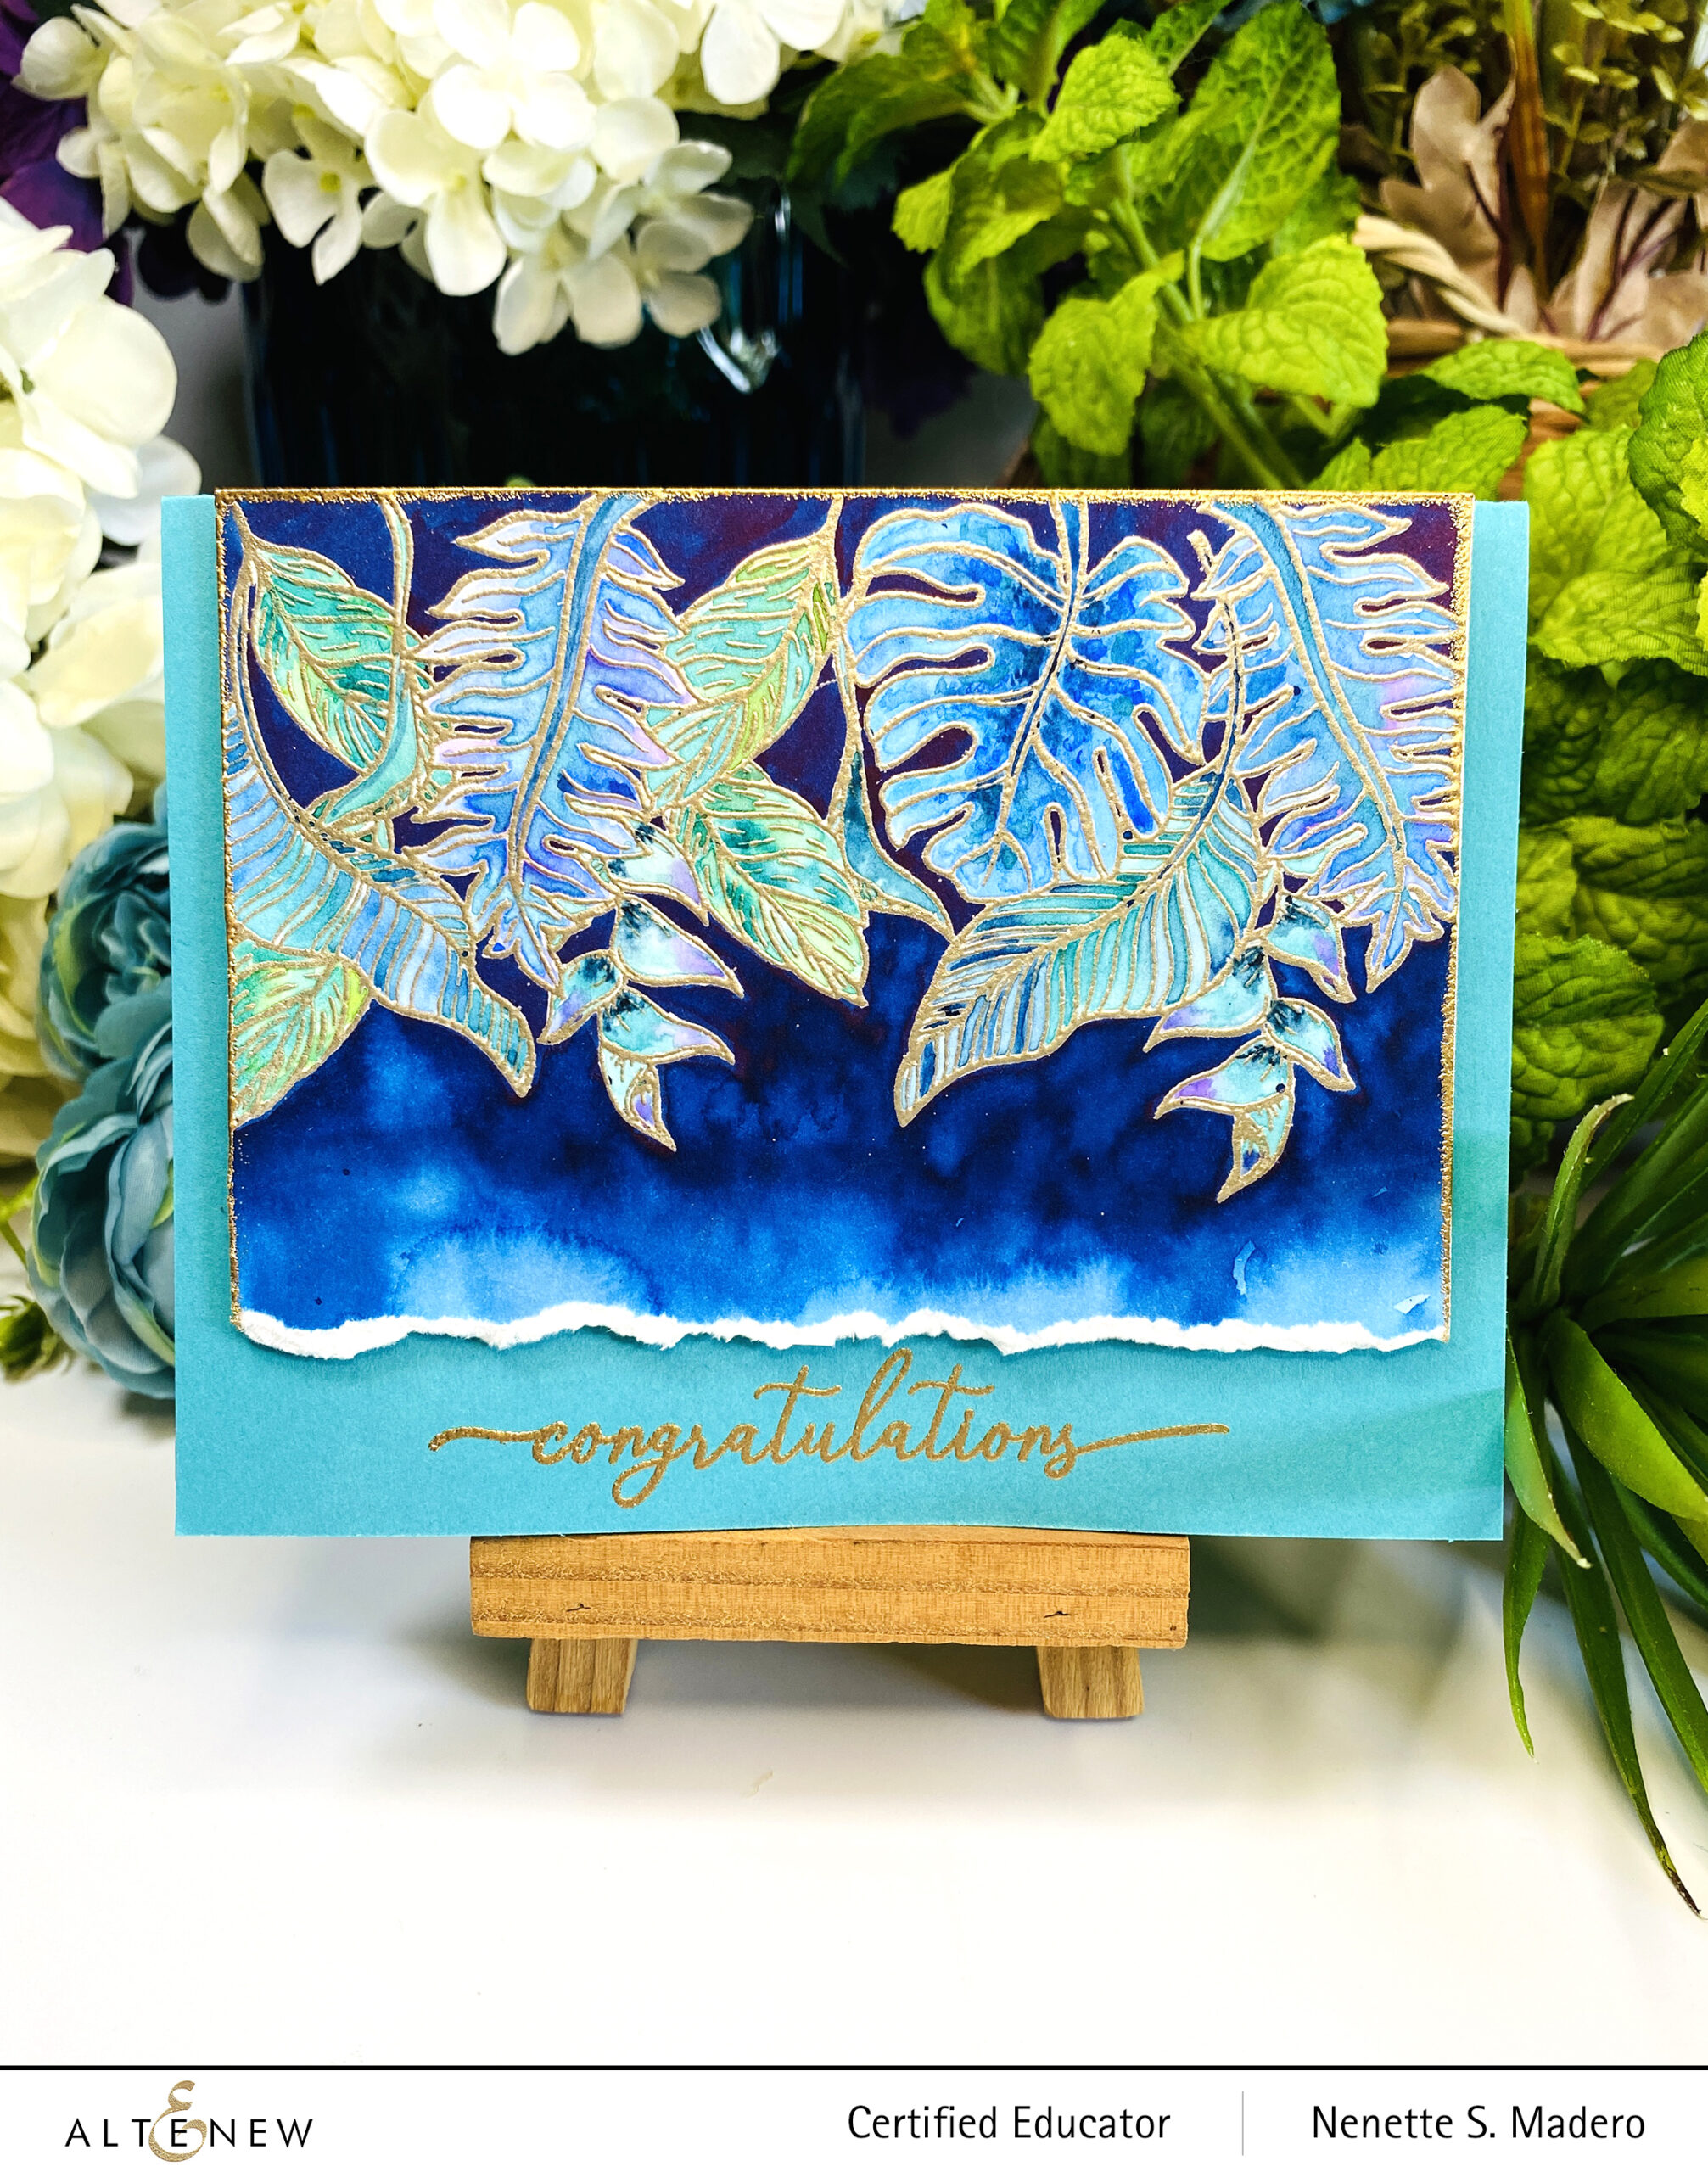
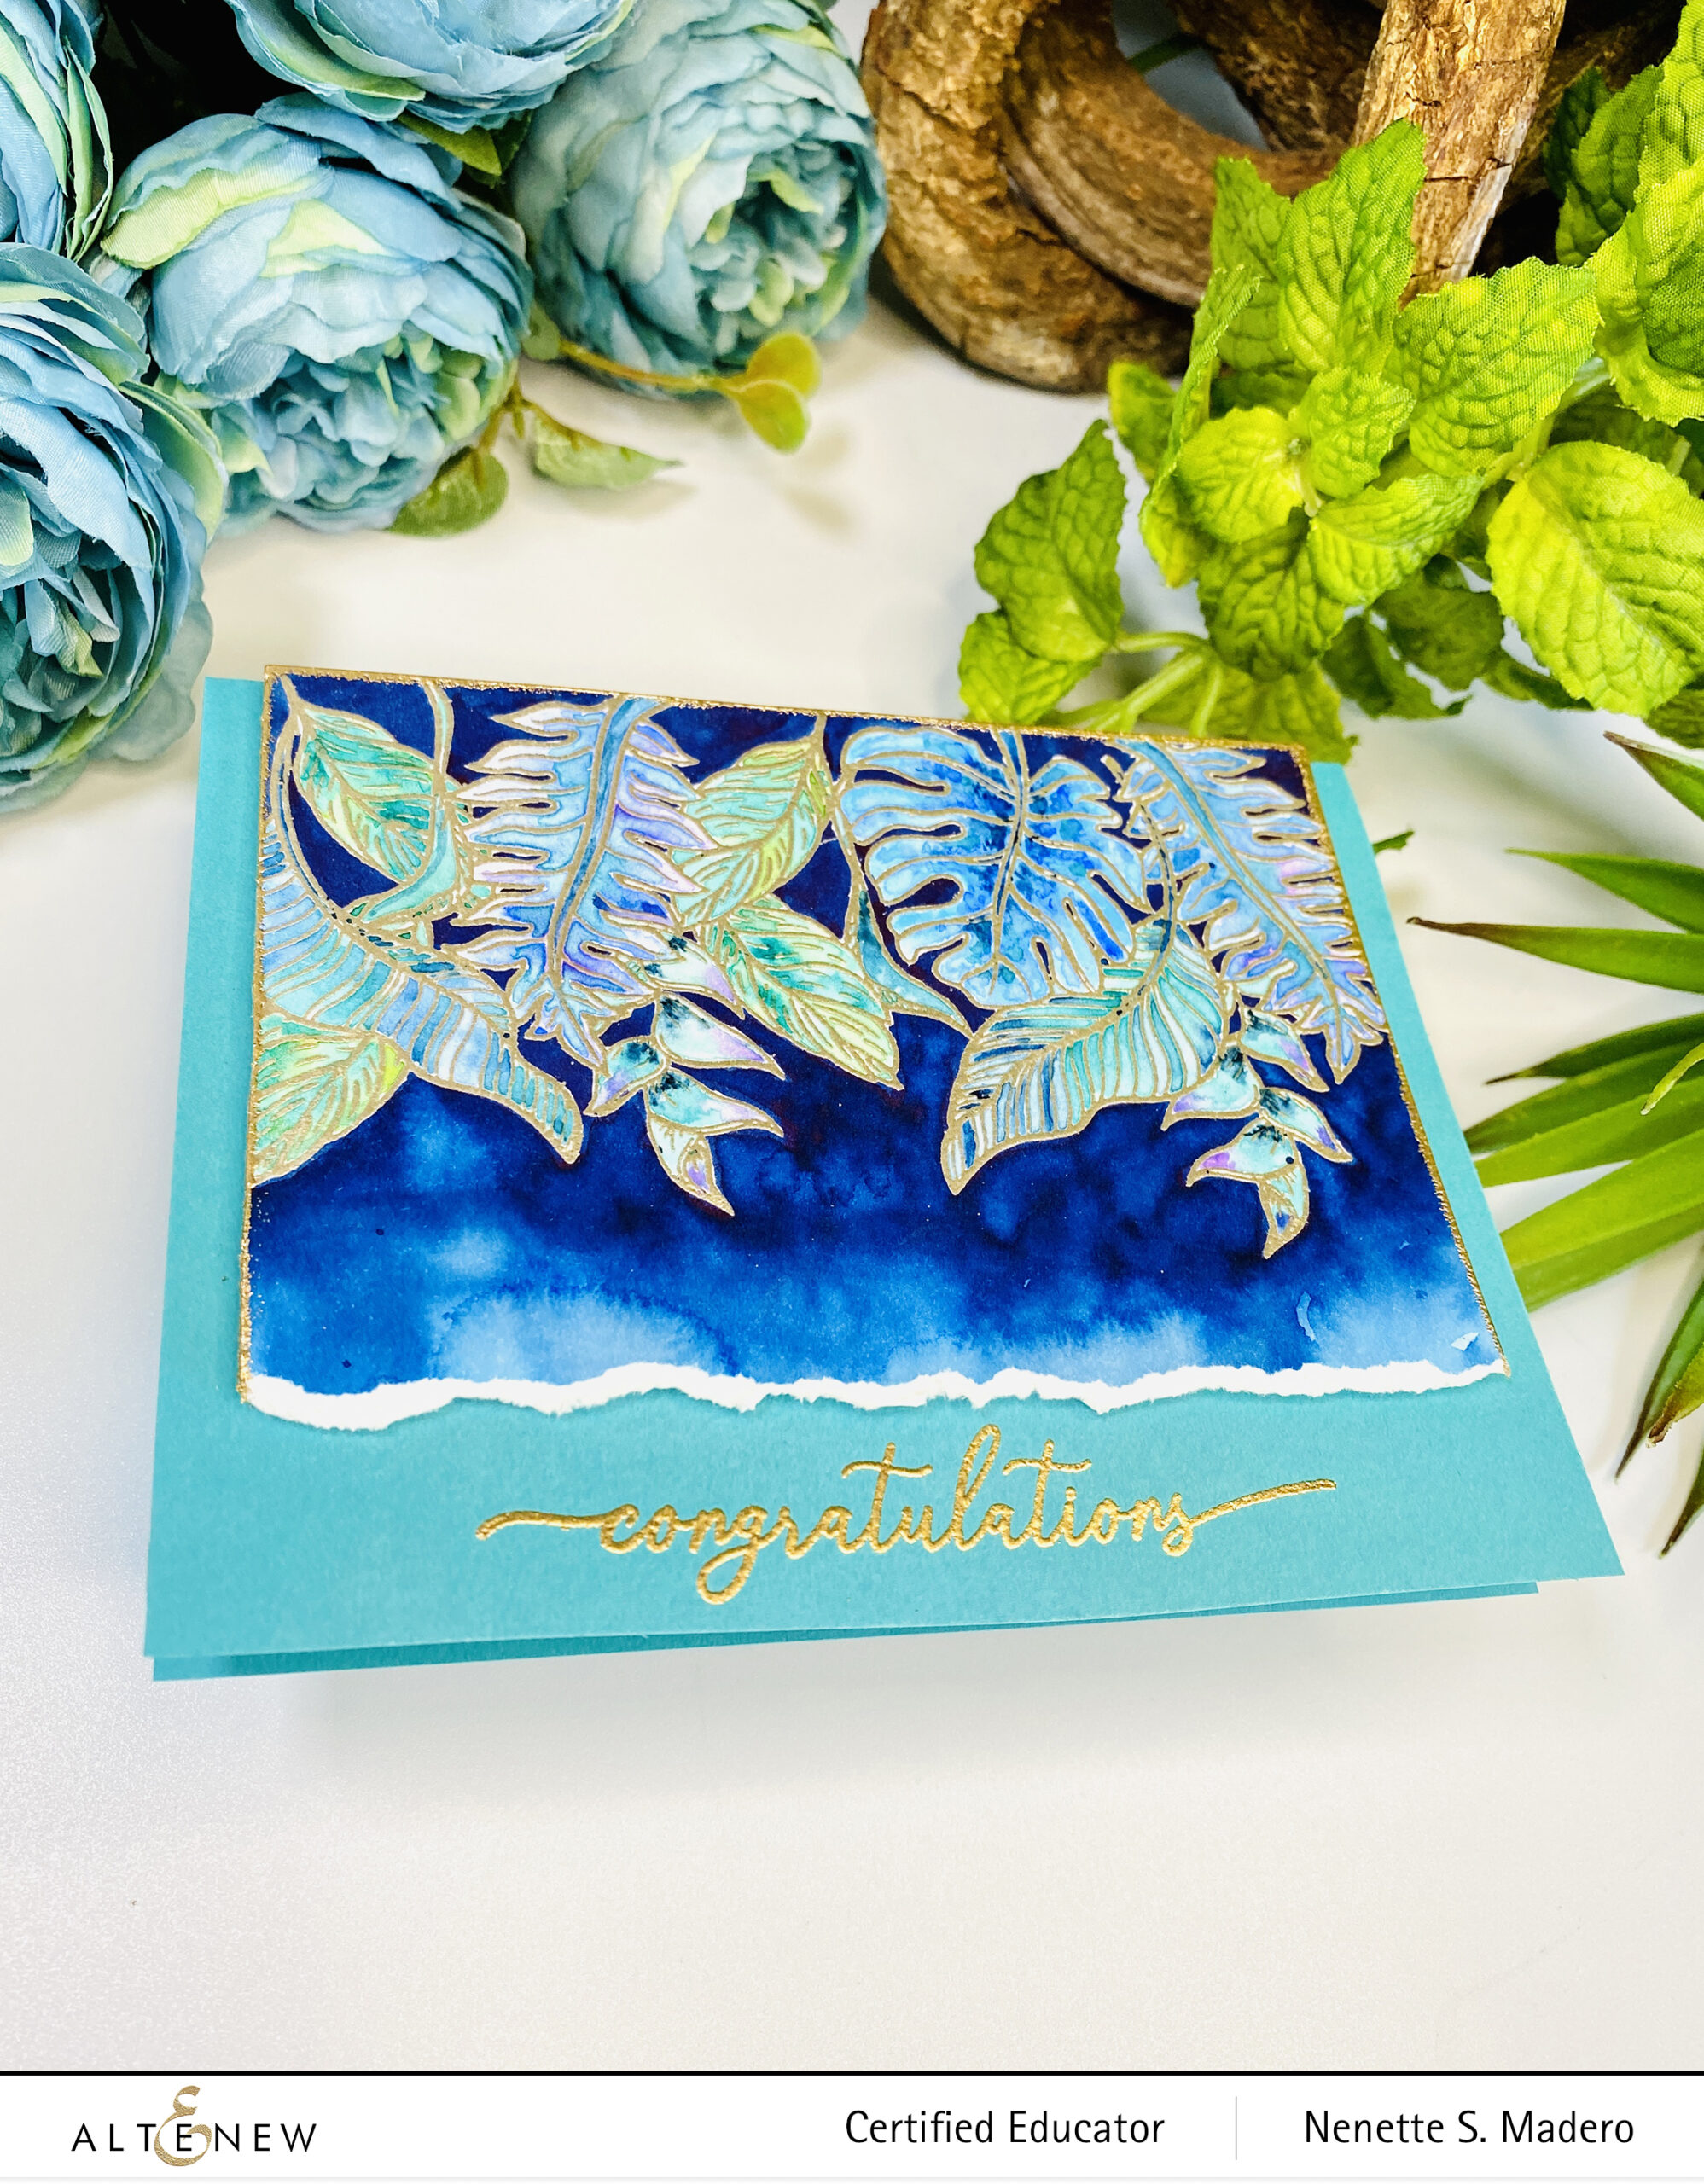
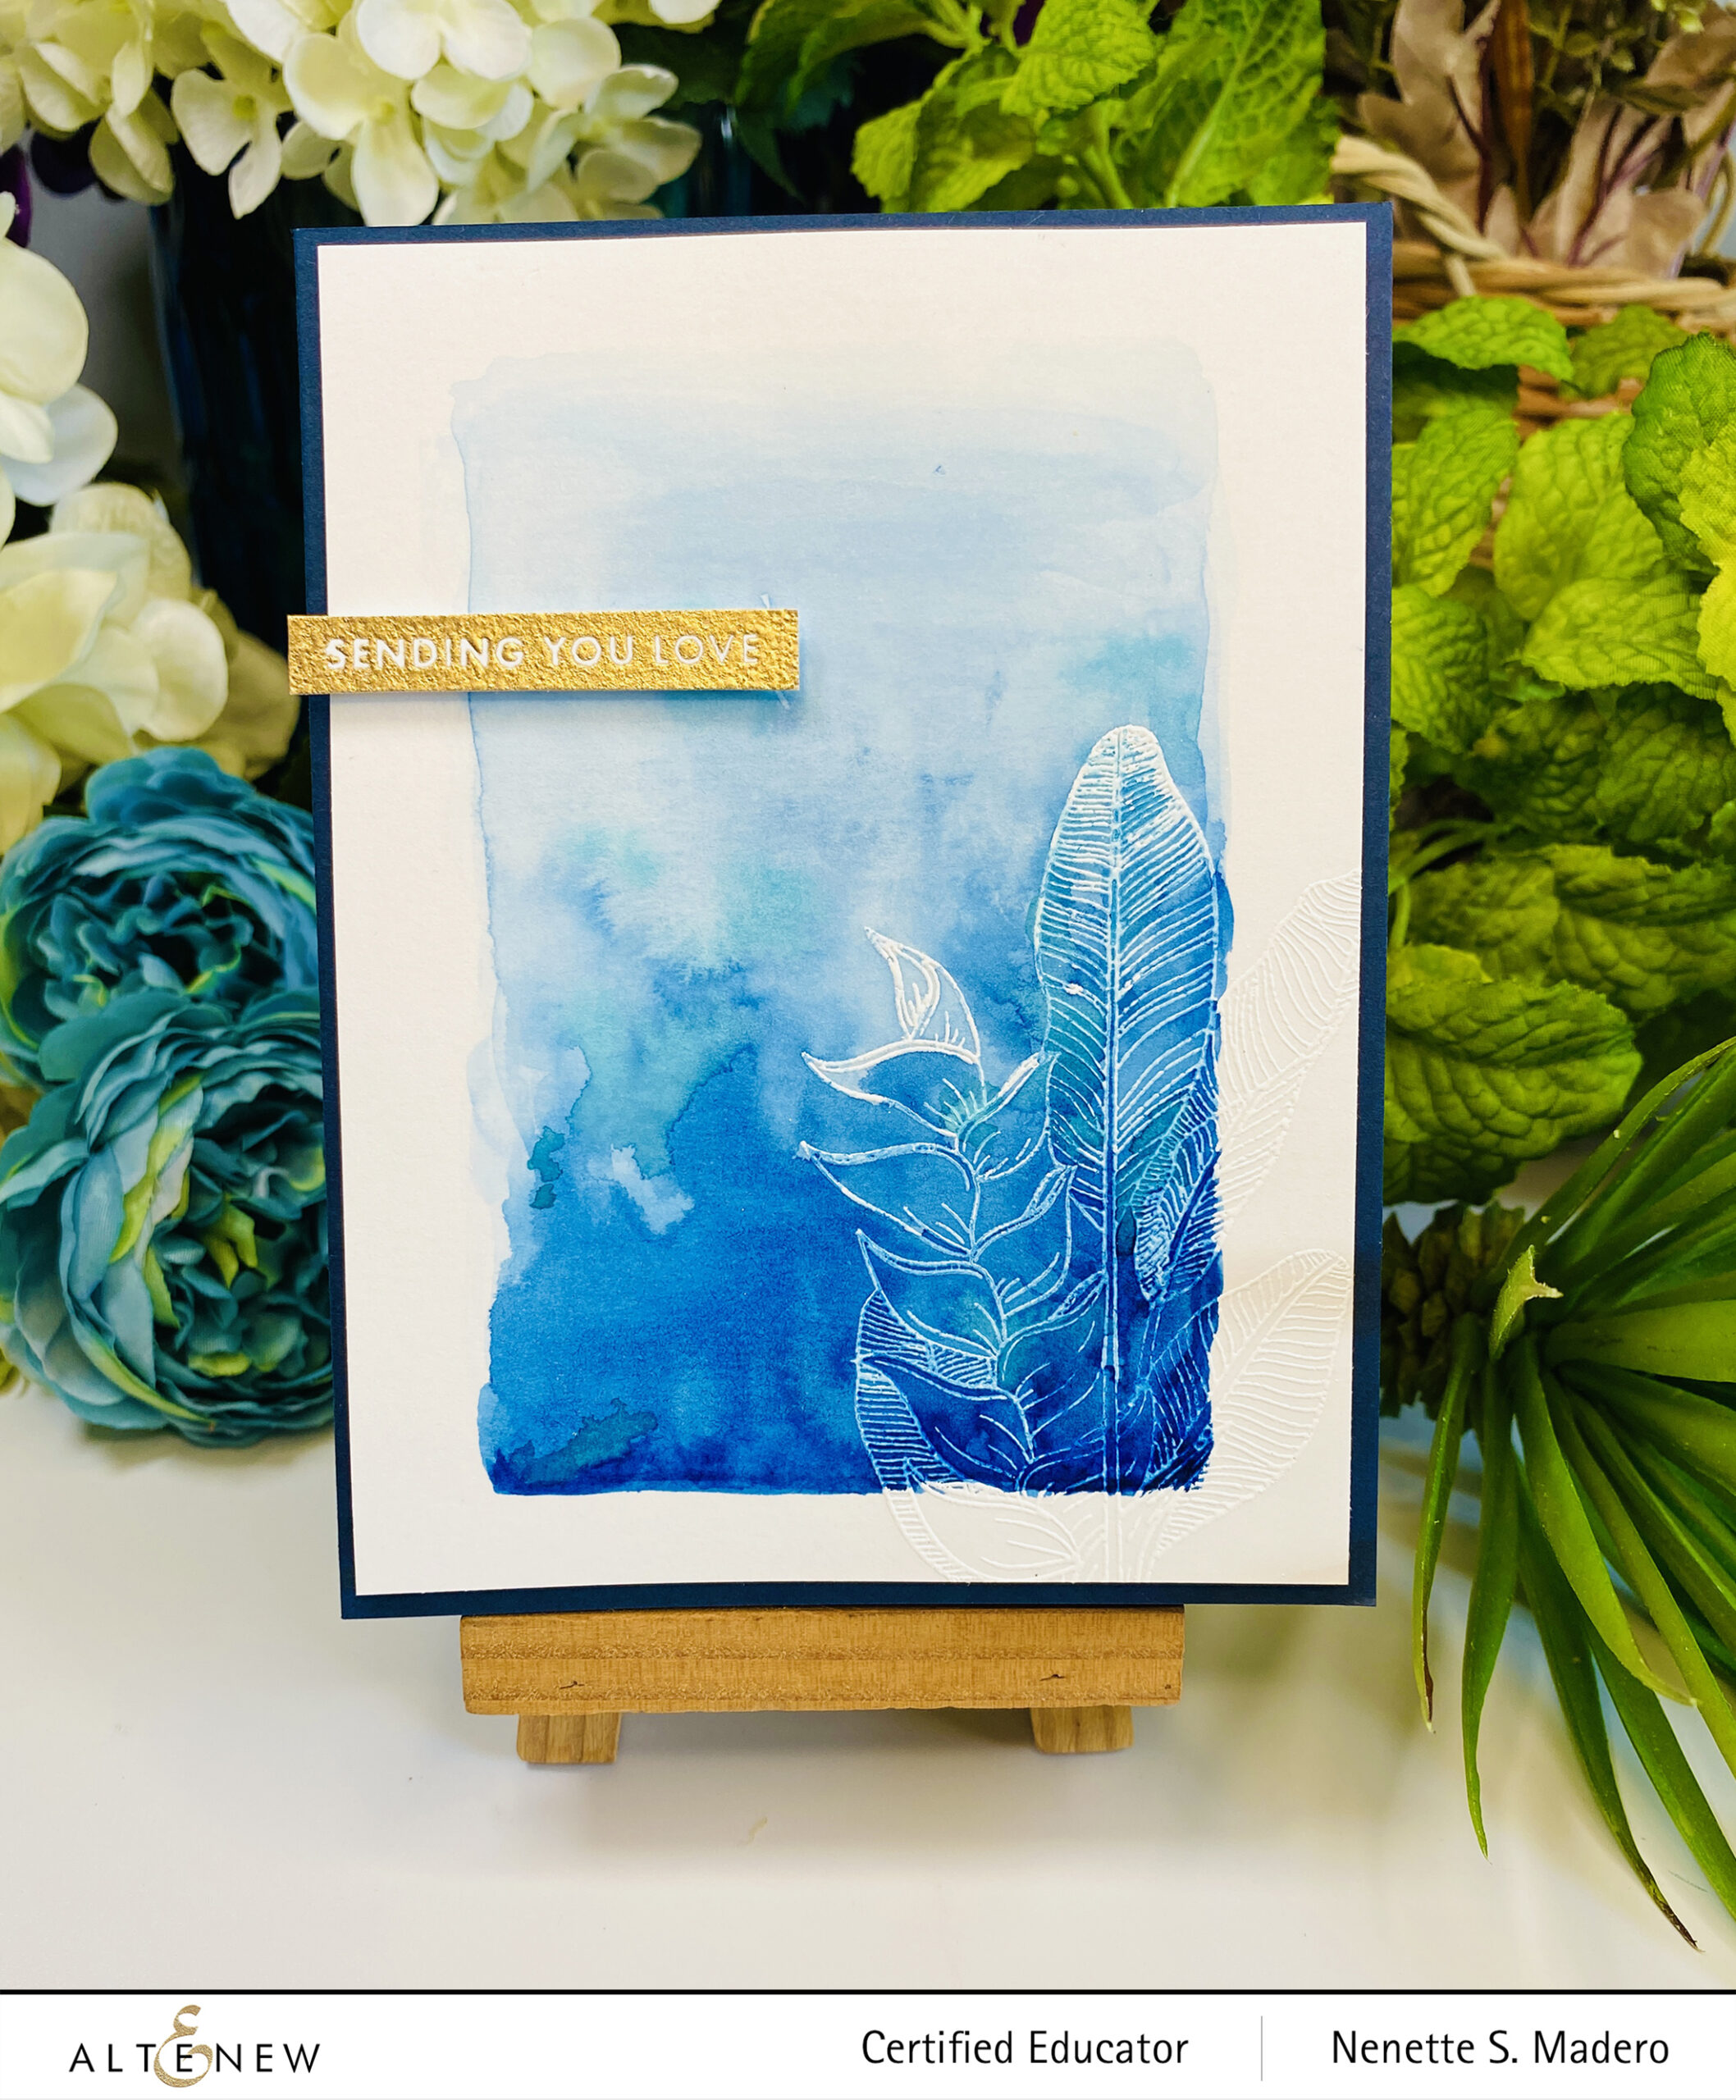
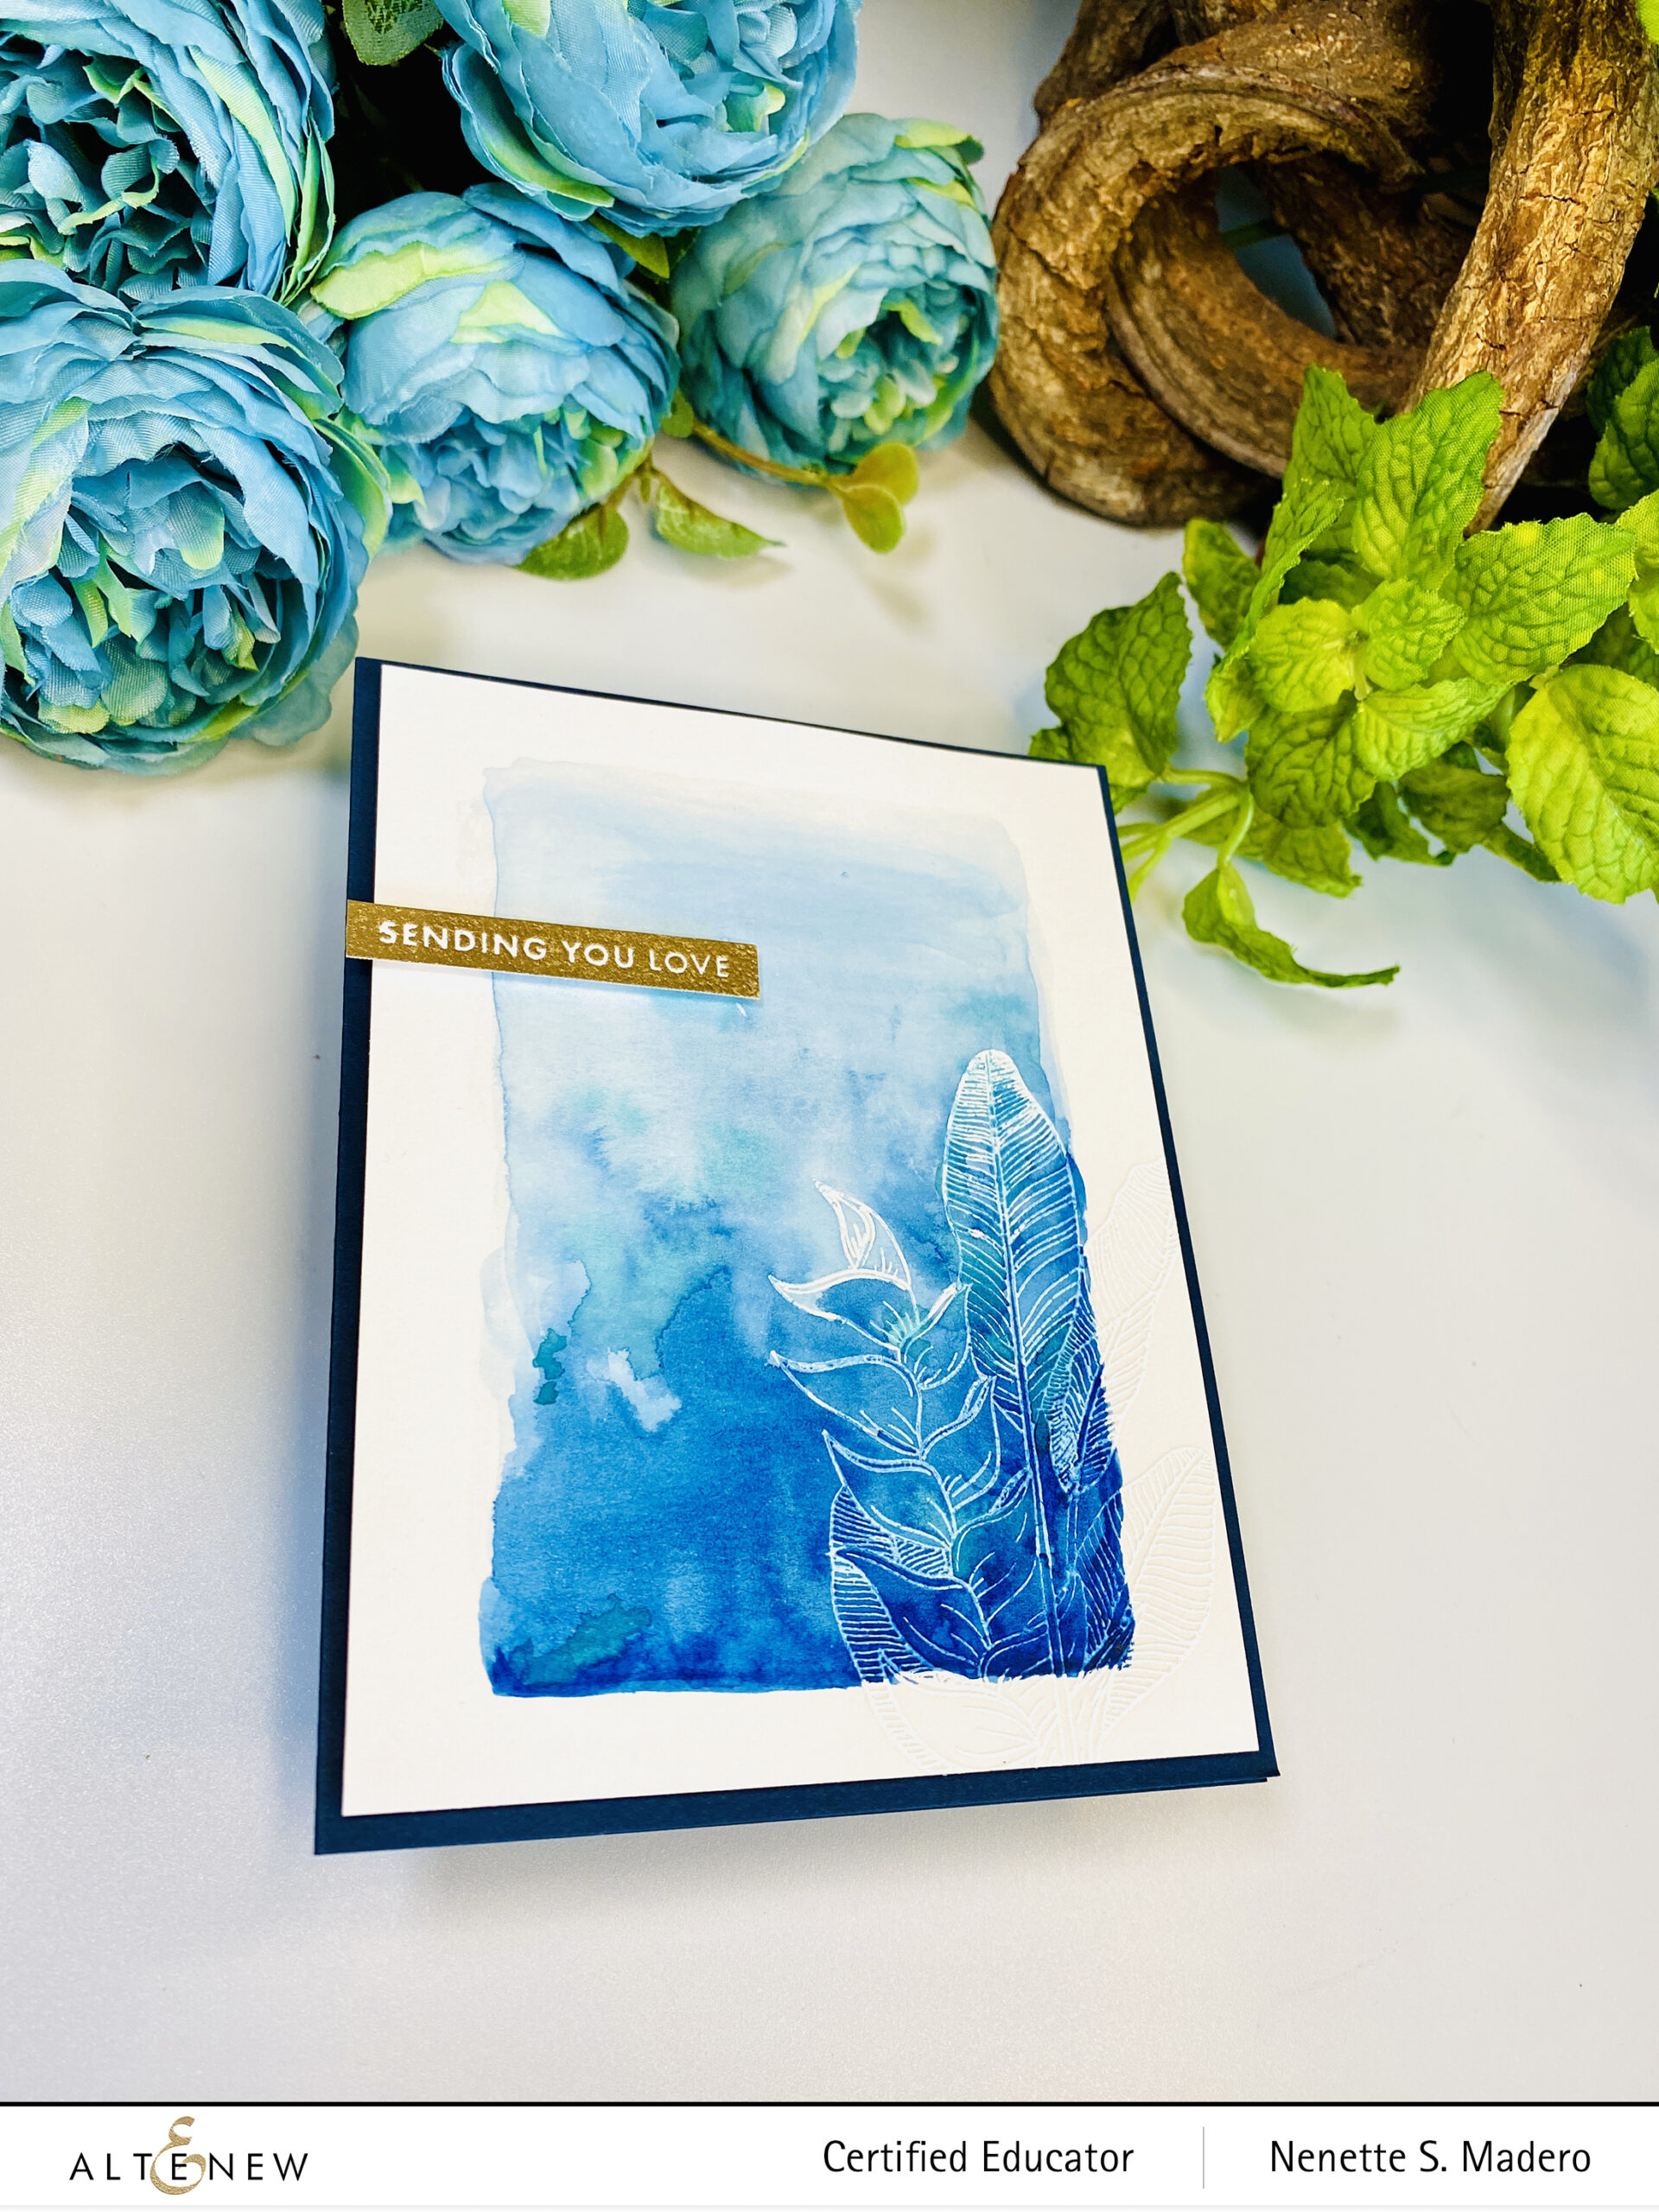
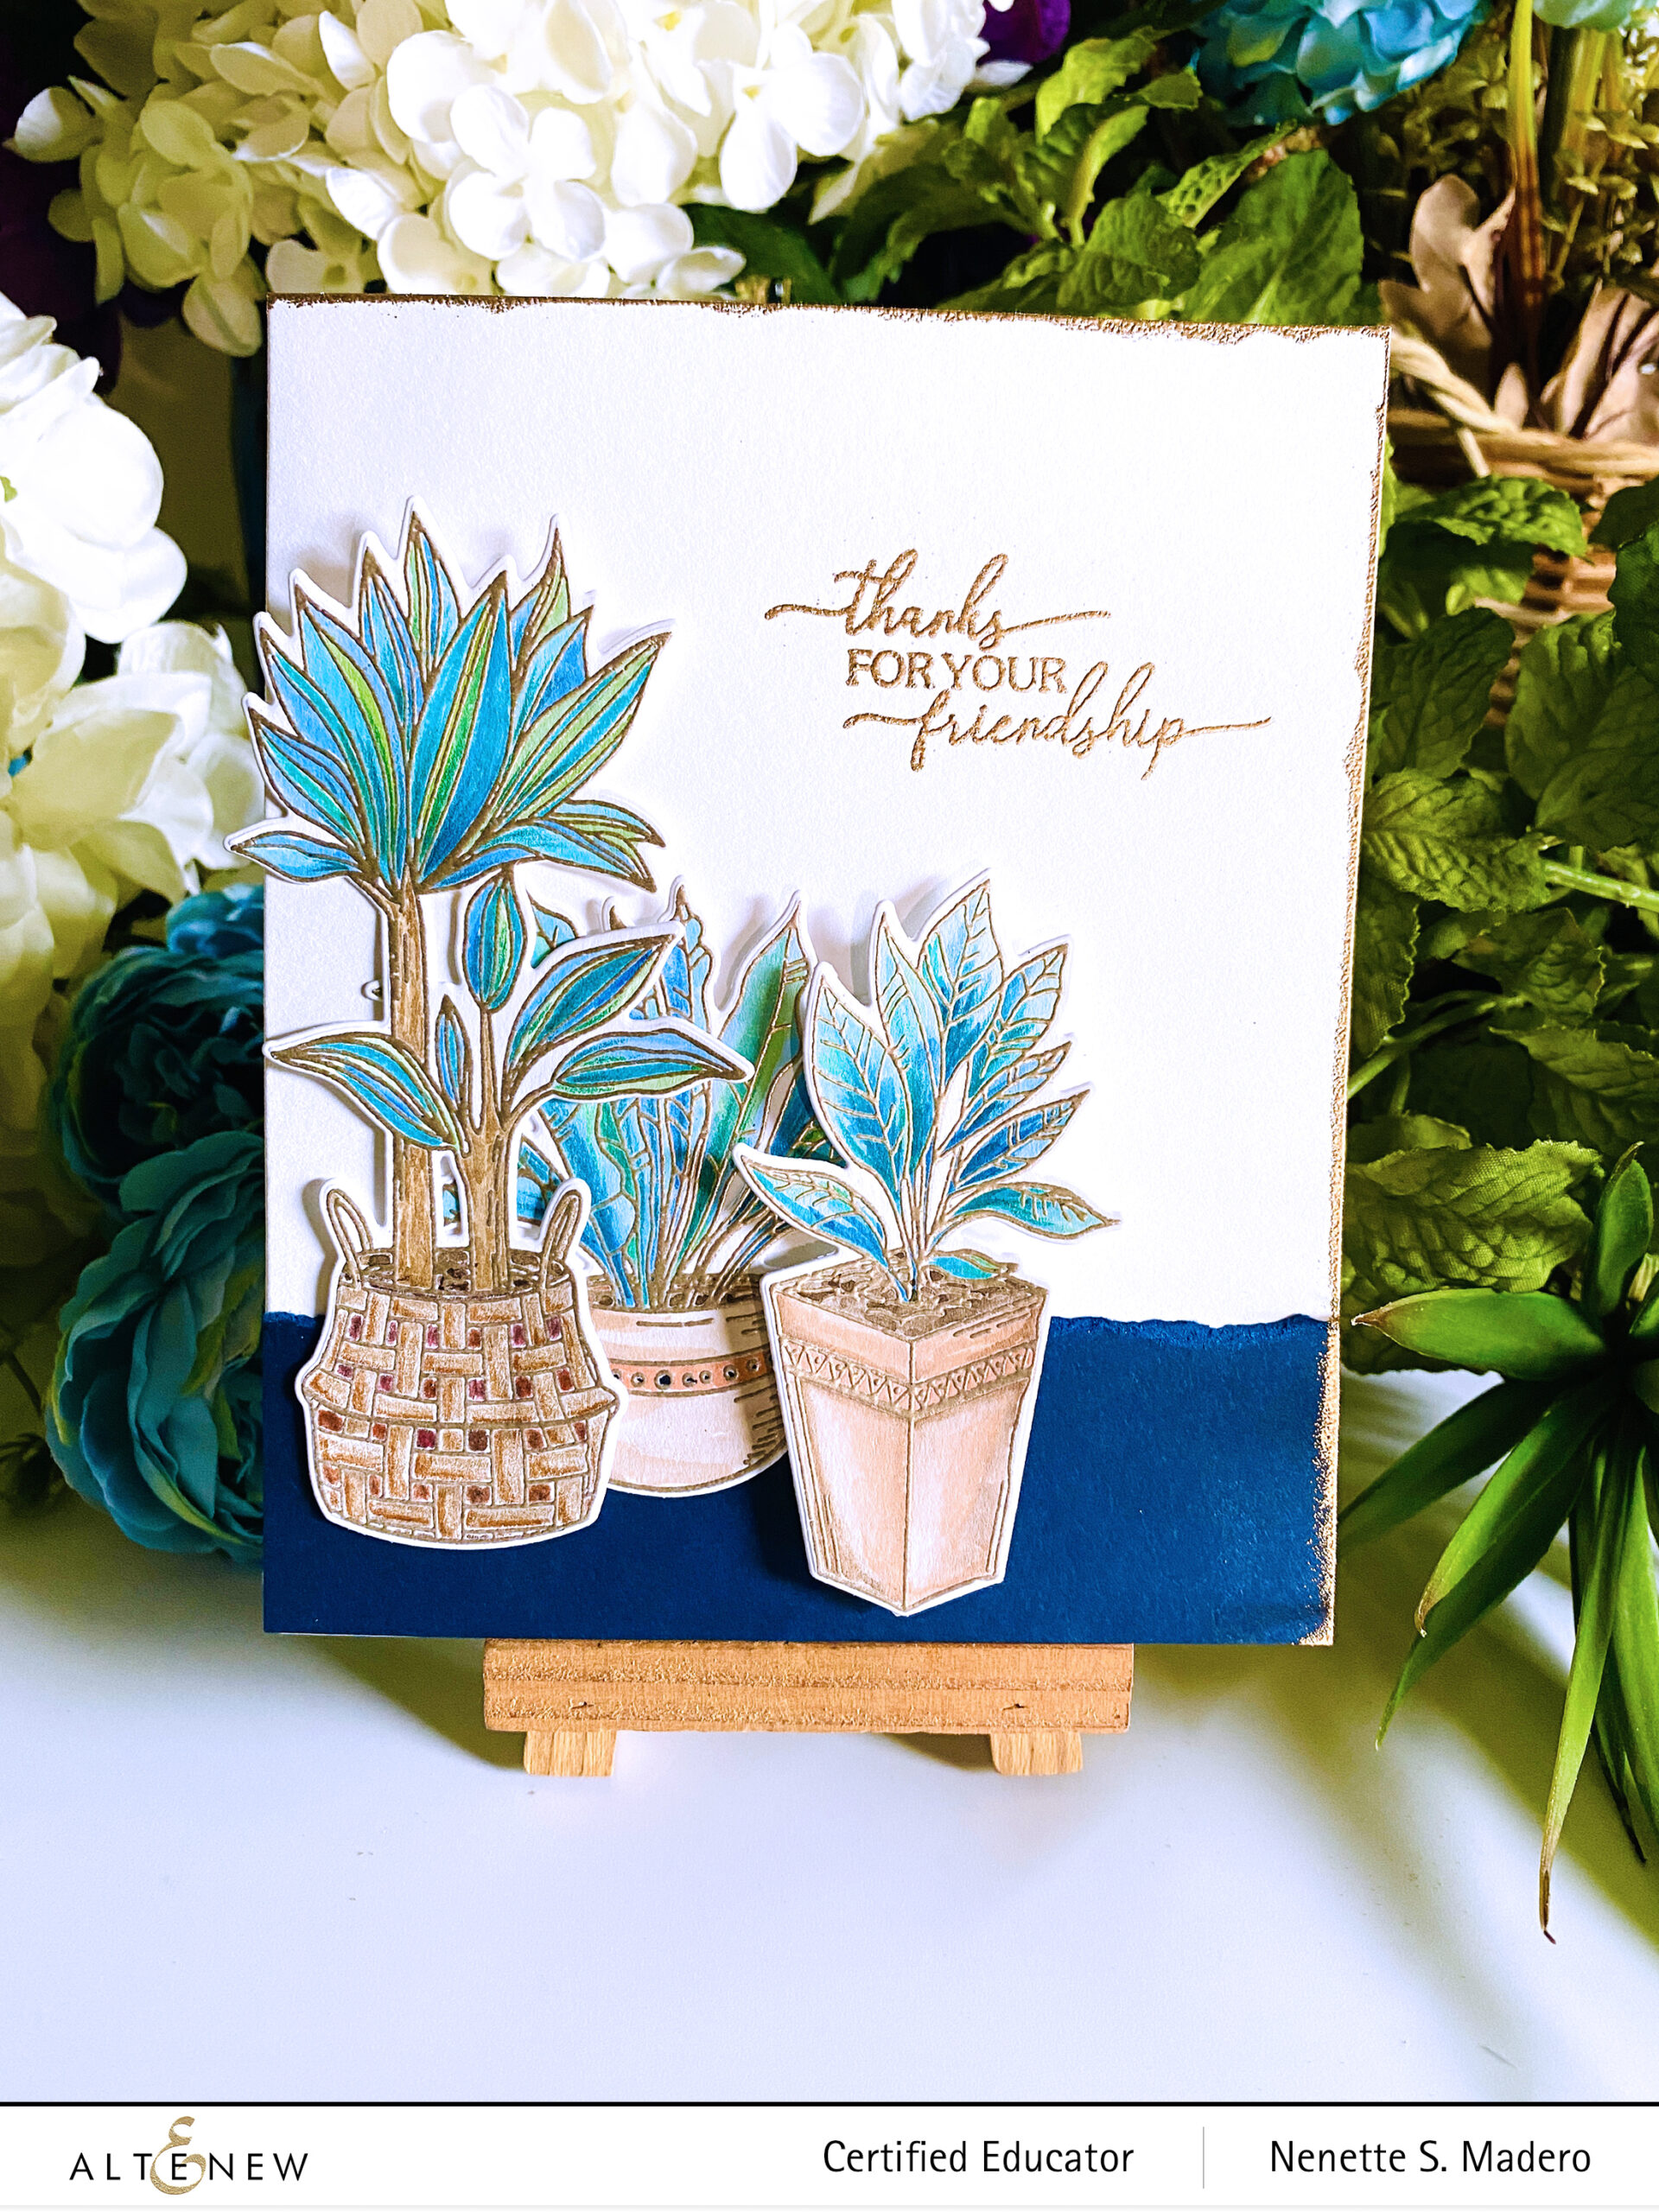
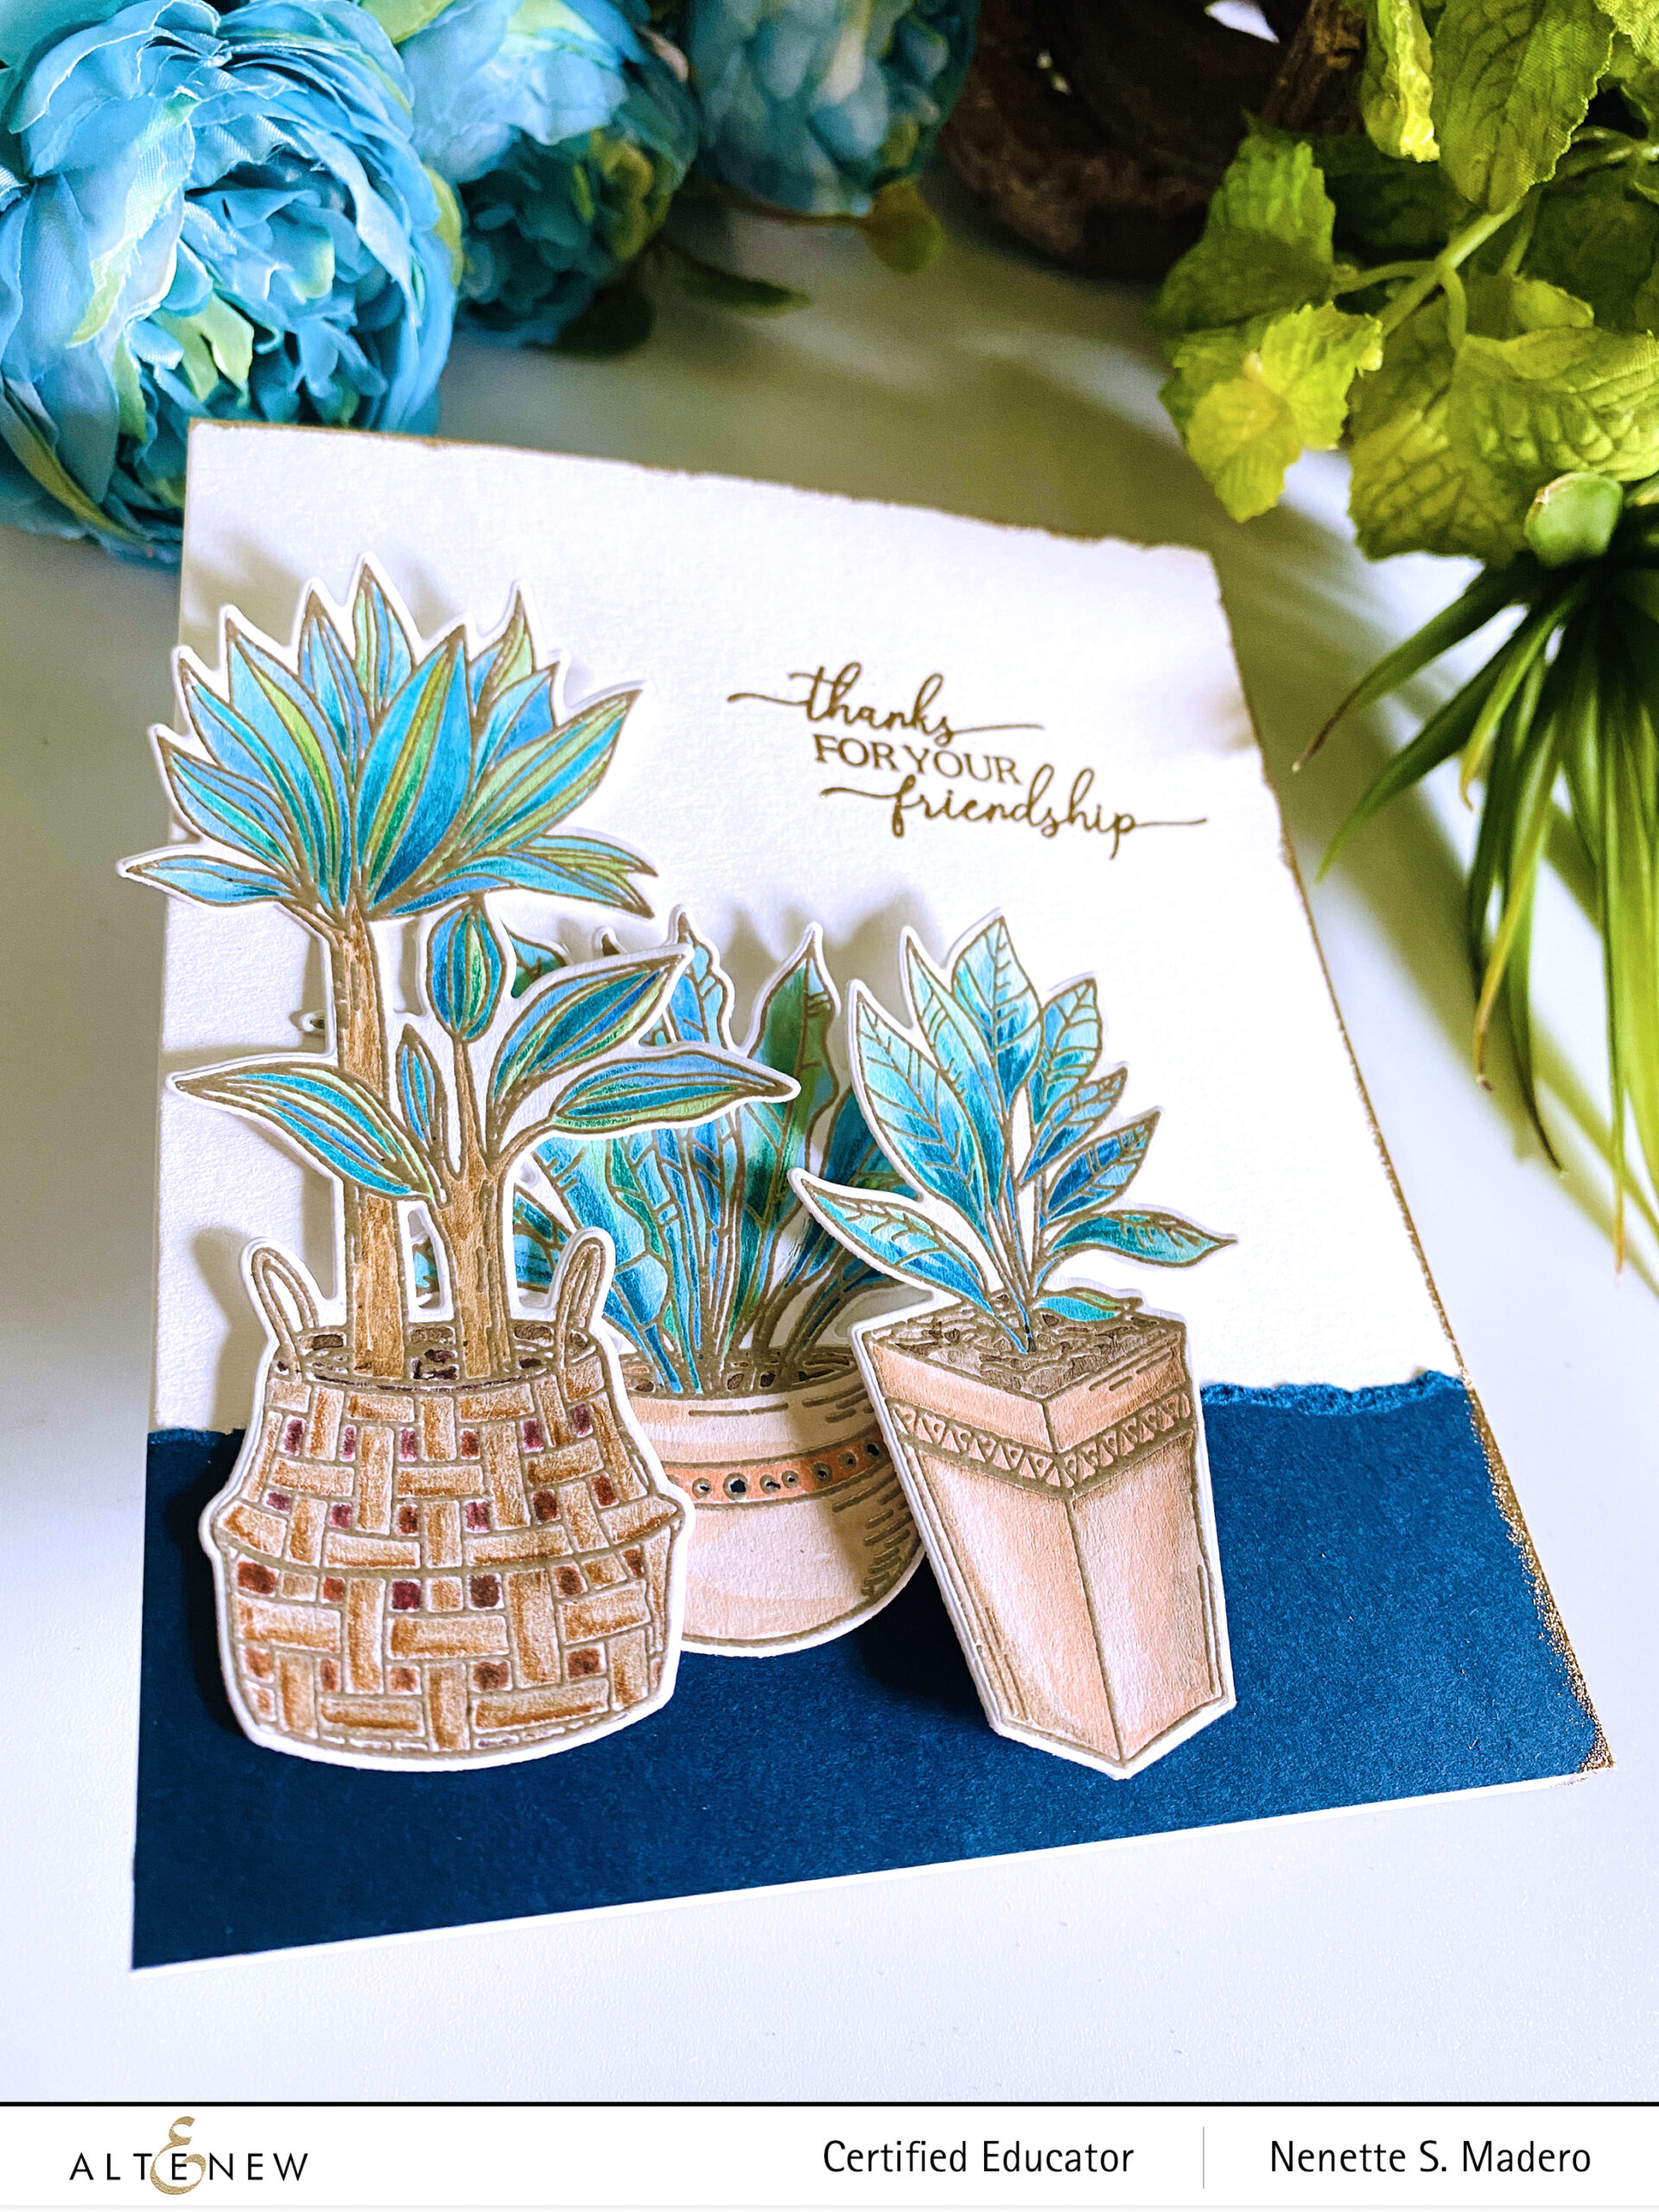
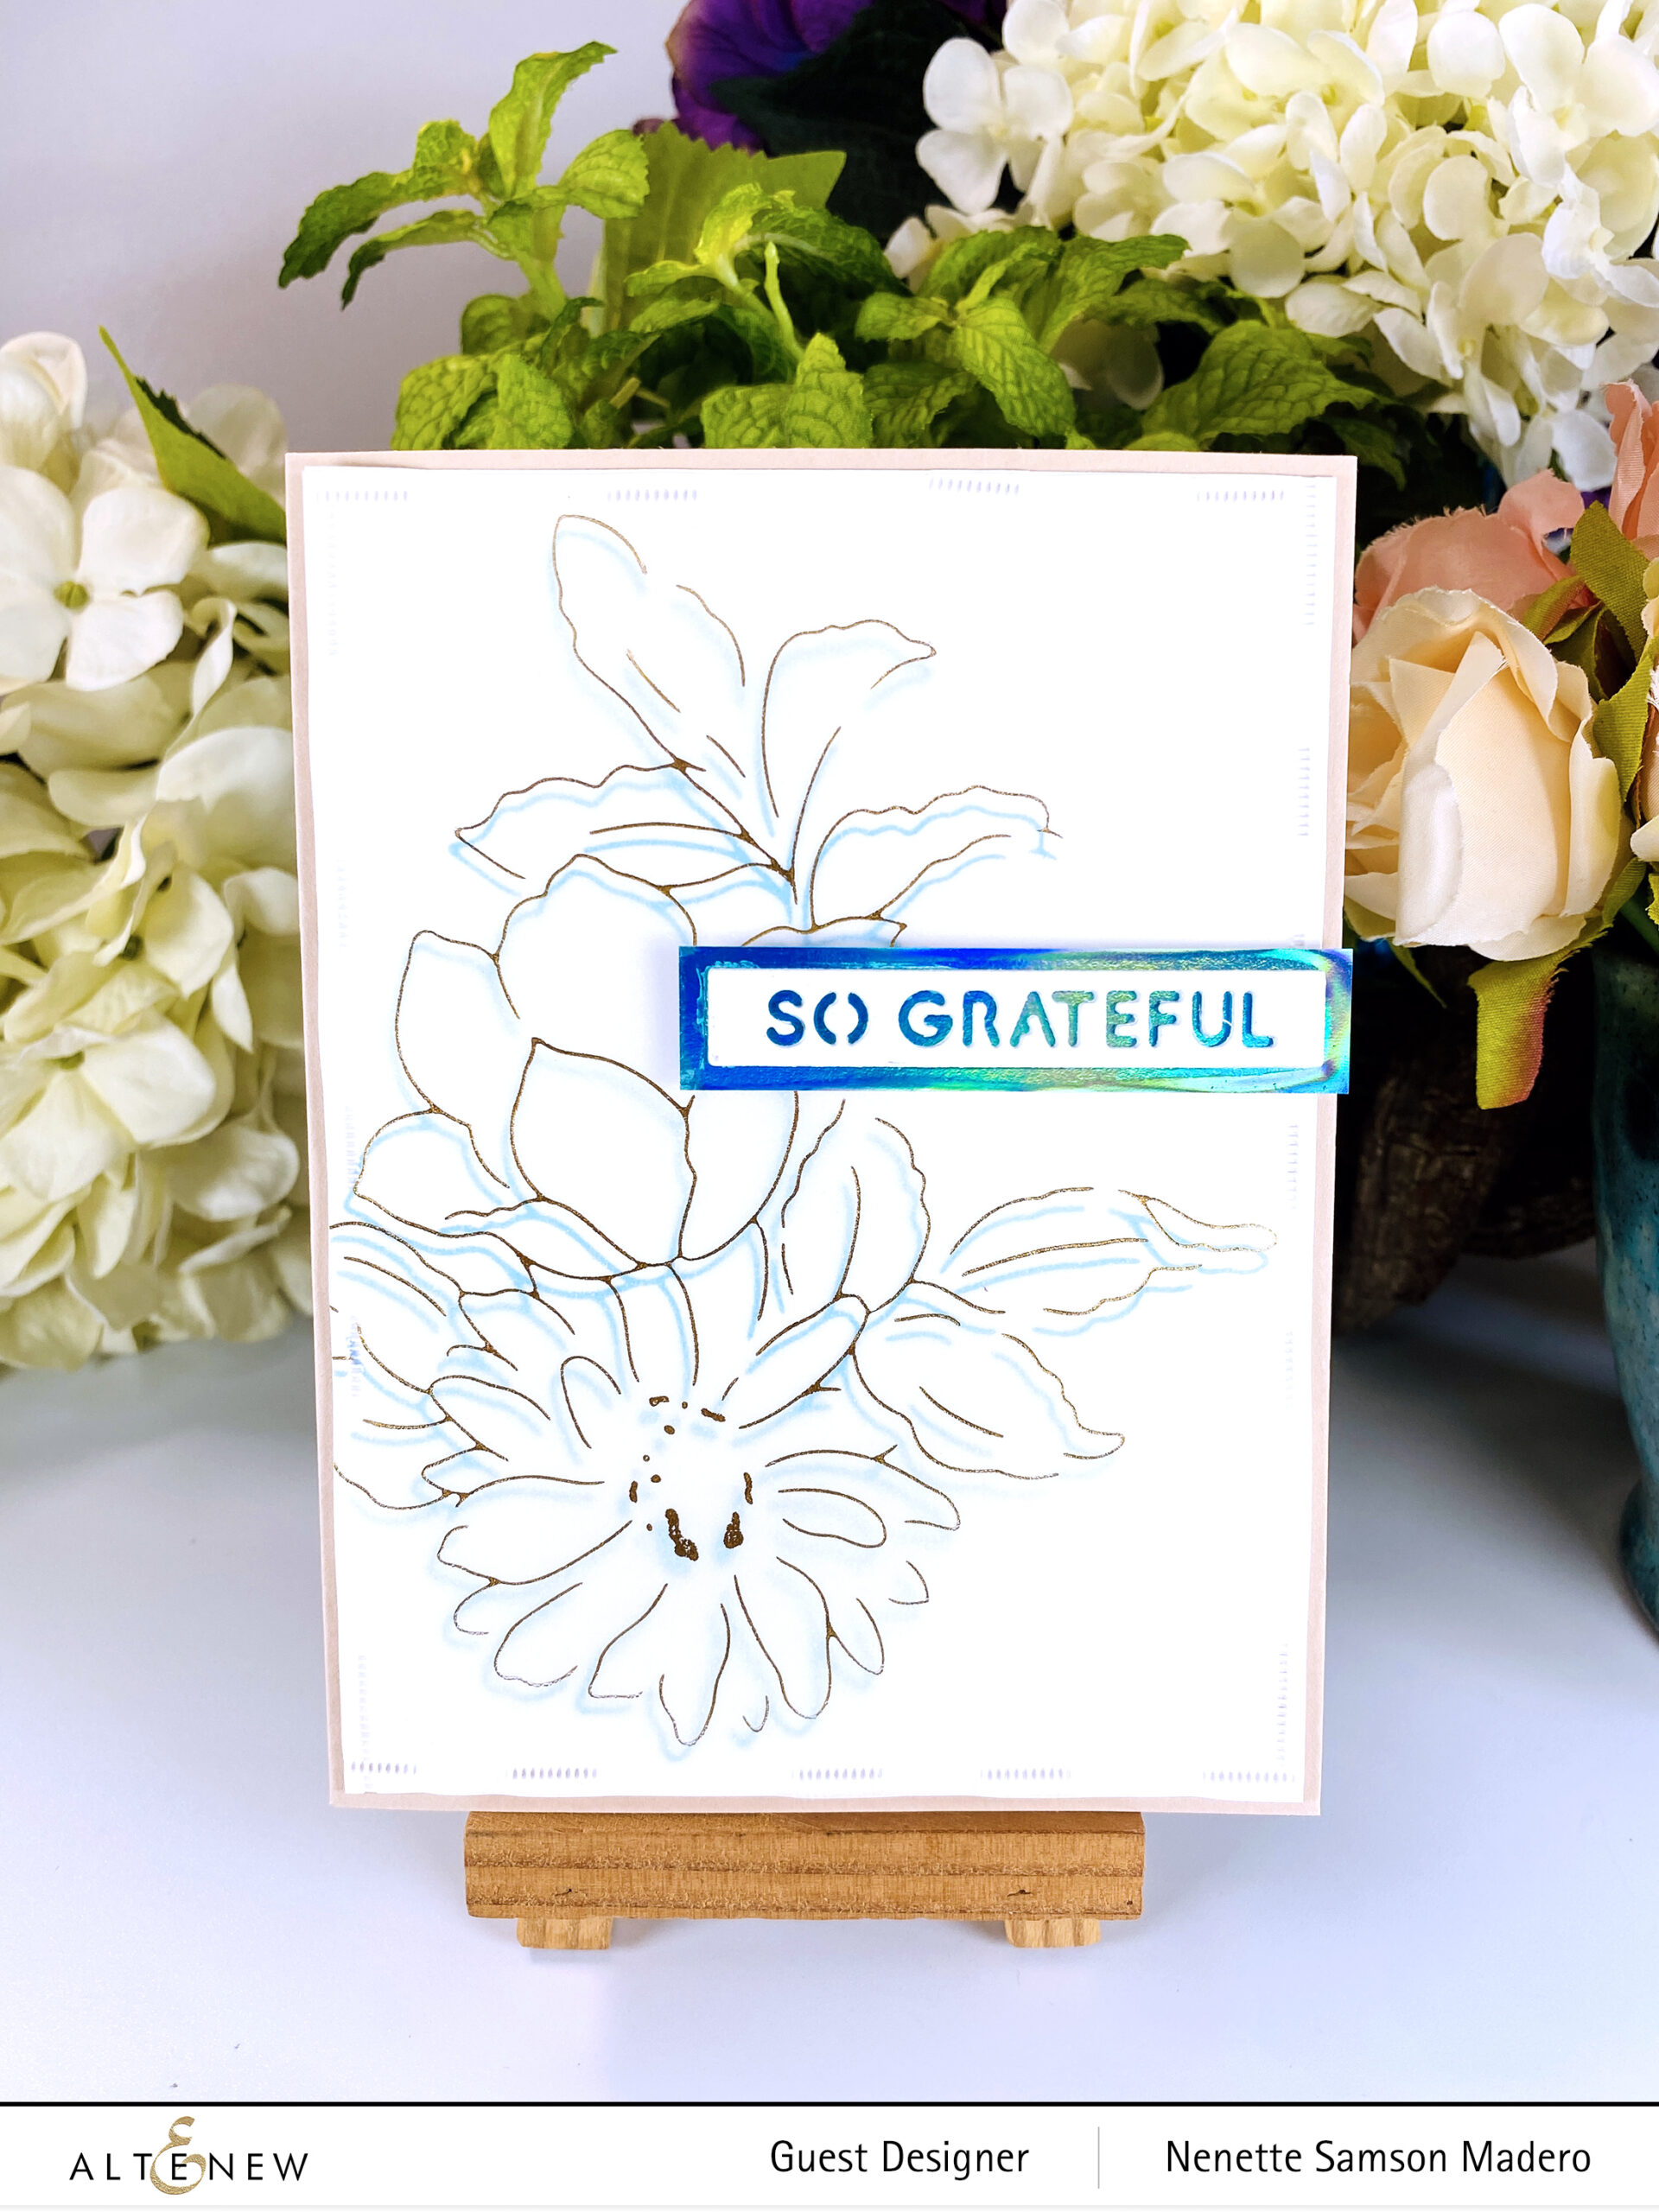
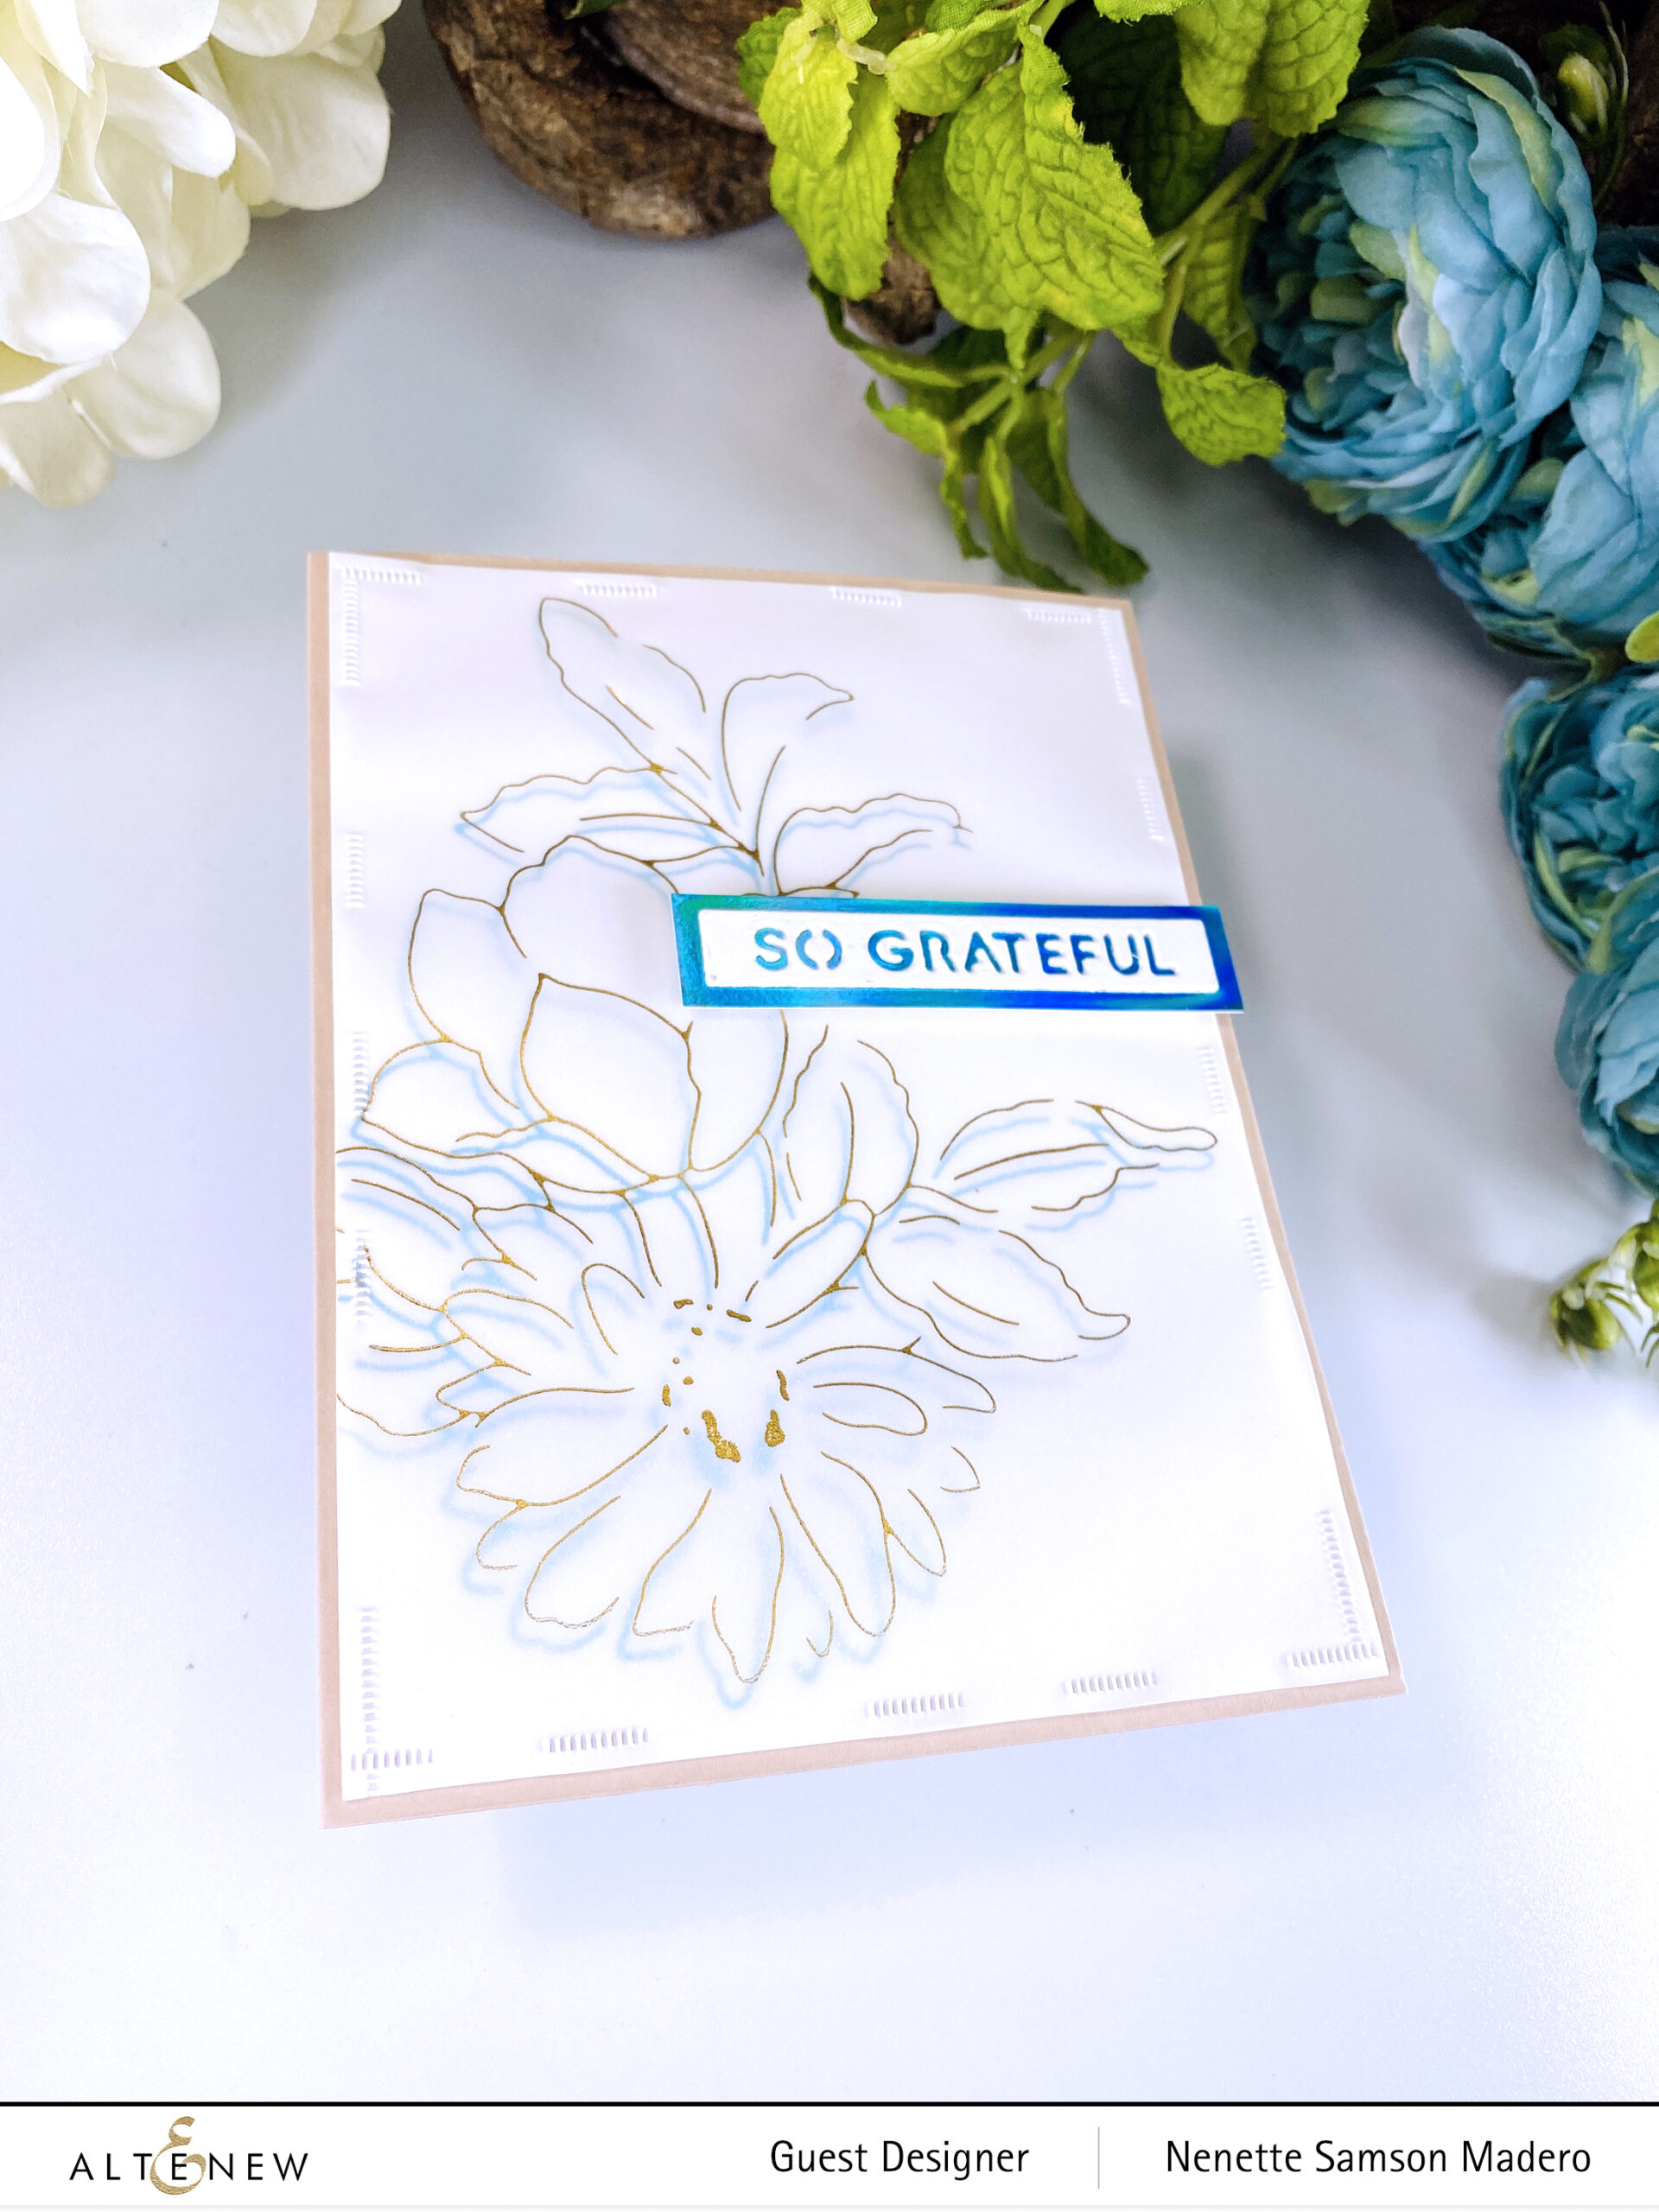
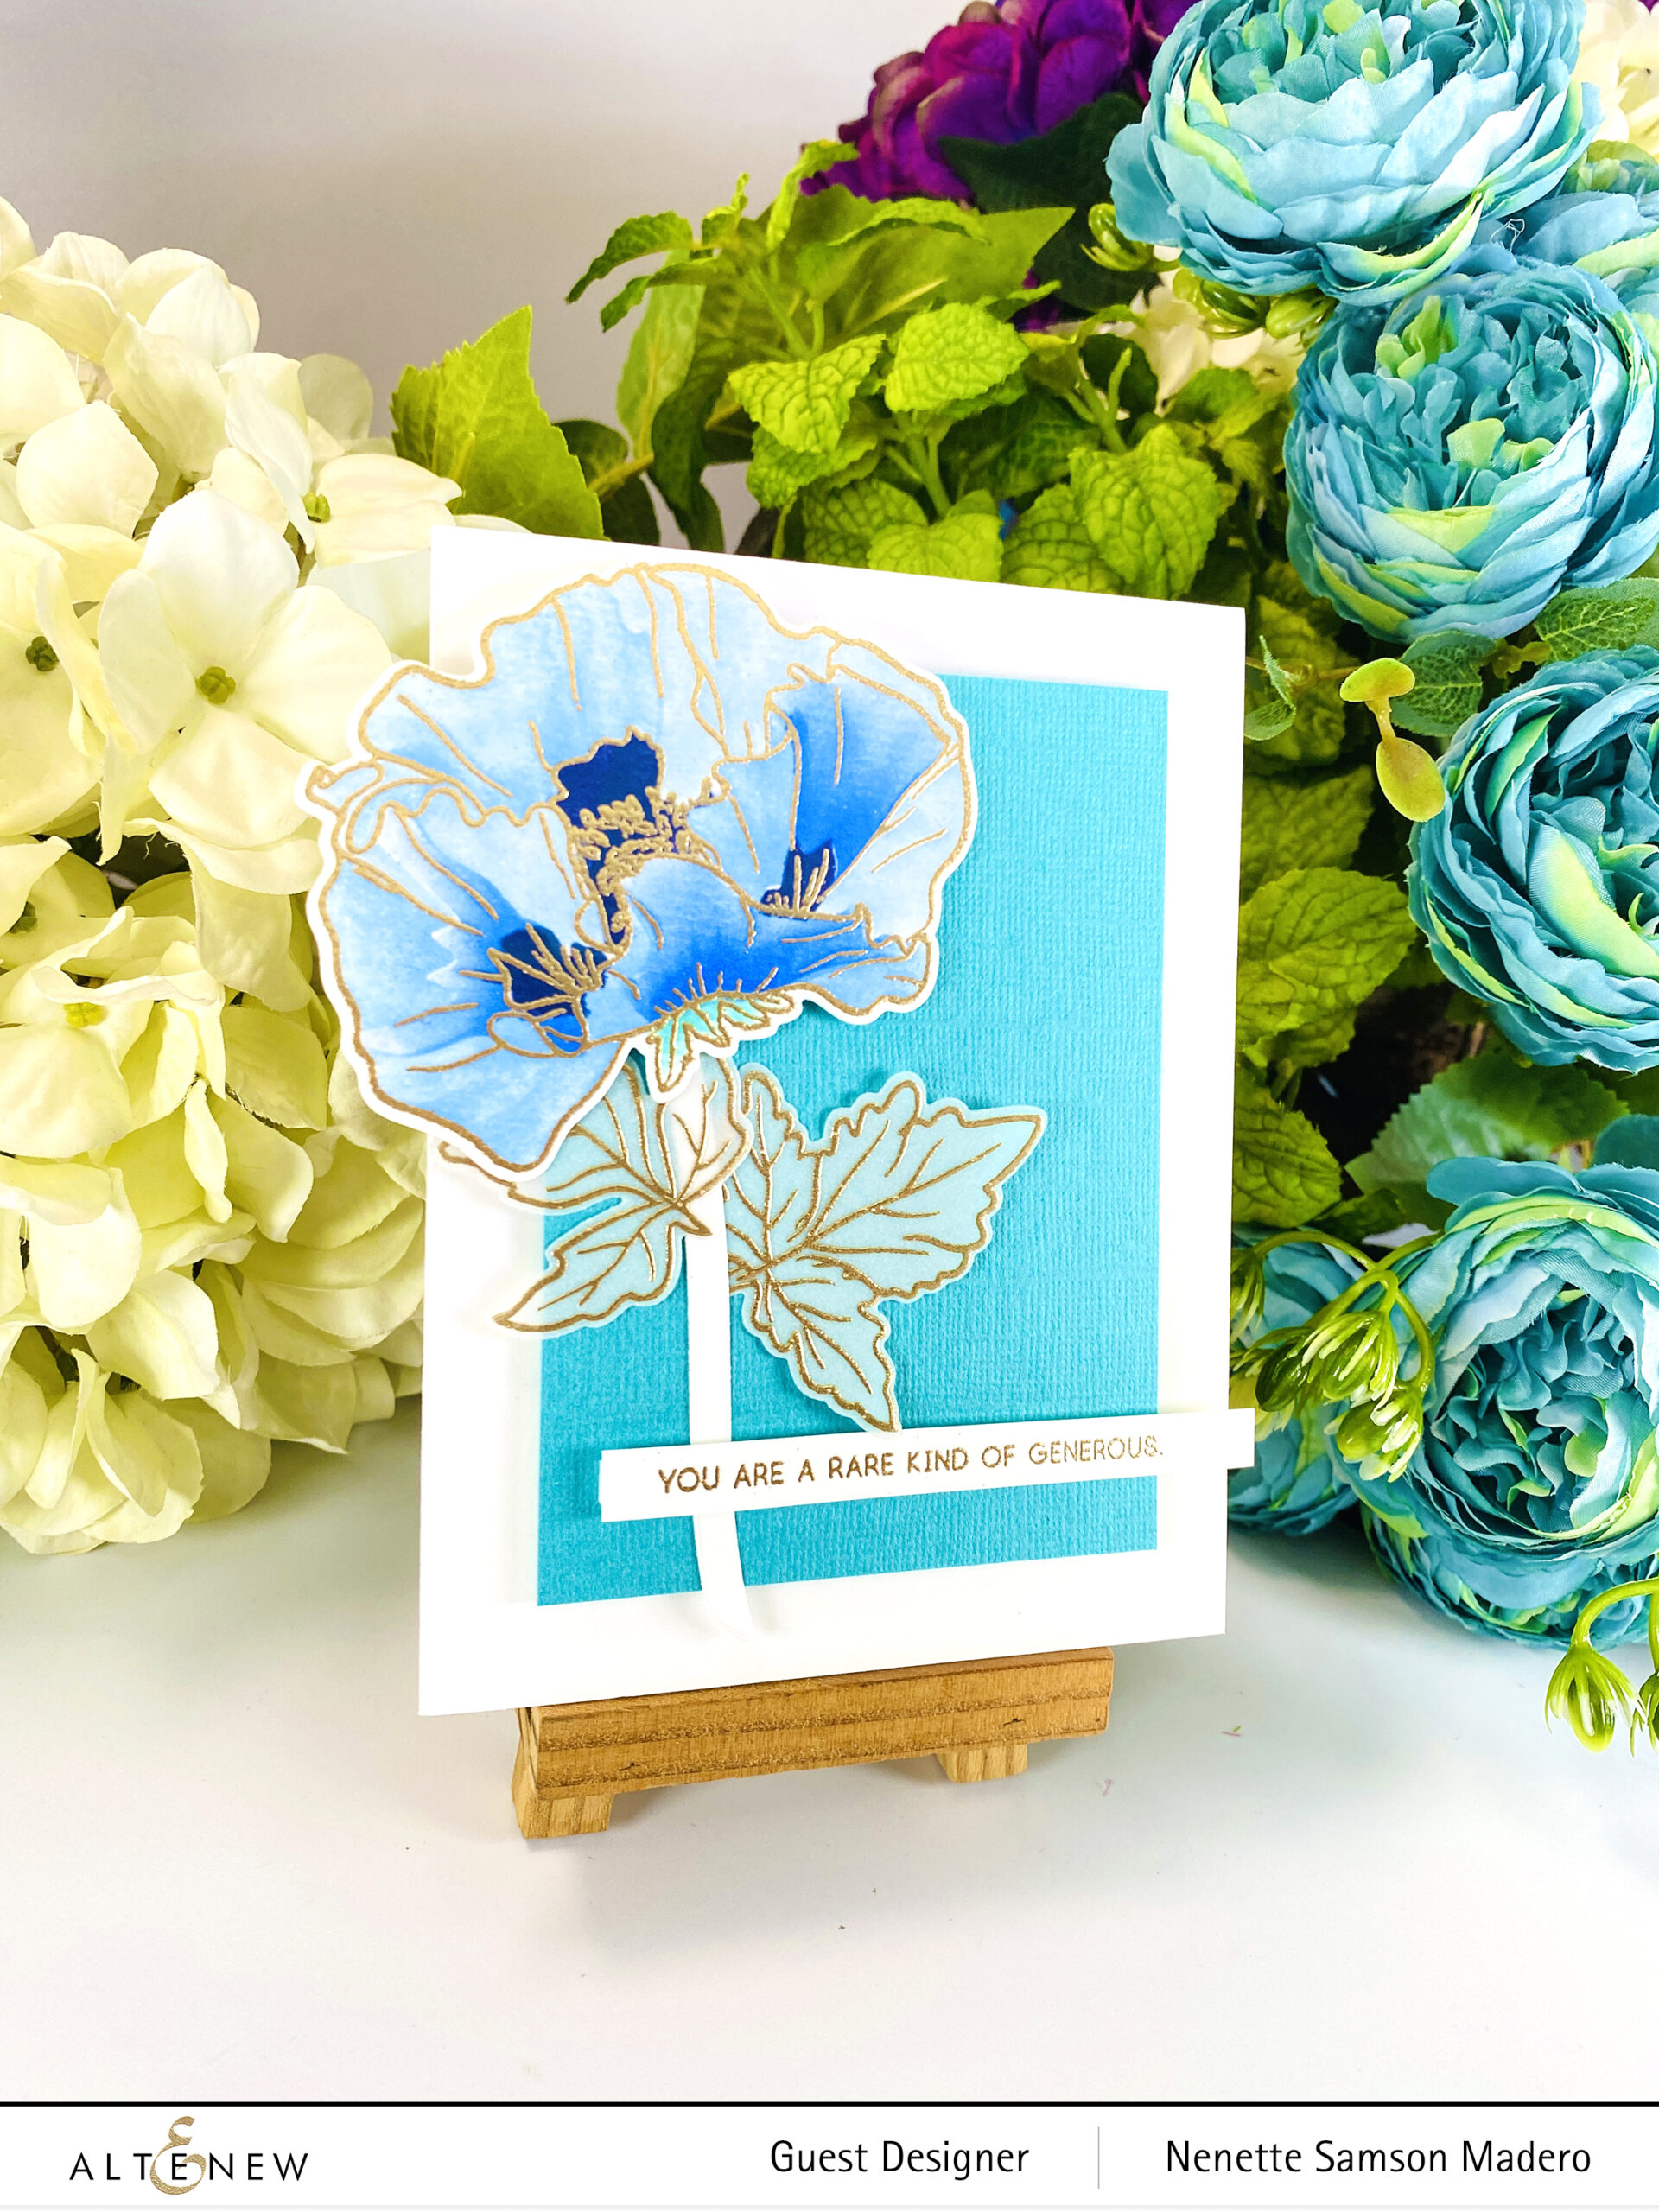
I became interested in plants when the Pandemic began, and taking care of them is pretty therapeutic! So for this set of cards, I used plant images in all of them. I chose cool colors for this card because, for me, plants evoke peace and serenity.
SENDING YOU LOVE
STEPS:
Stamp and emboss the image from the Tropical Jungle Stamp set on the lower right corner of the watercolor paper.
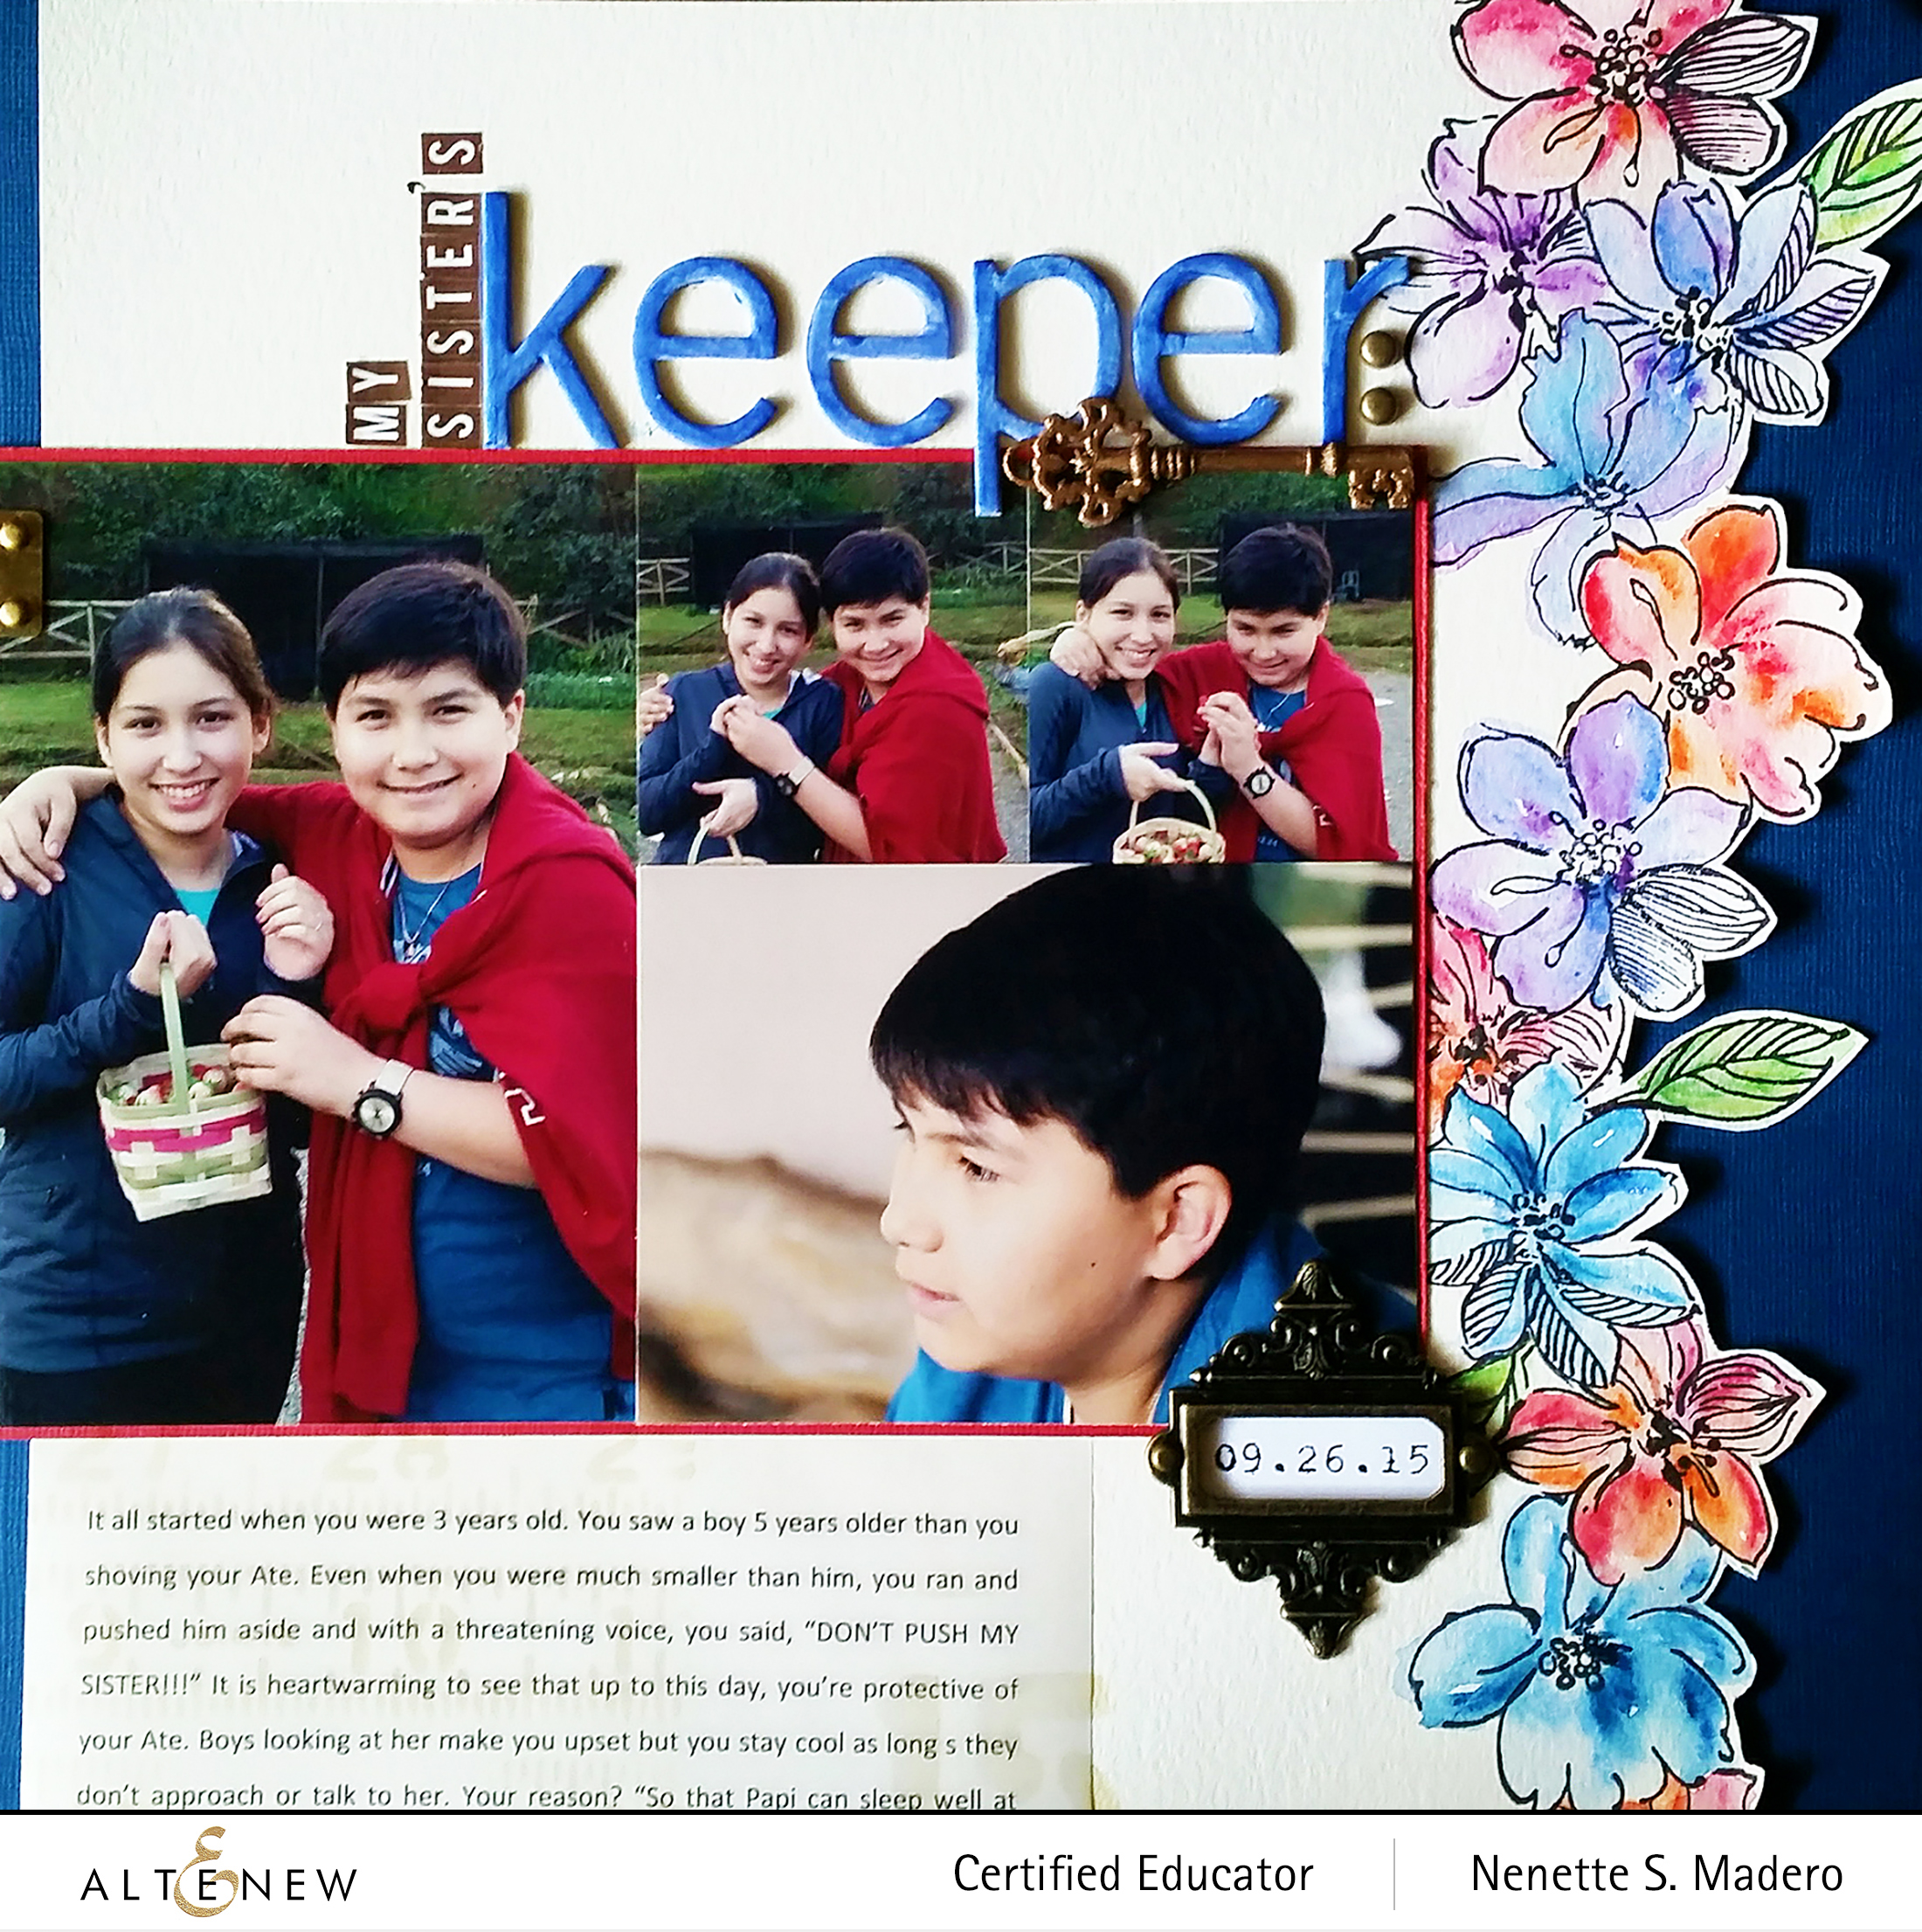
I enjoyed coloring these beautiful plant images! Arranging them in different levels also created depth.
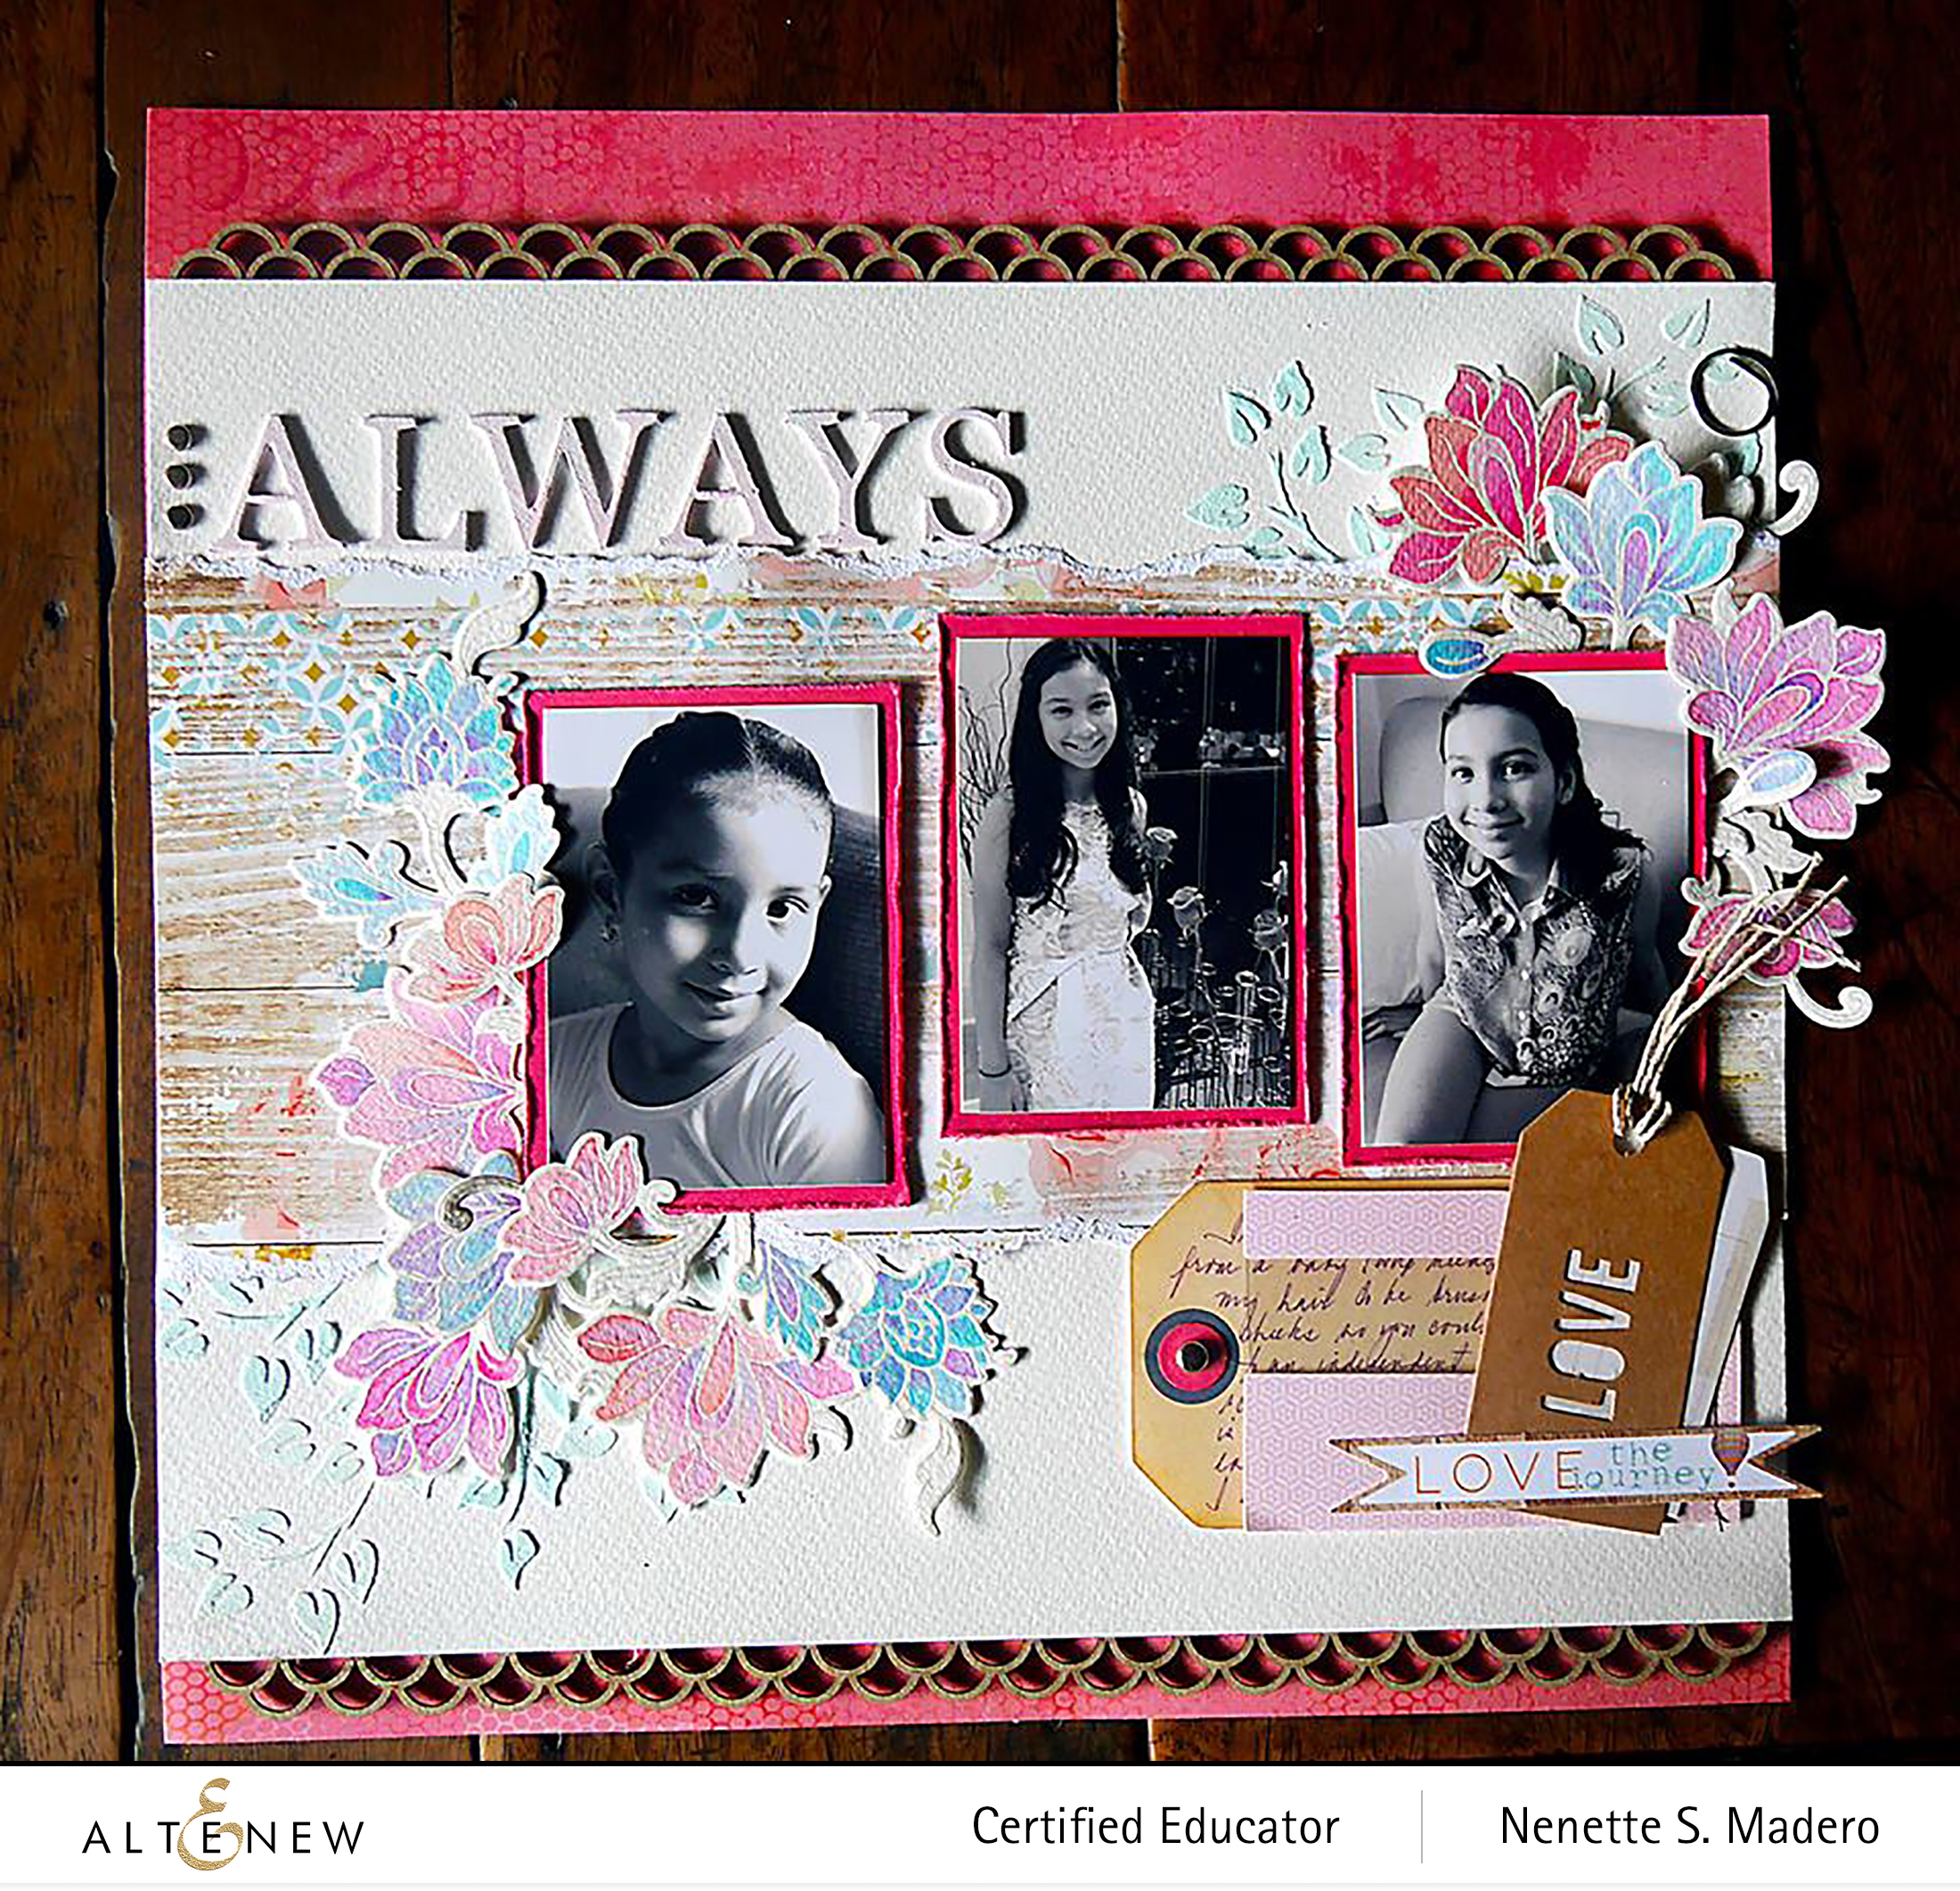
Below are some scrapbooking layouts I previously created using Altenew stamps, stenchils and watercolors. I love how Altenew stamps have become my go-to embellishments for scrapbook pages.
$300 in total prizes! To celebrate this special blog hop, Altenew is giving away a $50 gift certificate to 2 lucky winners and a $25 gift certificate to 8 winners! Please comment on the Altenew Card Blog and/or each designer’s blog post on the blog hop list below by 08/05/2022 for a chance to win. Altenew will draw 10 random winners from the comments left on each stop of this blog hop and announce the winners on the Altenew Winners Page on 08/09/2022.
If you haven’t visited the Altenew blog, this is where you start. I’m sure my uber-talented friend, Erum Tasnim, will mesmerize you with her fantastic talent.
I hope you liked the projects I made for this hop. If you want to see my other creations, please follow me on Instagram. I also share video tutorials on Youtube. All the links are found below. Thank you so much, and happy crafting! <3
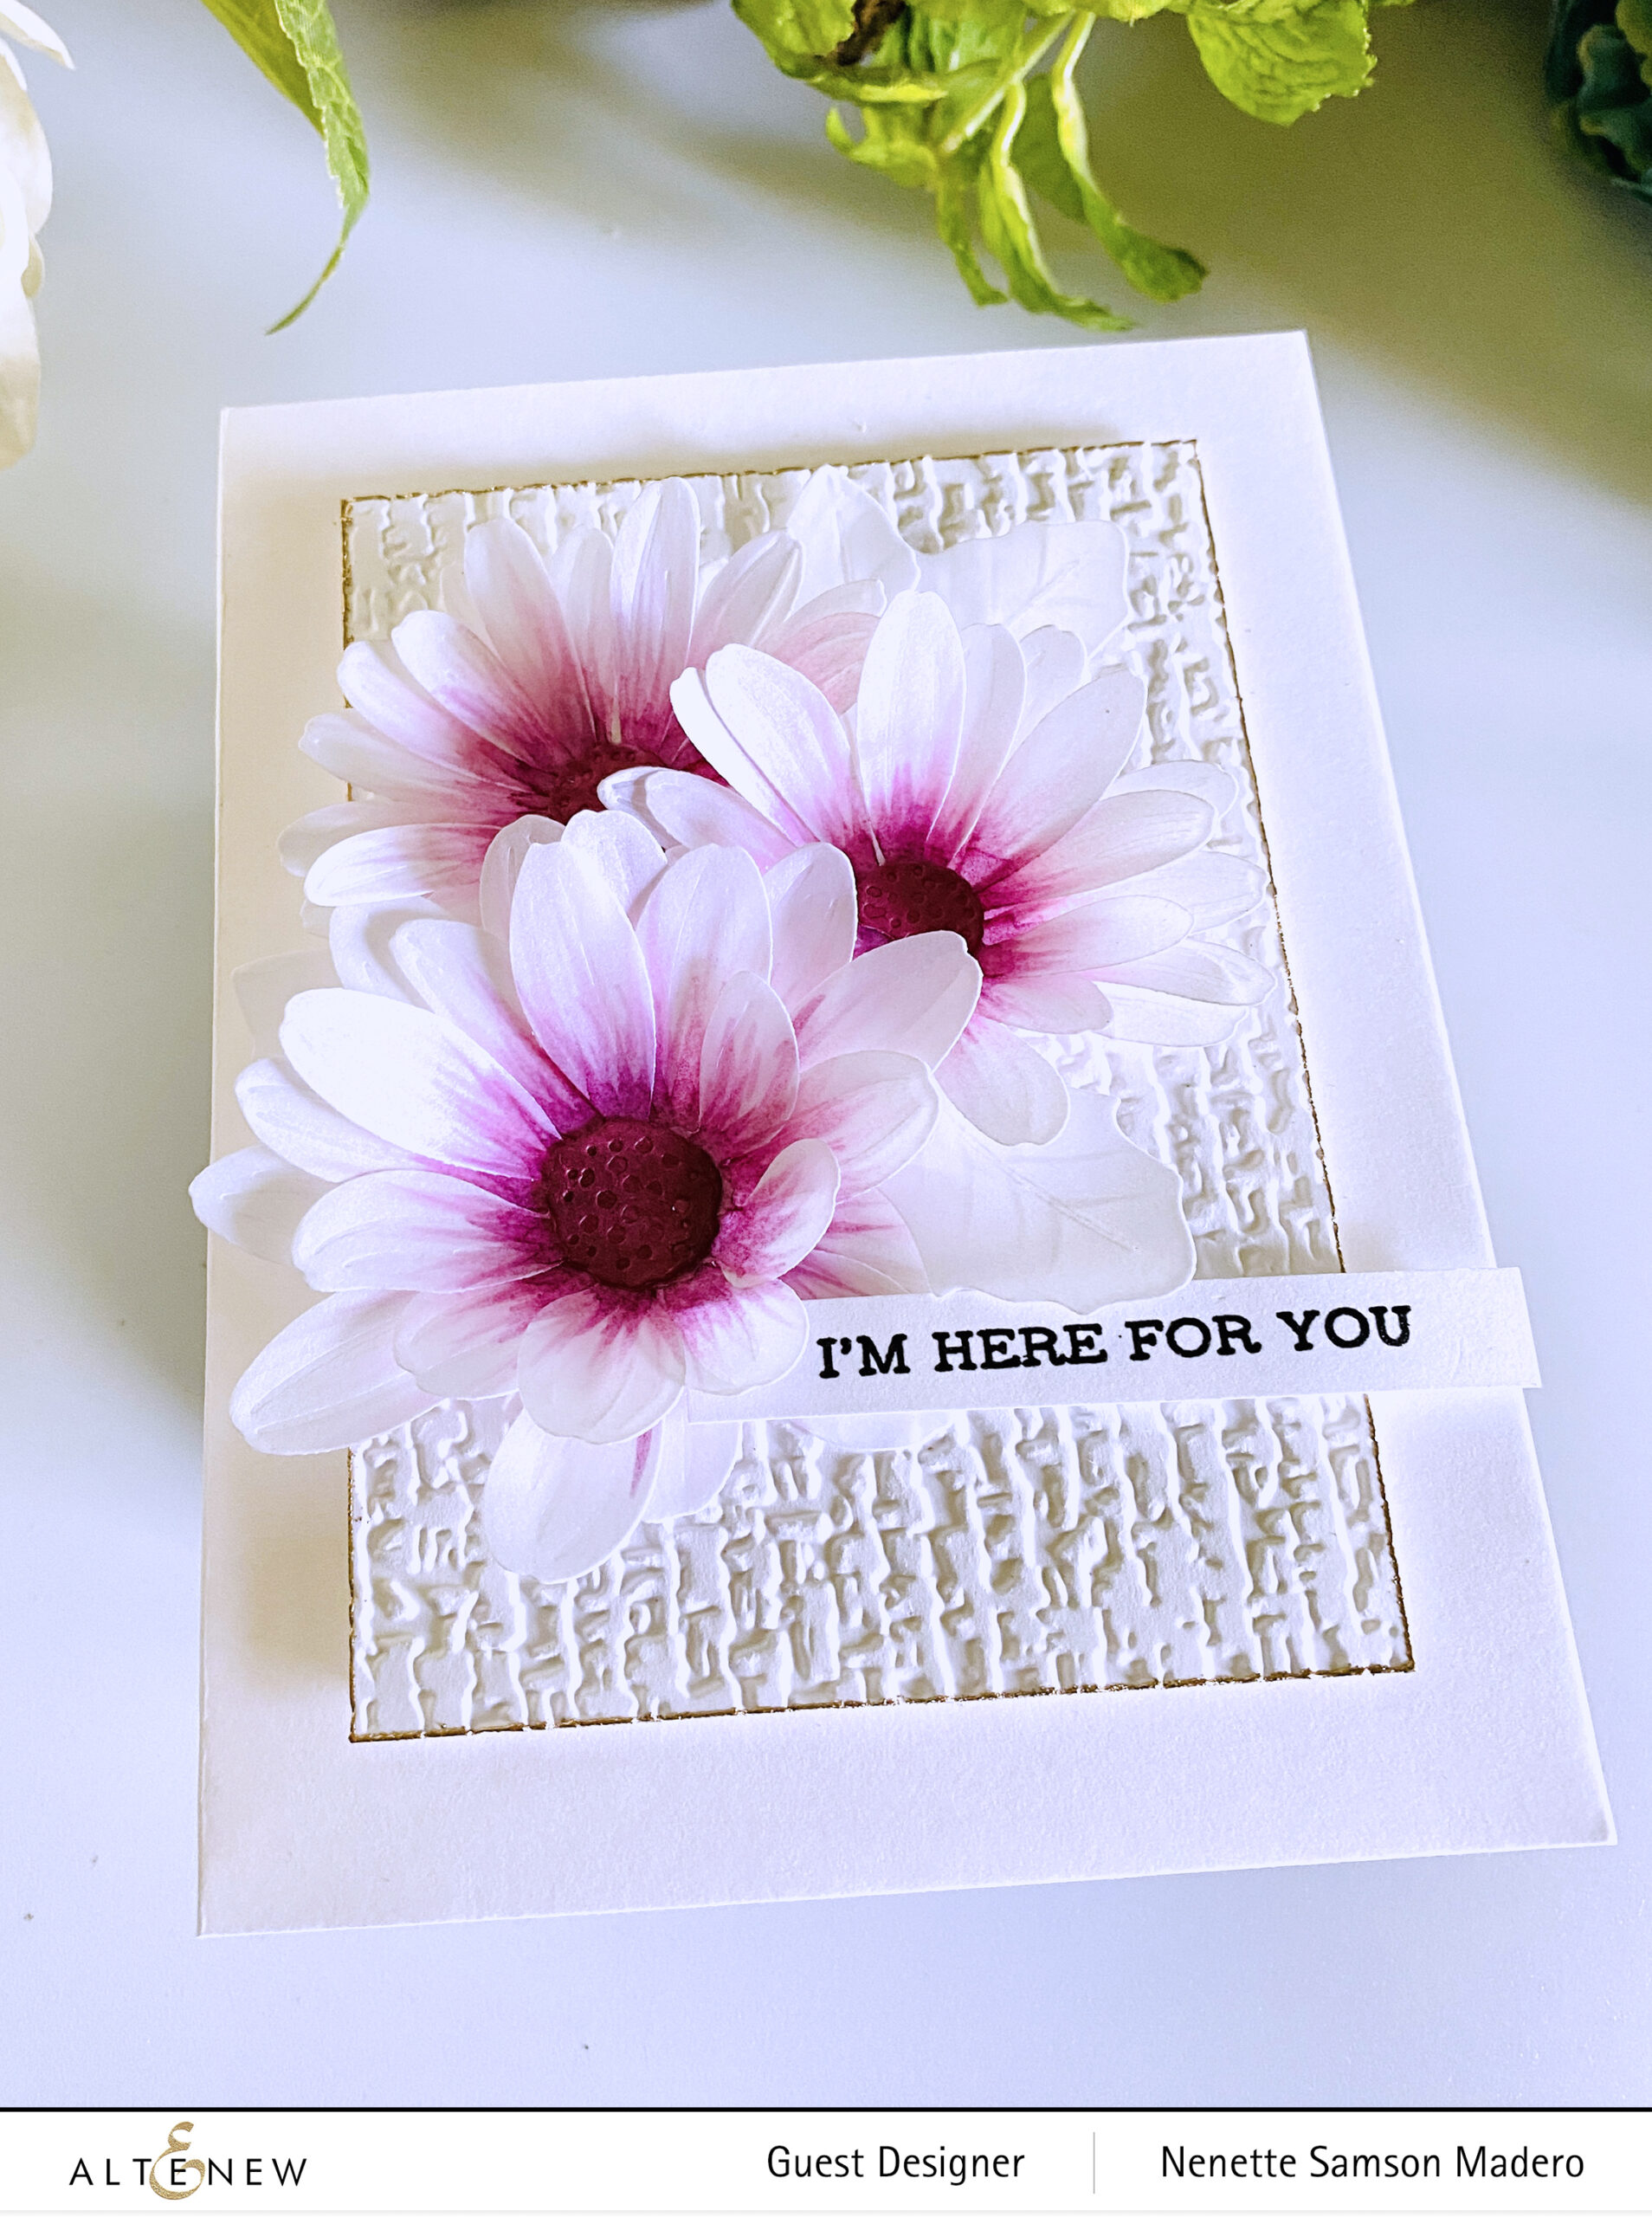
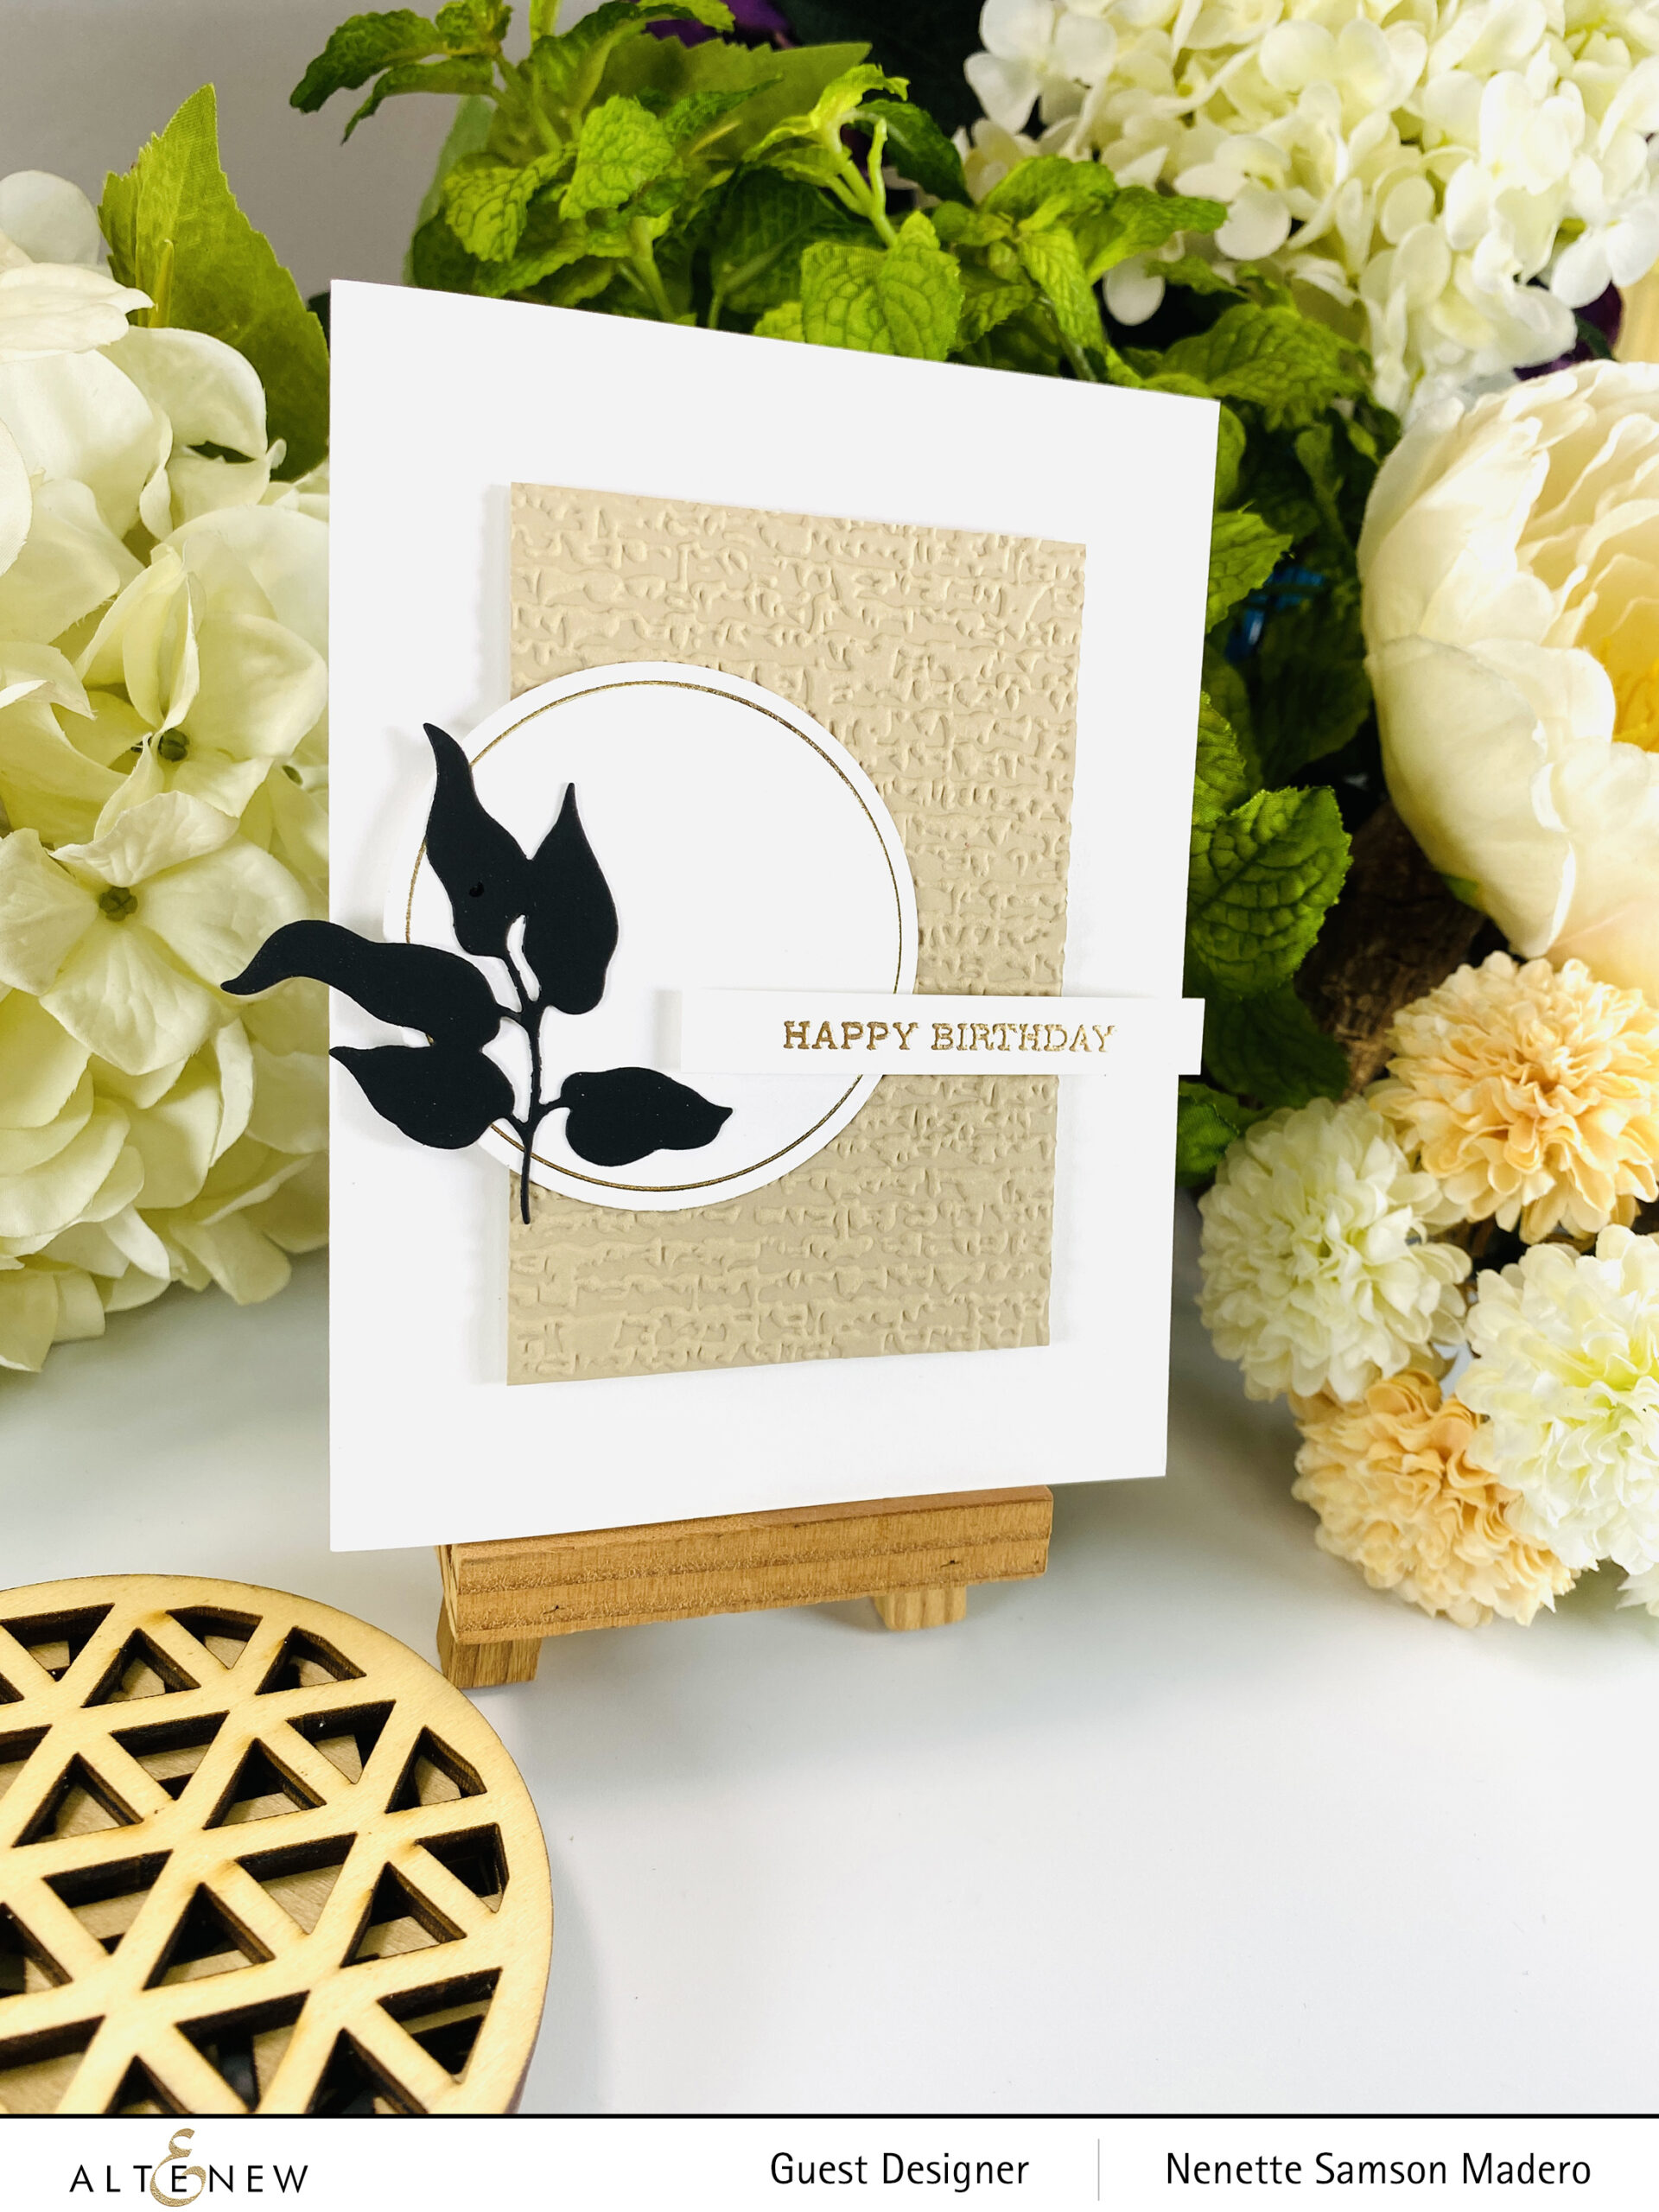
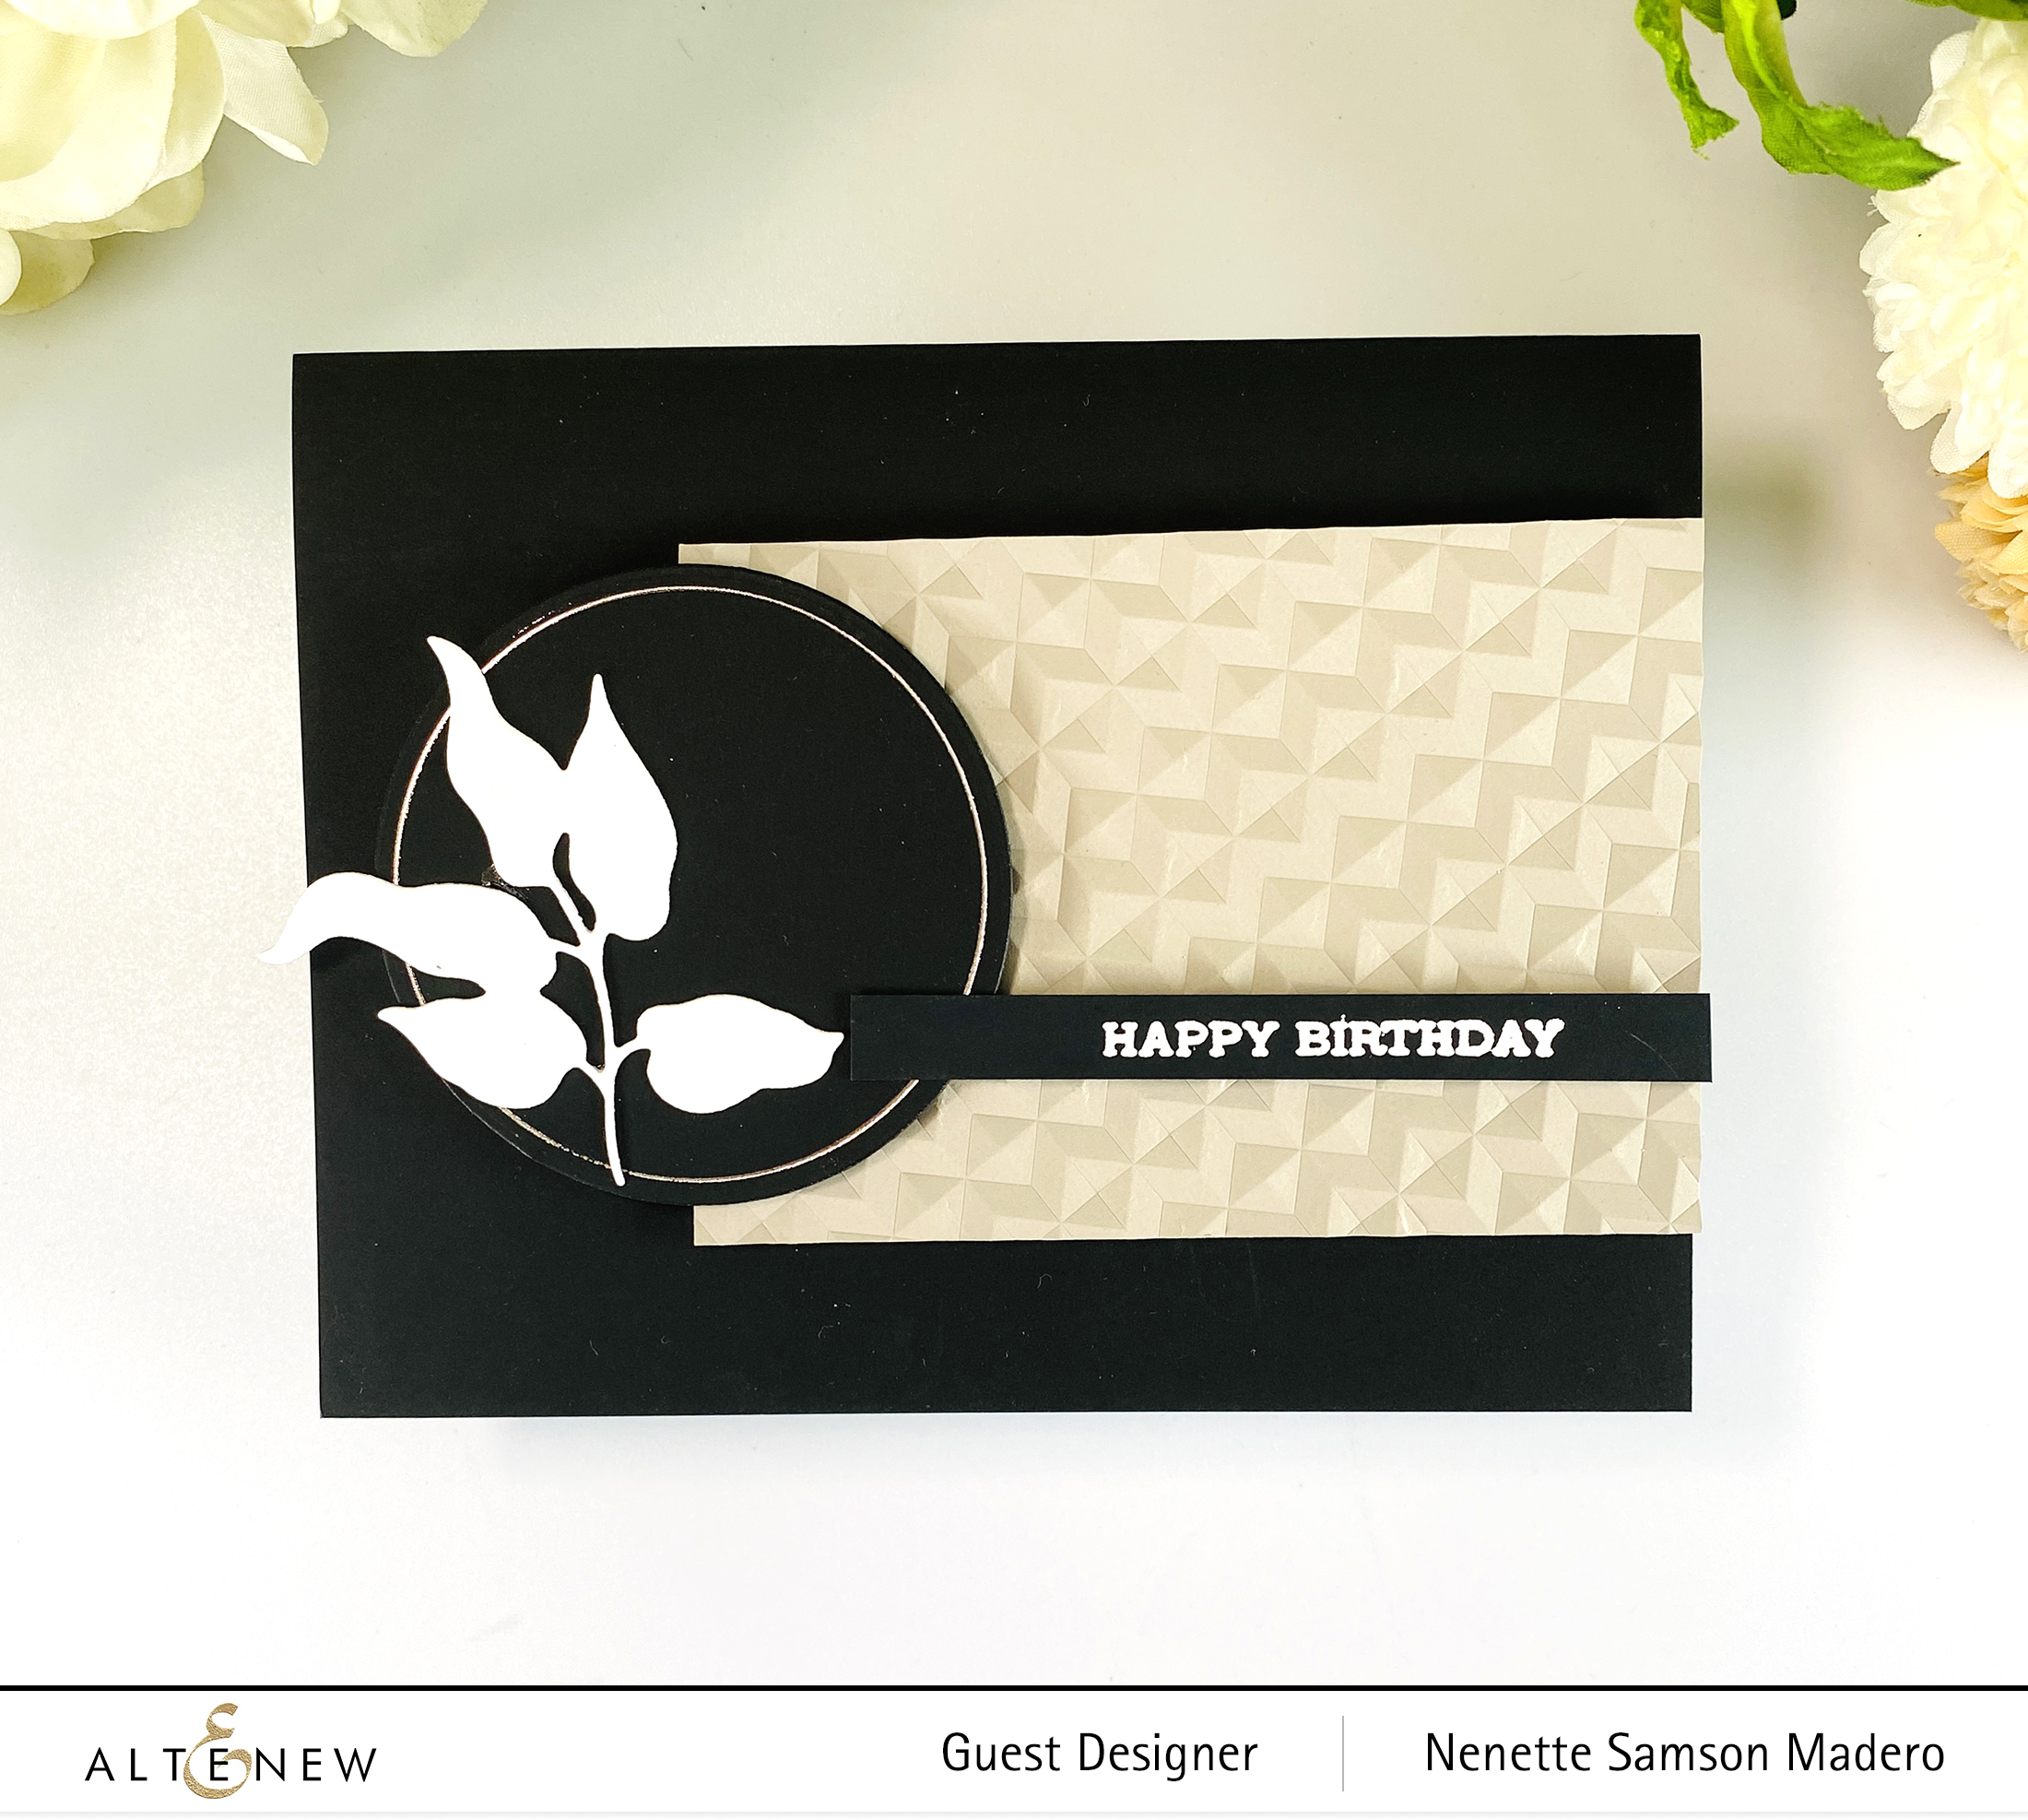
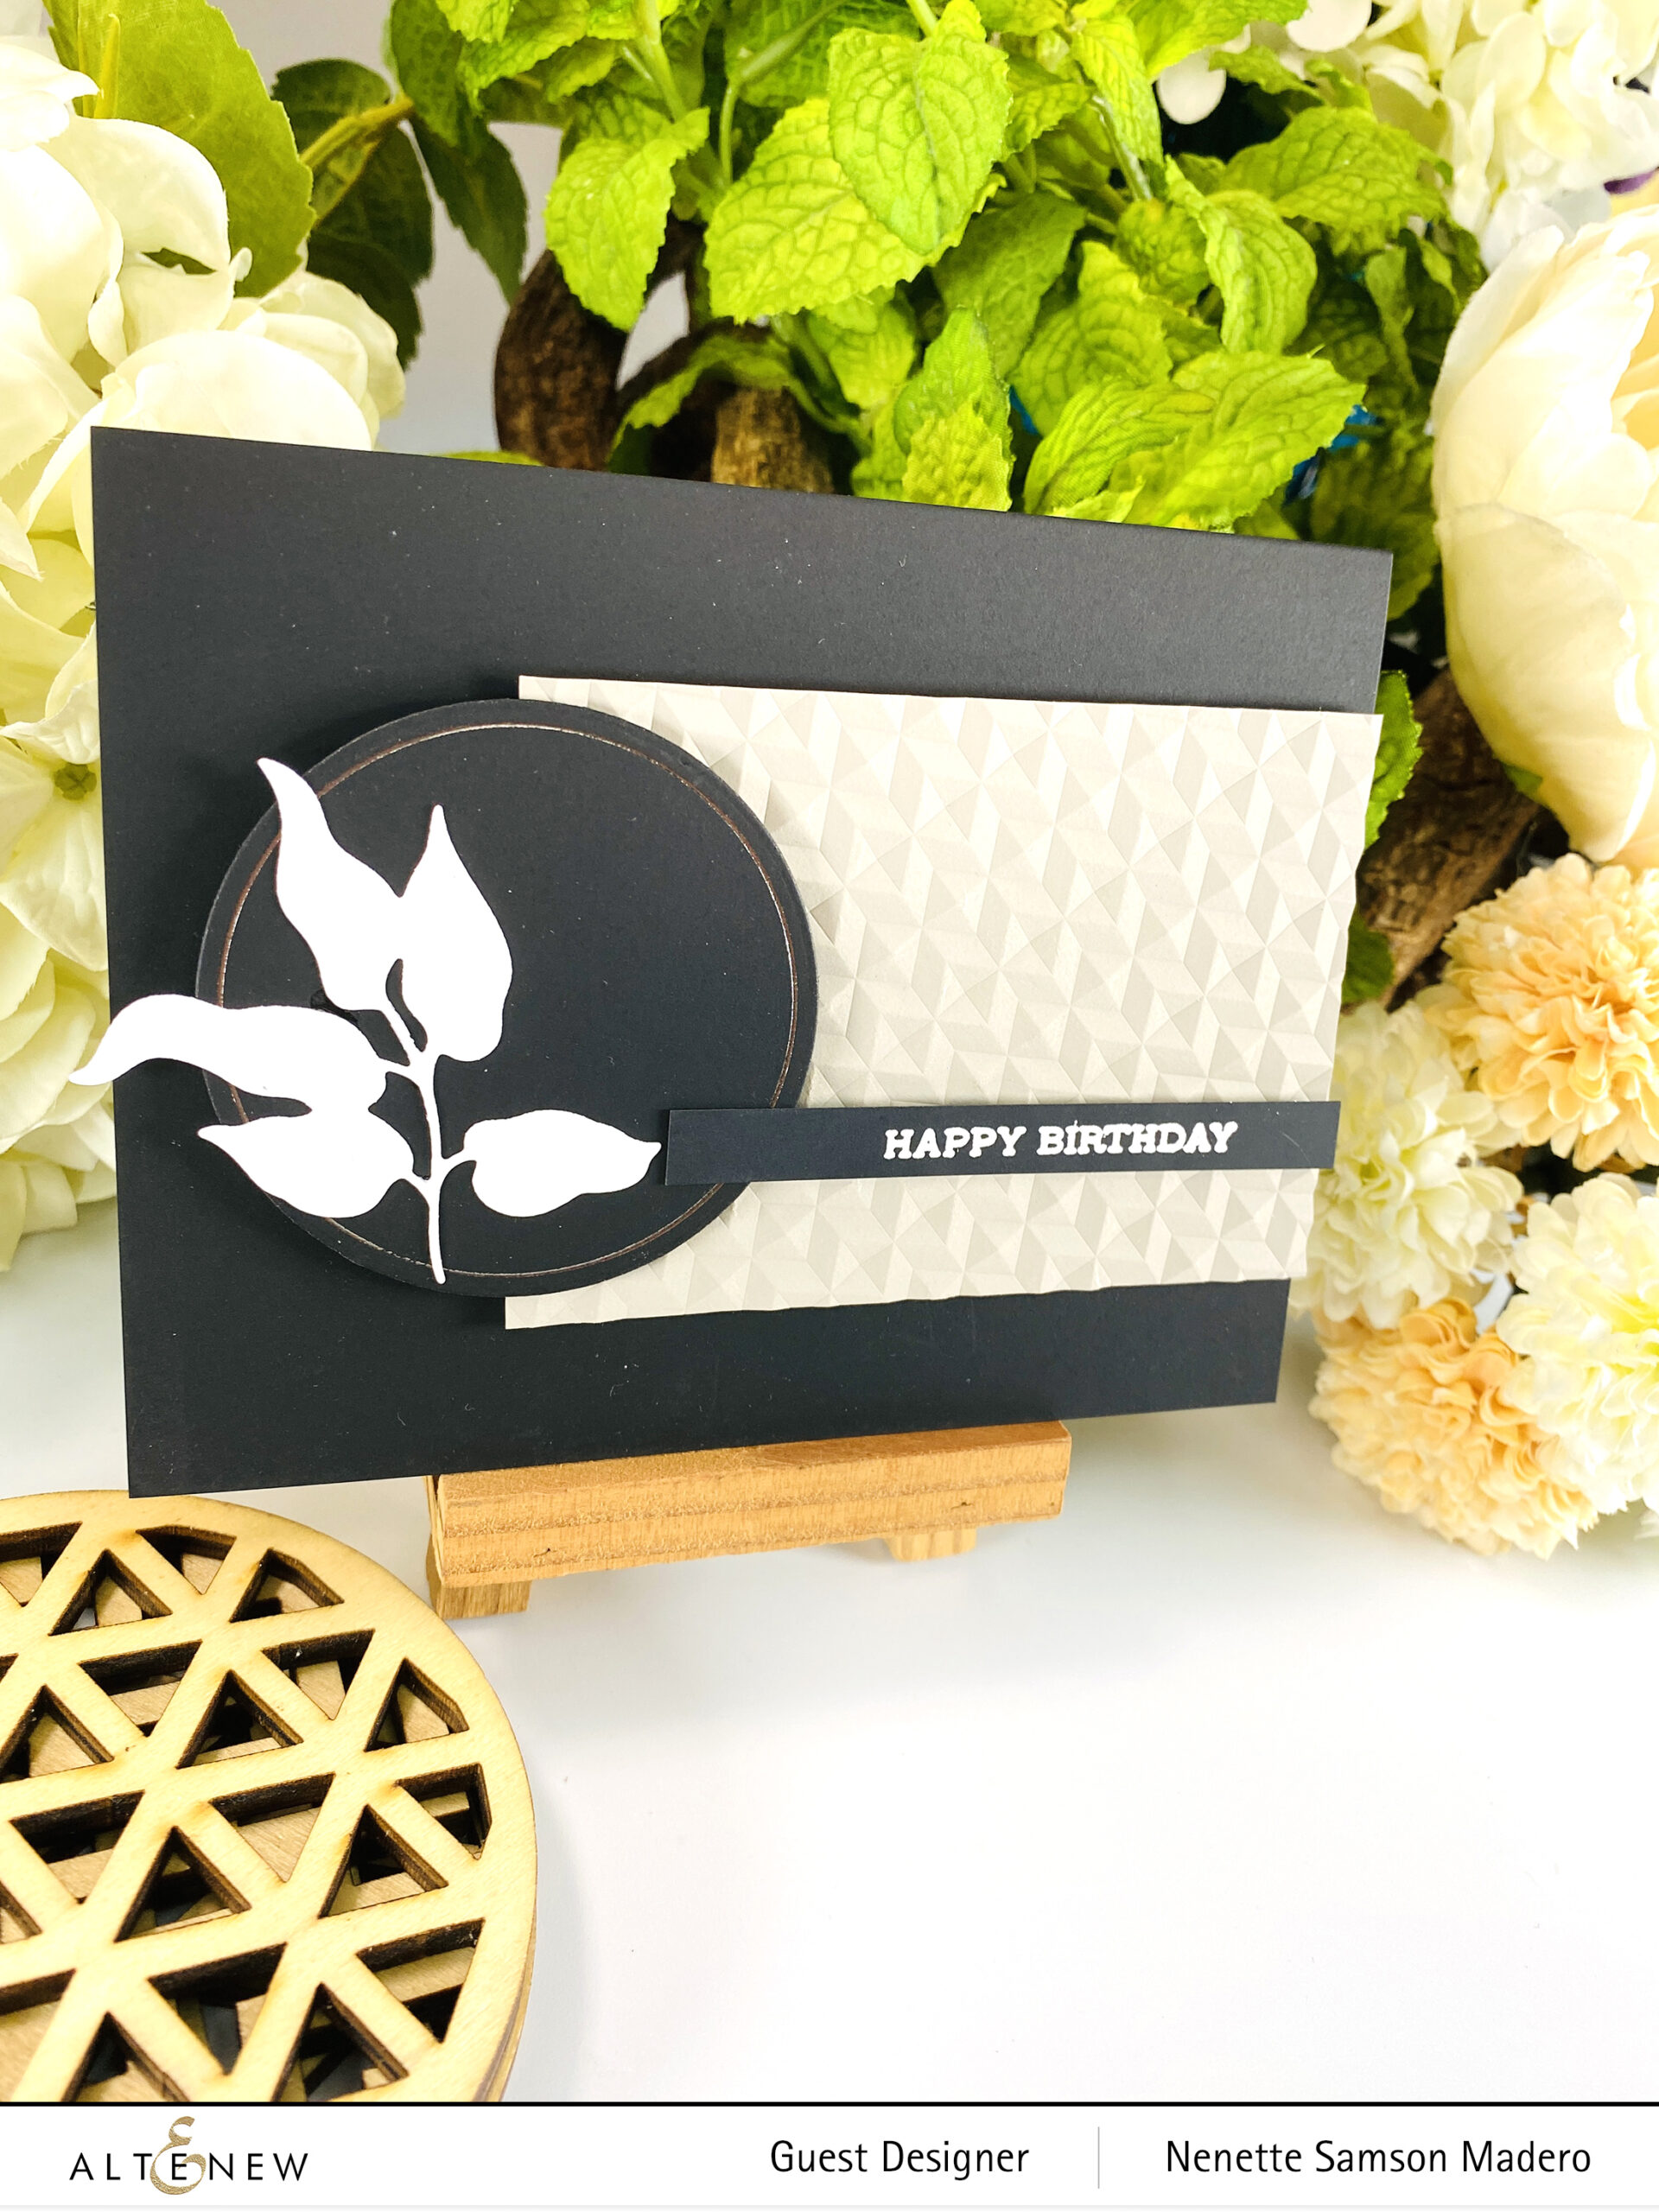
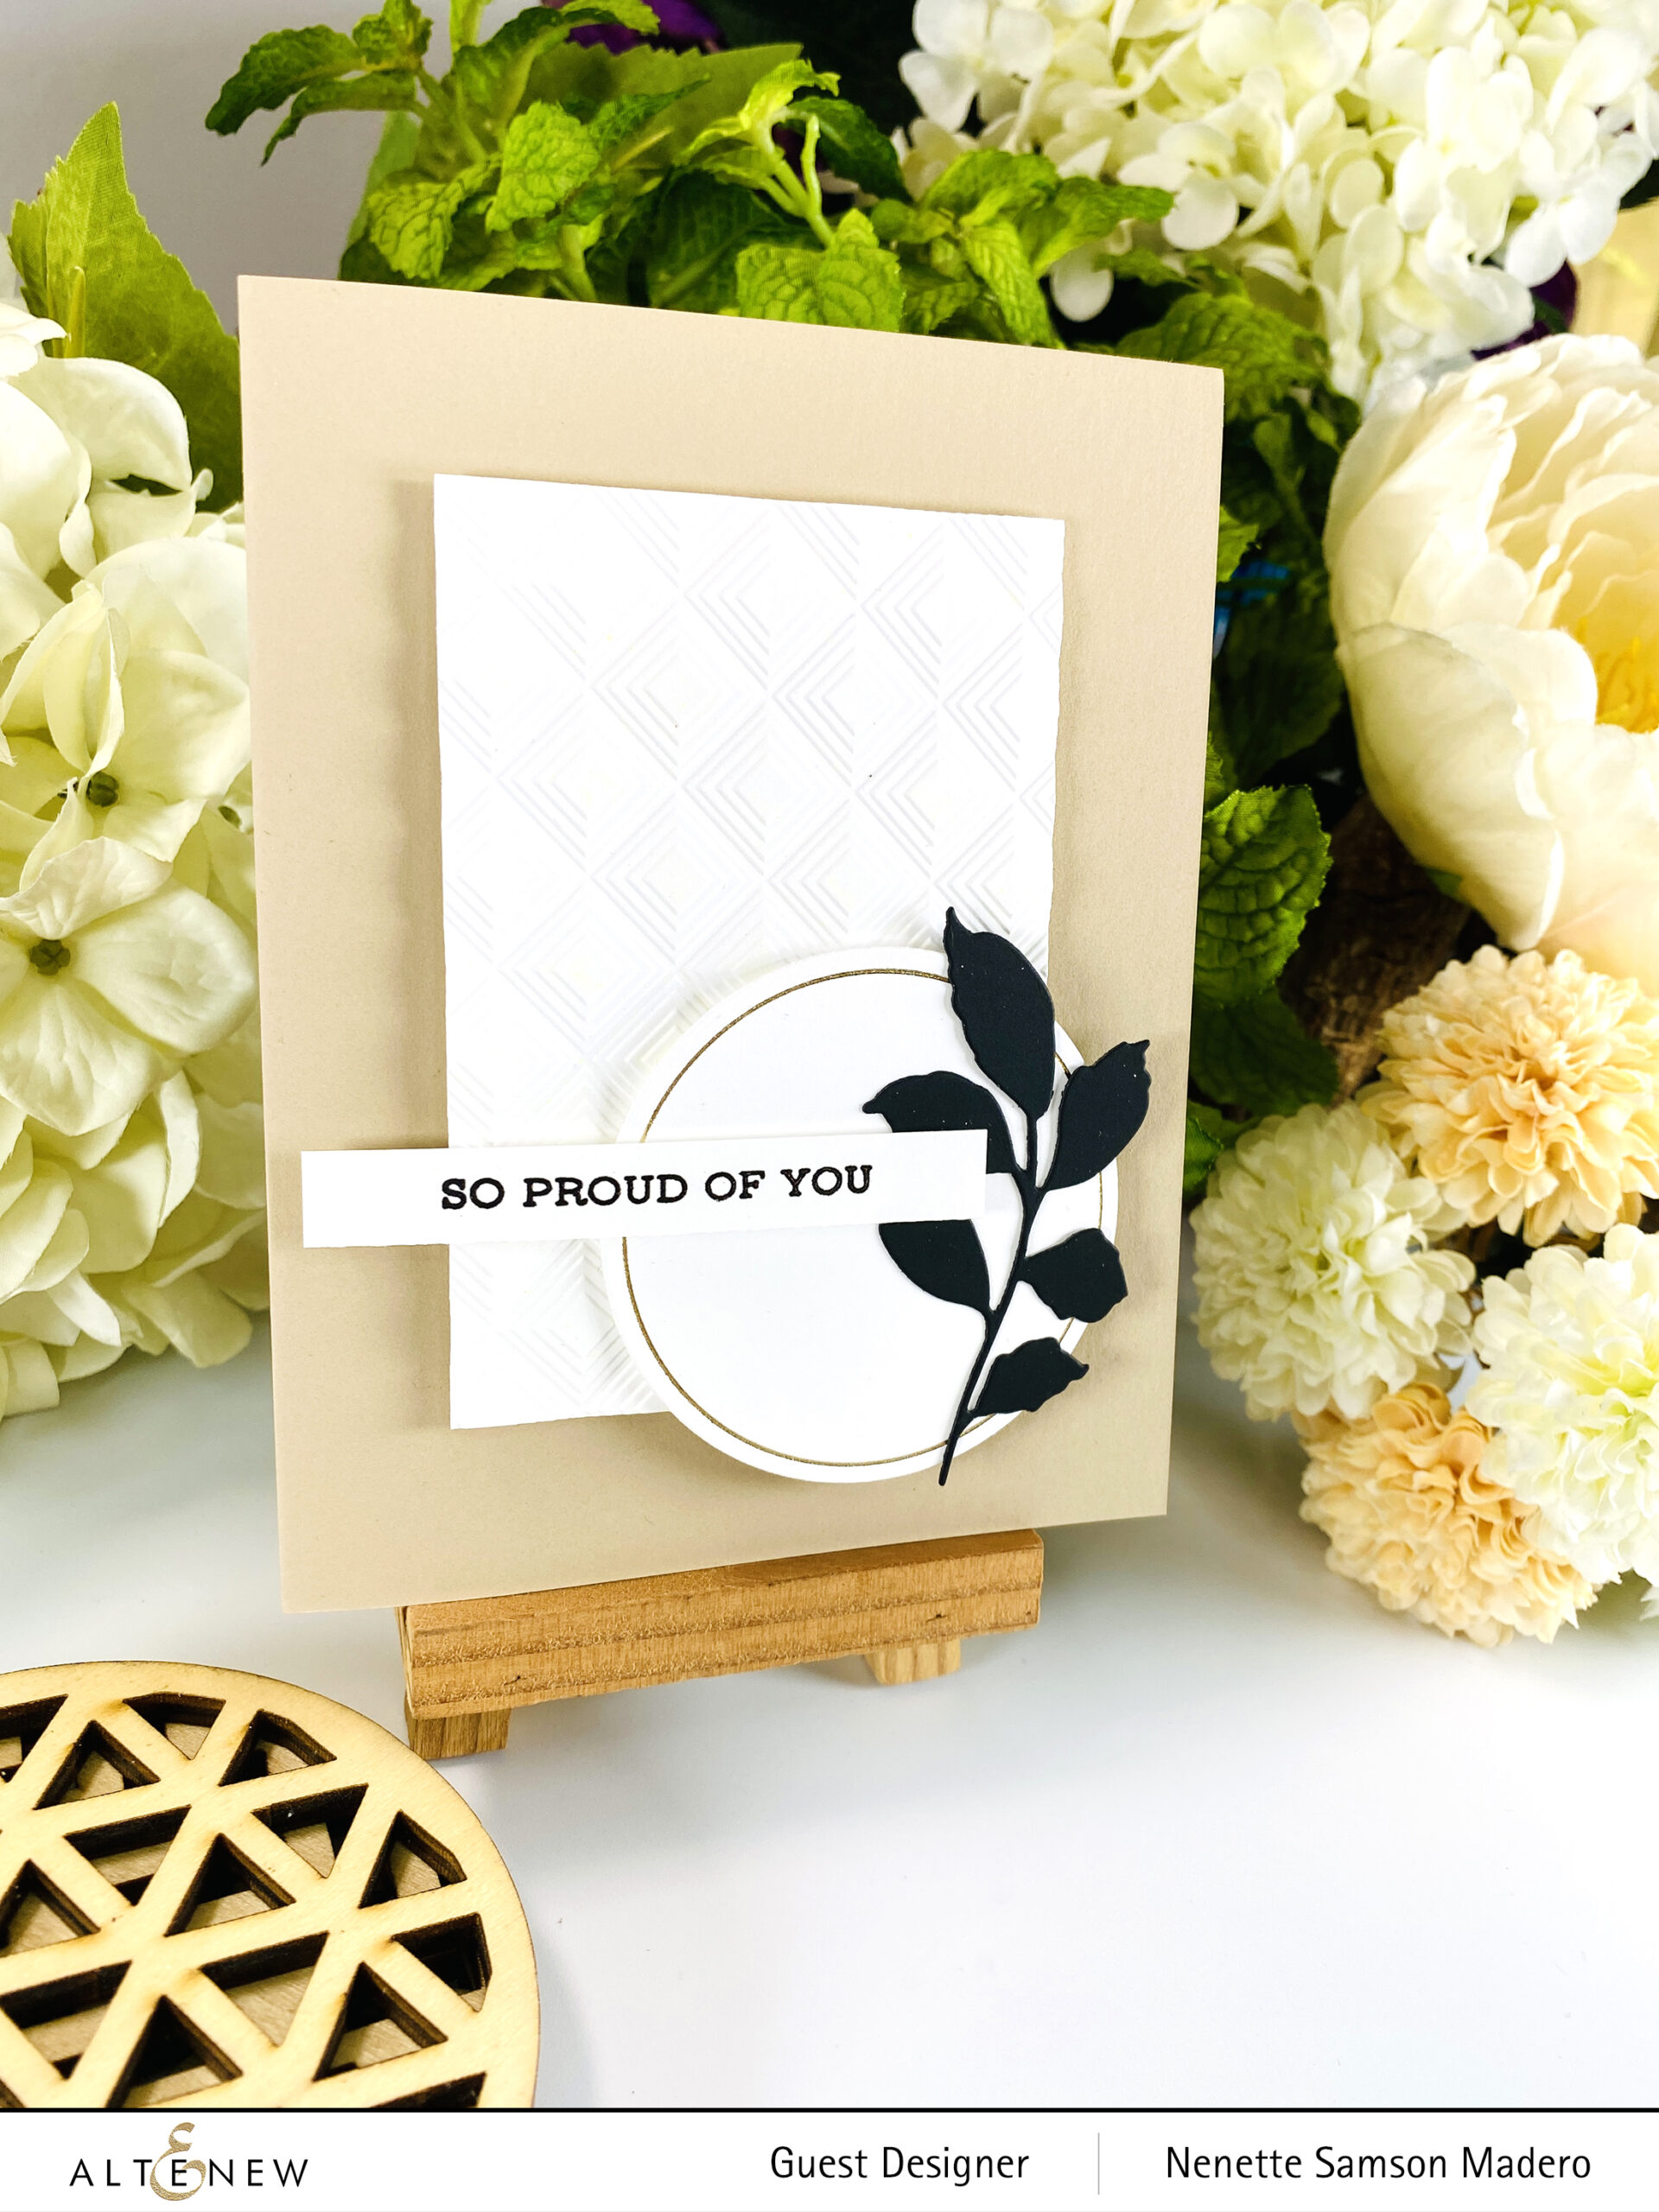
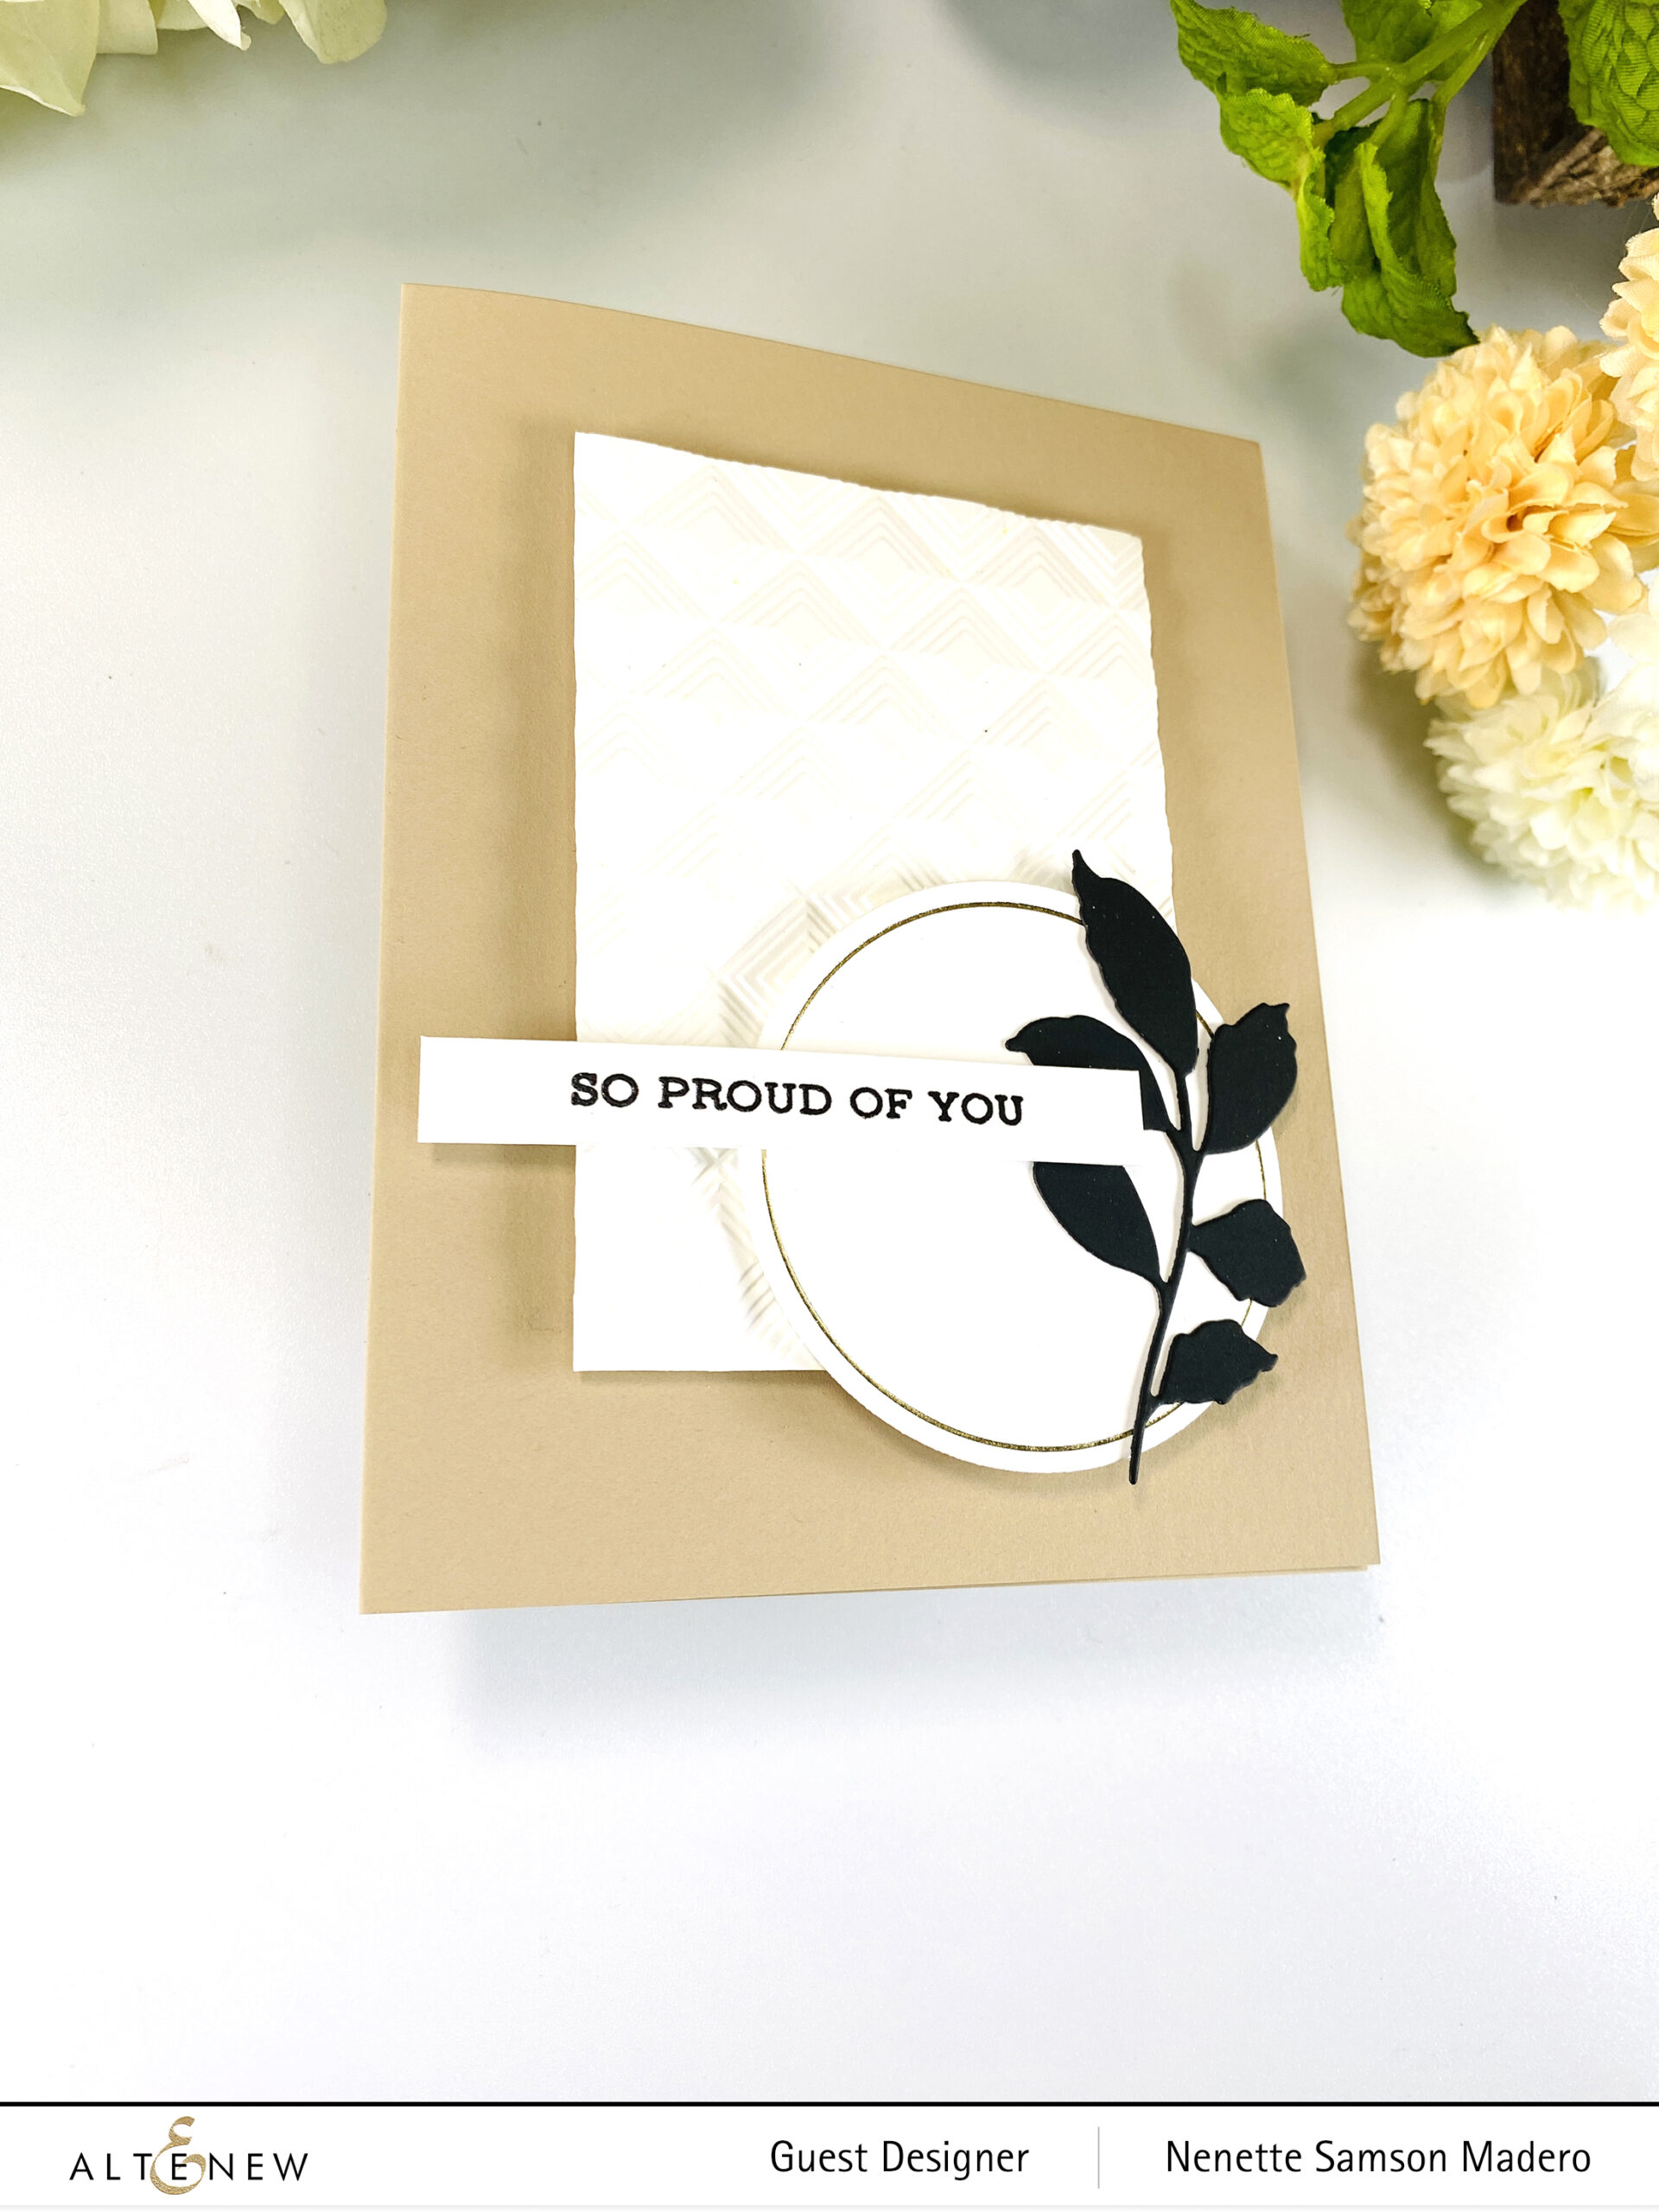
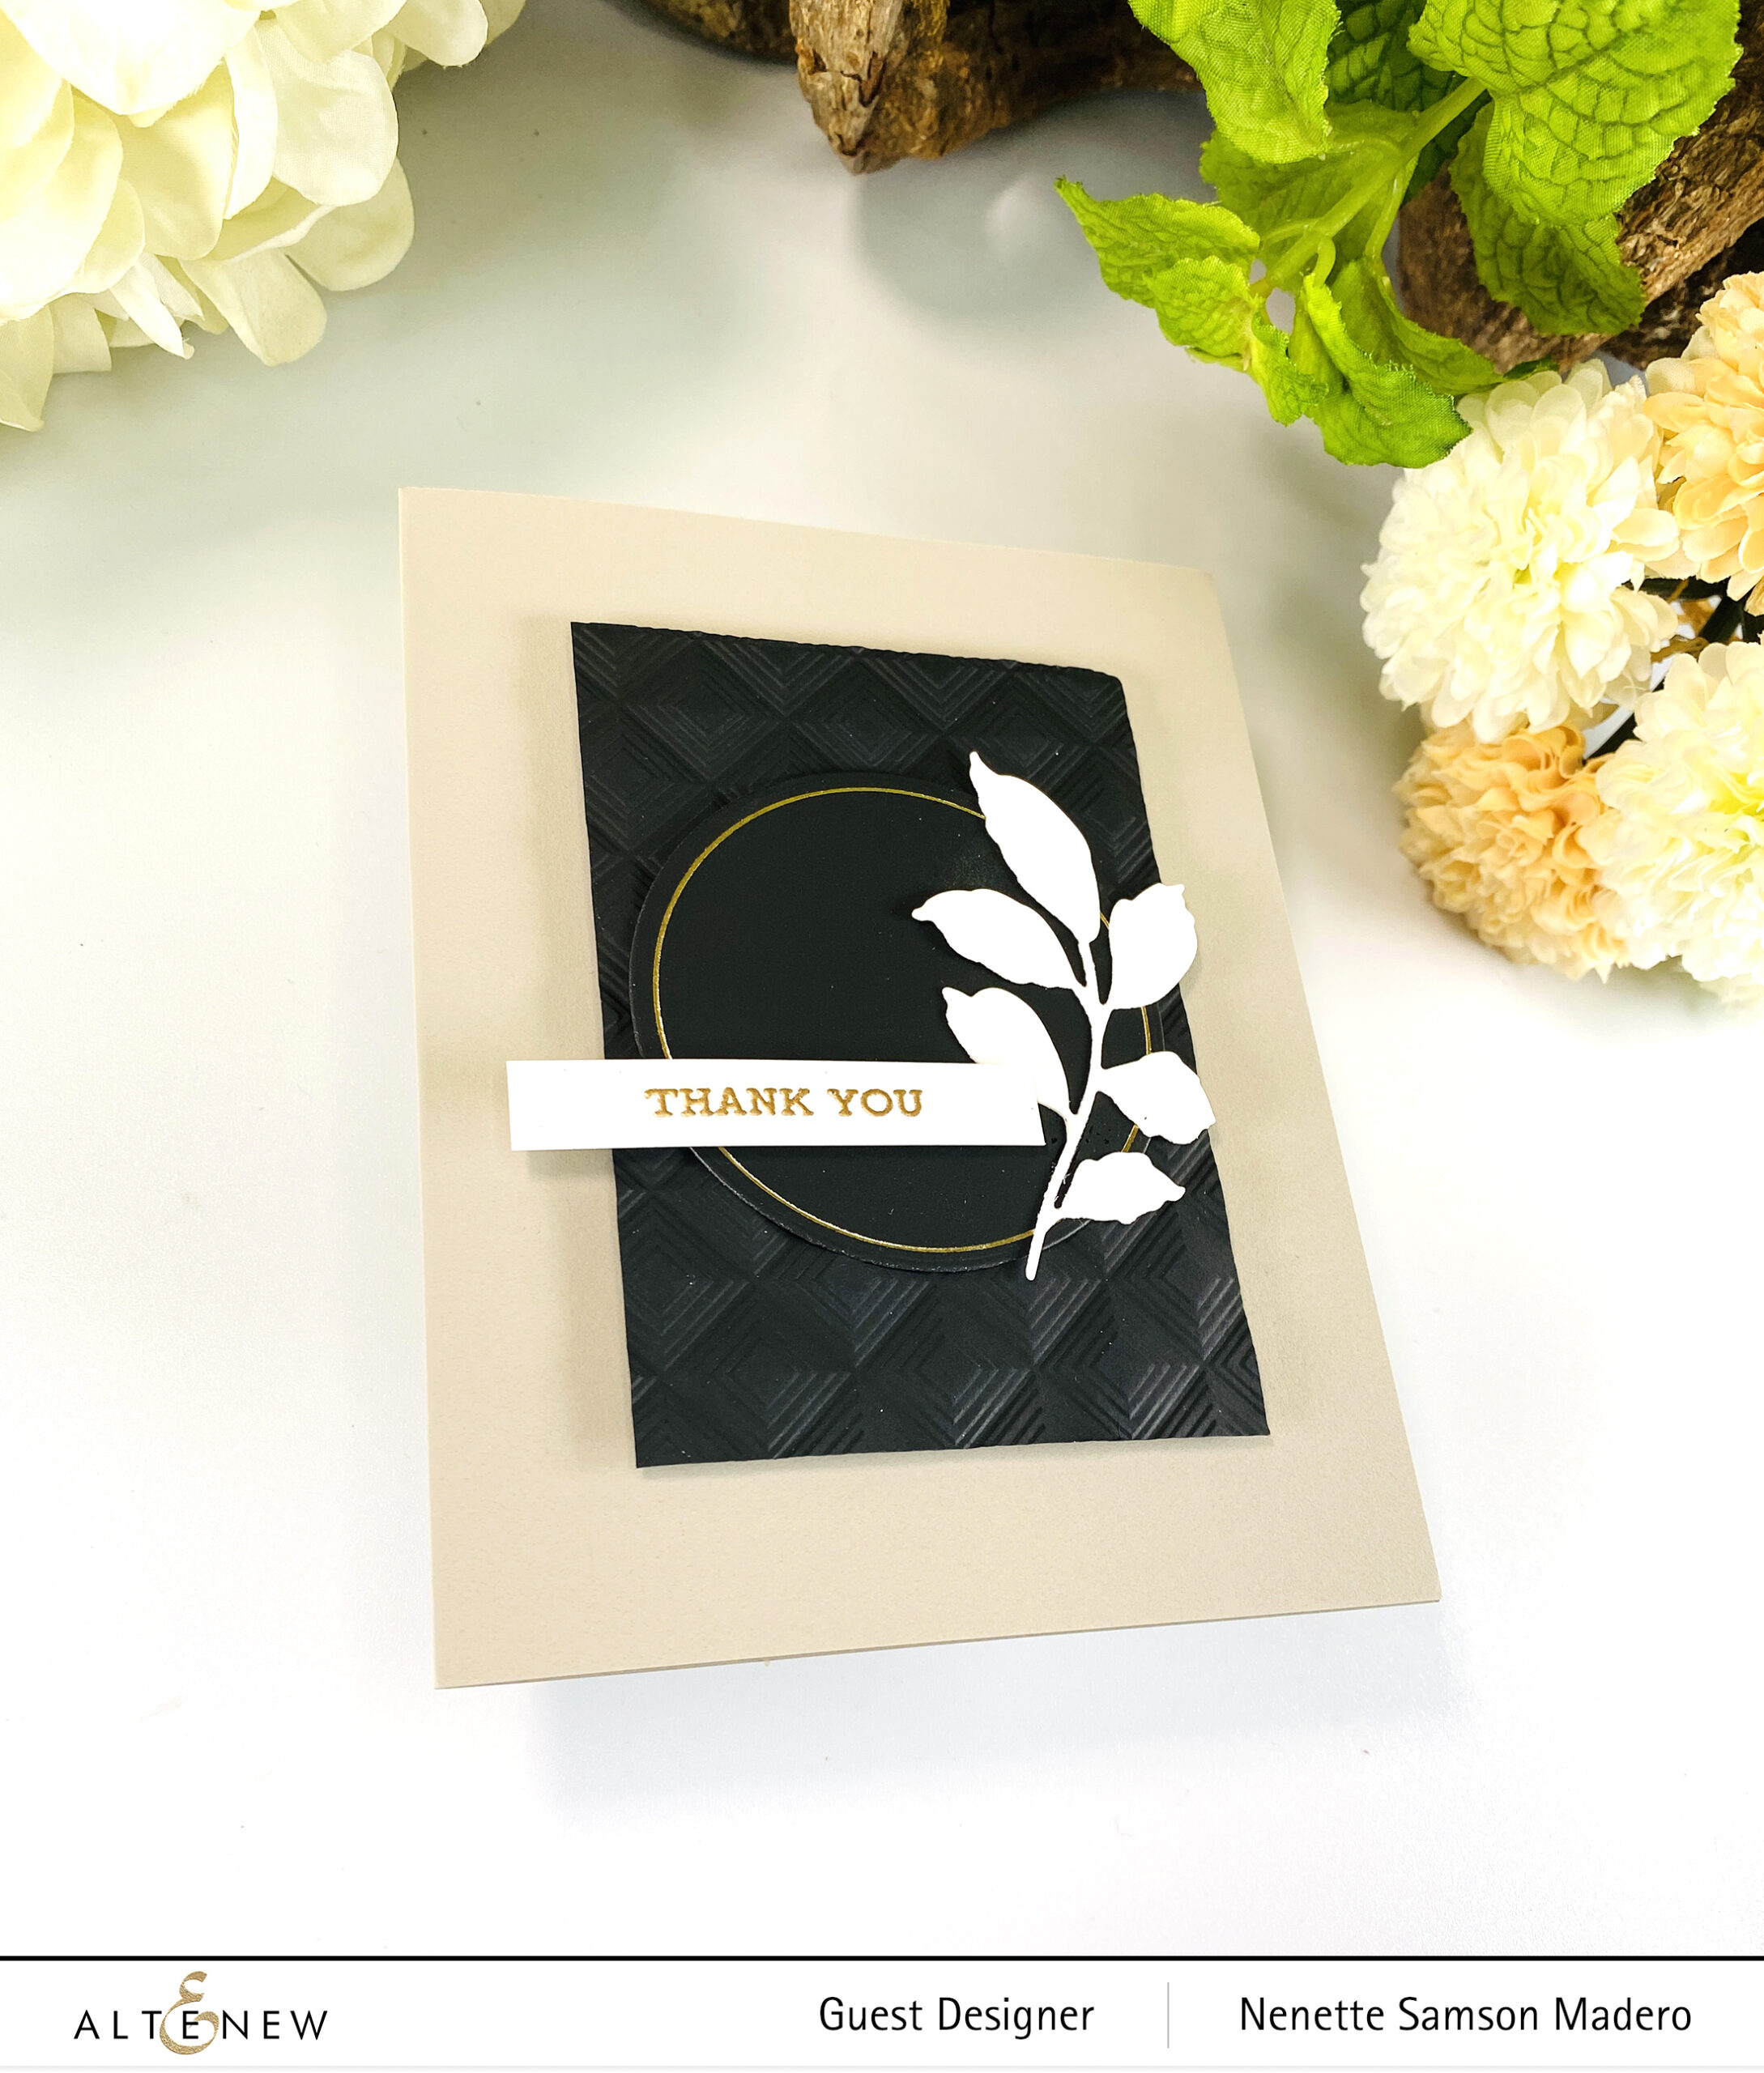
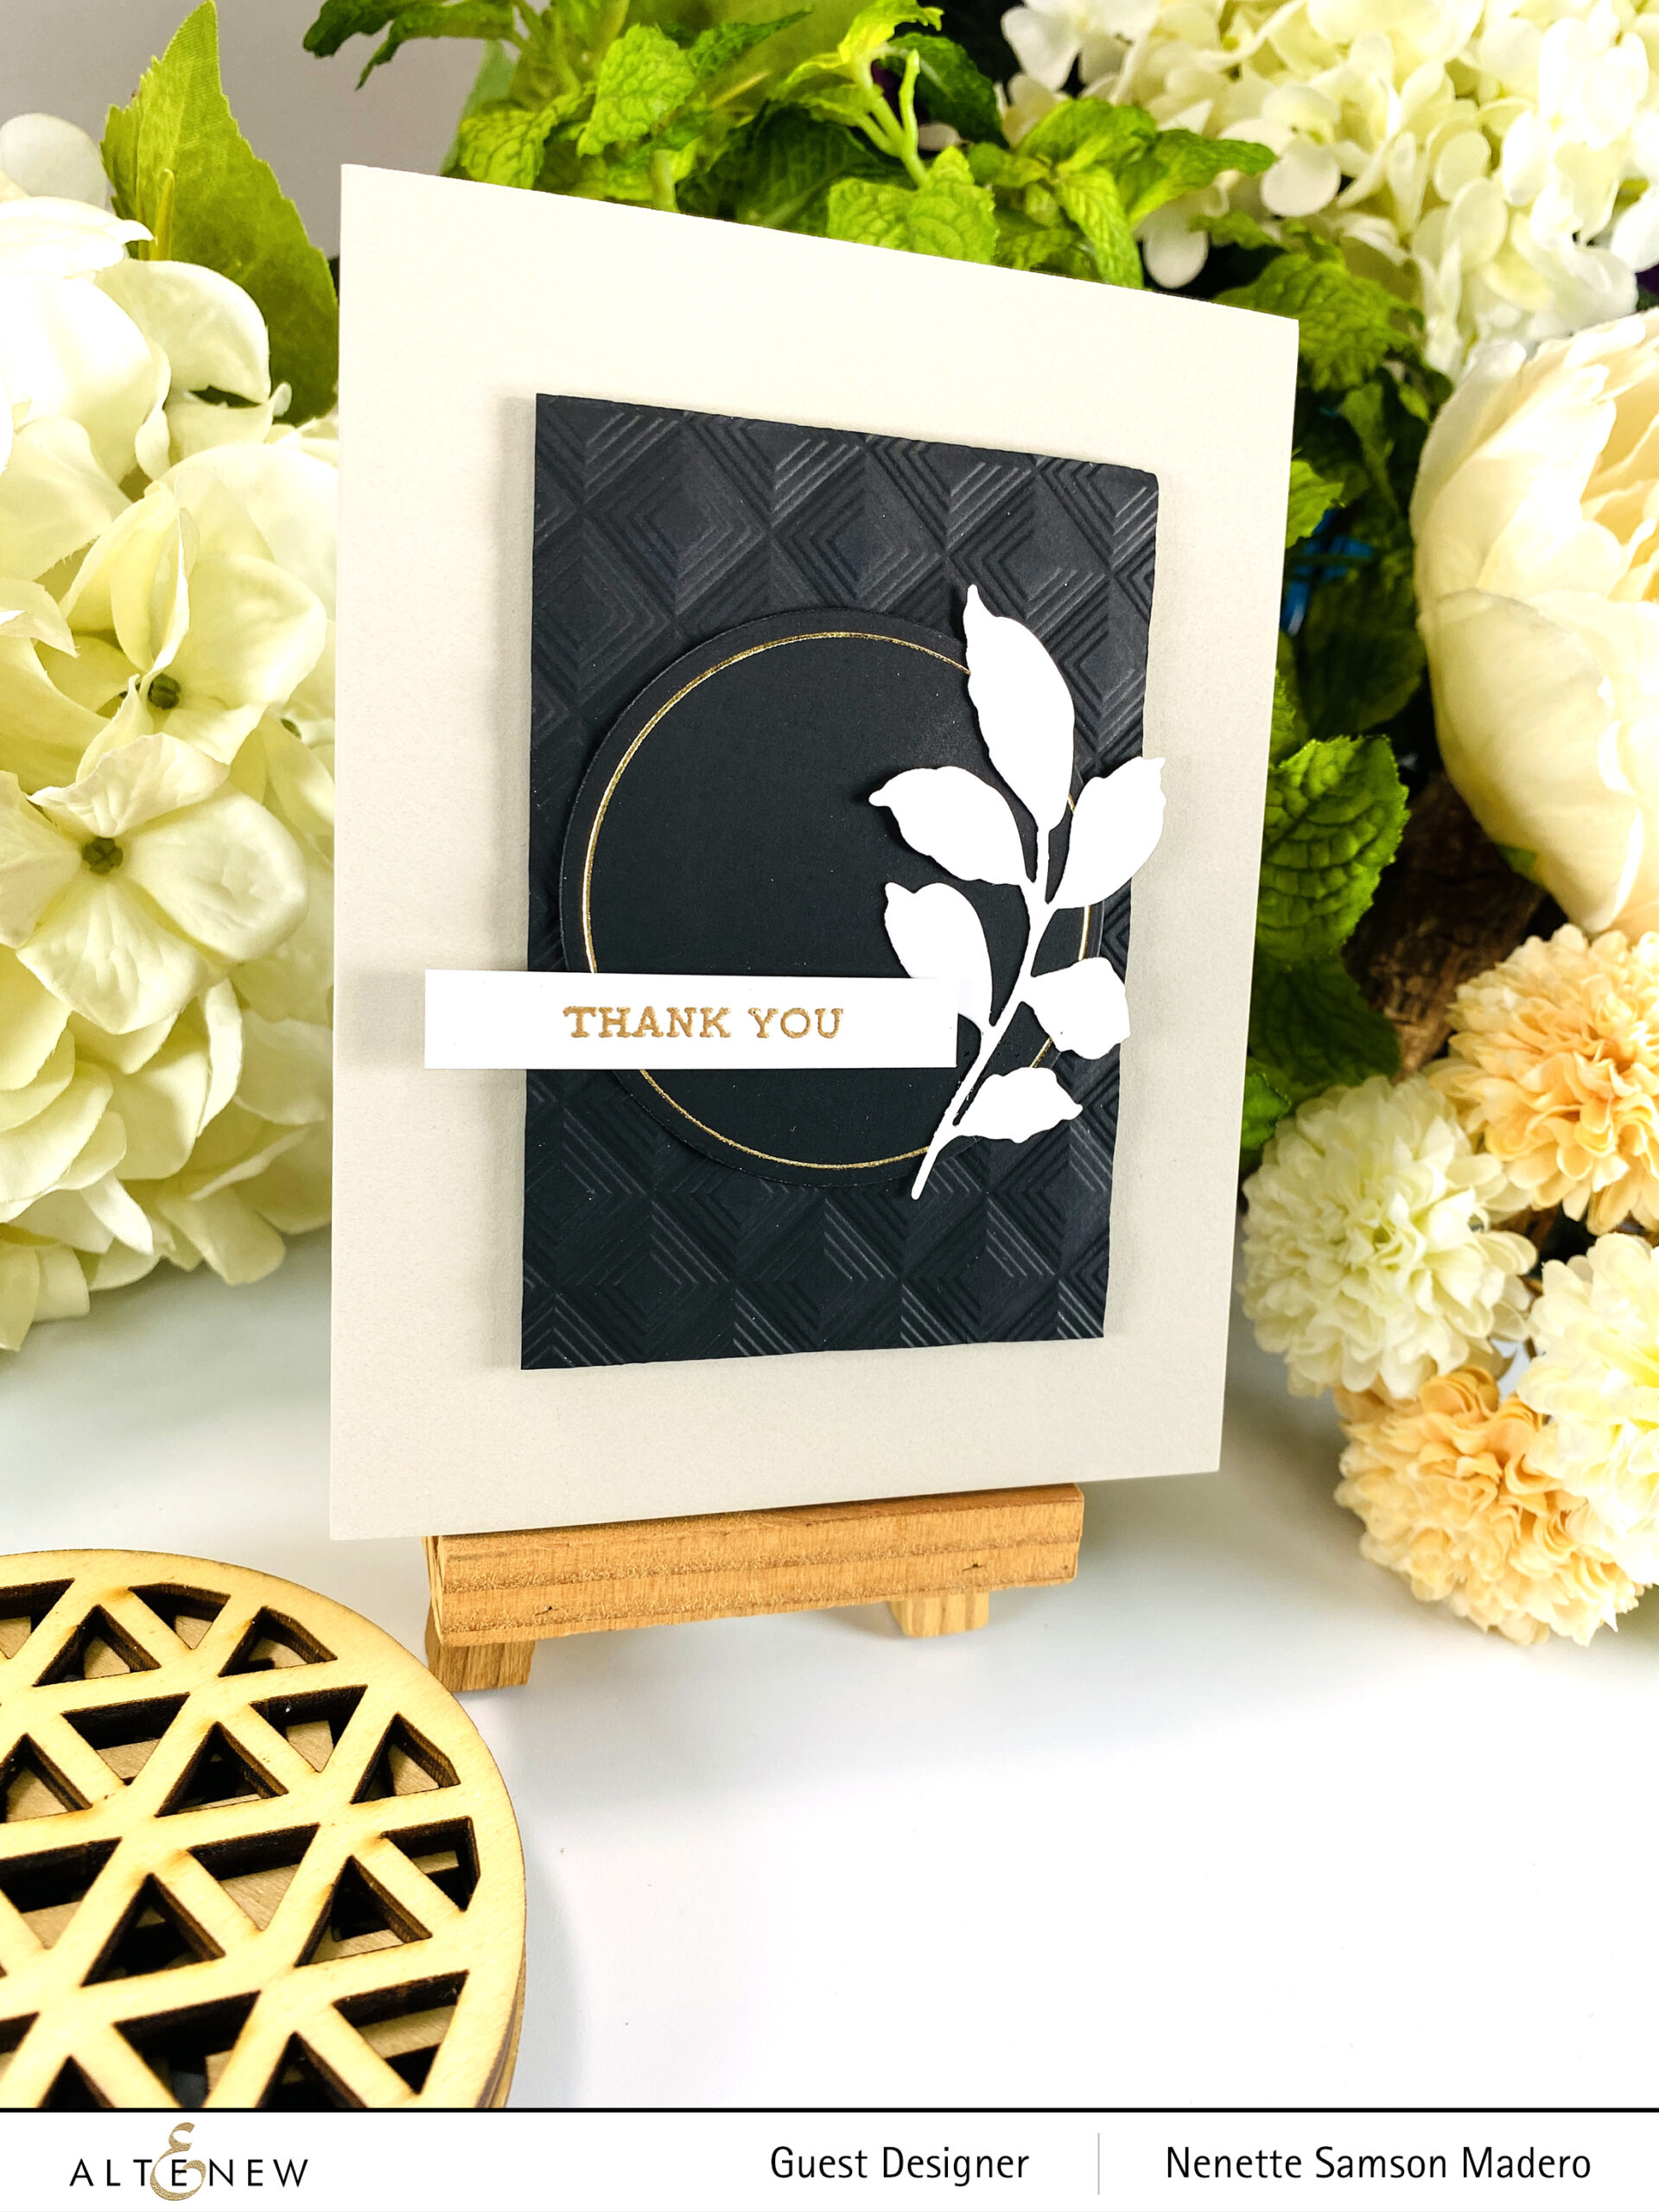
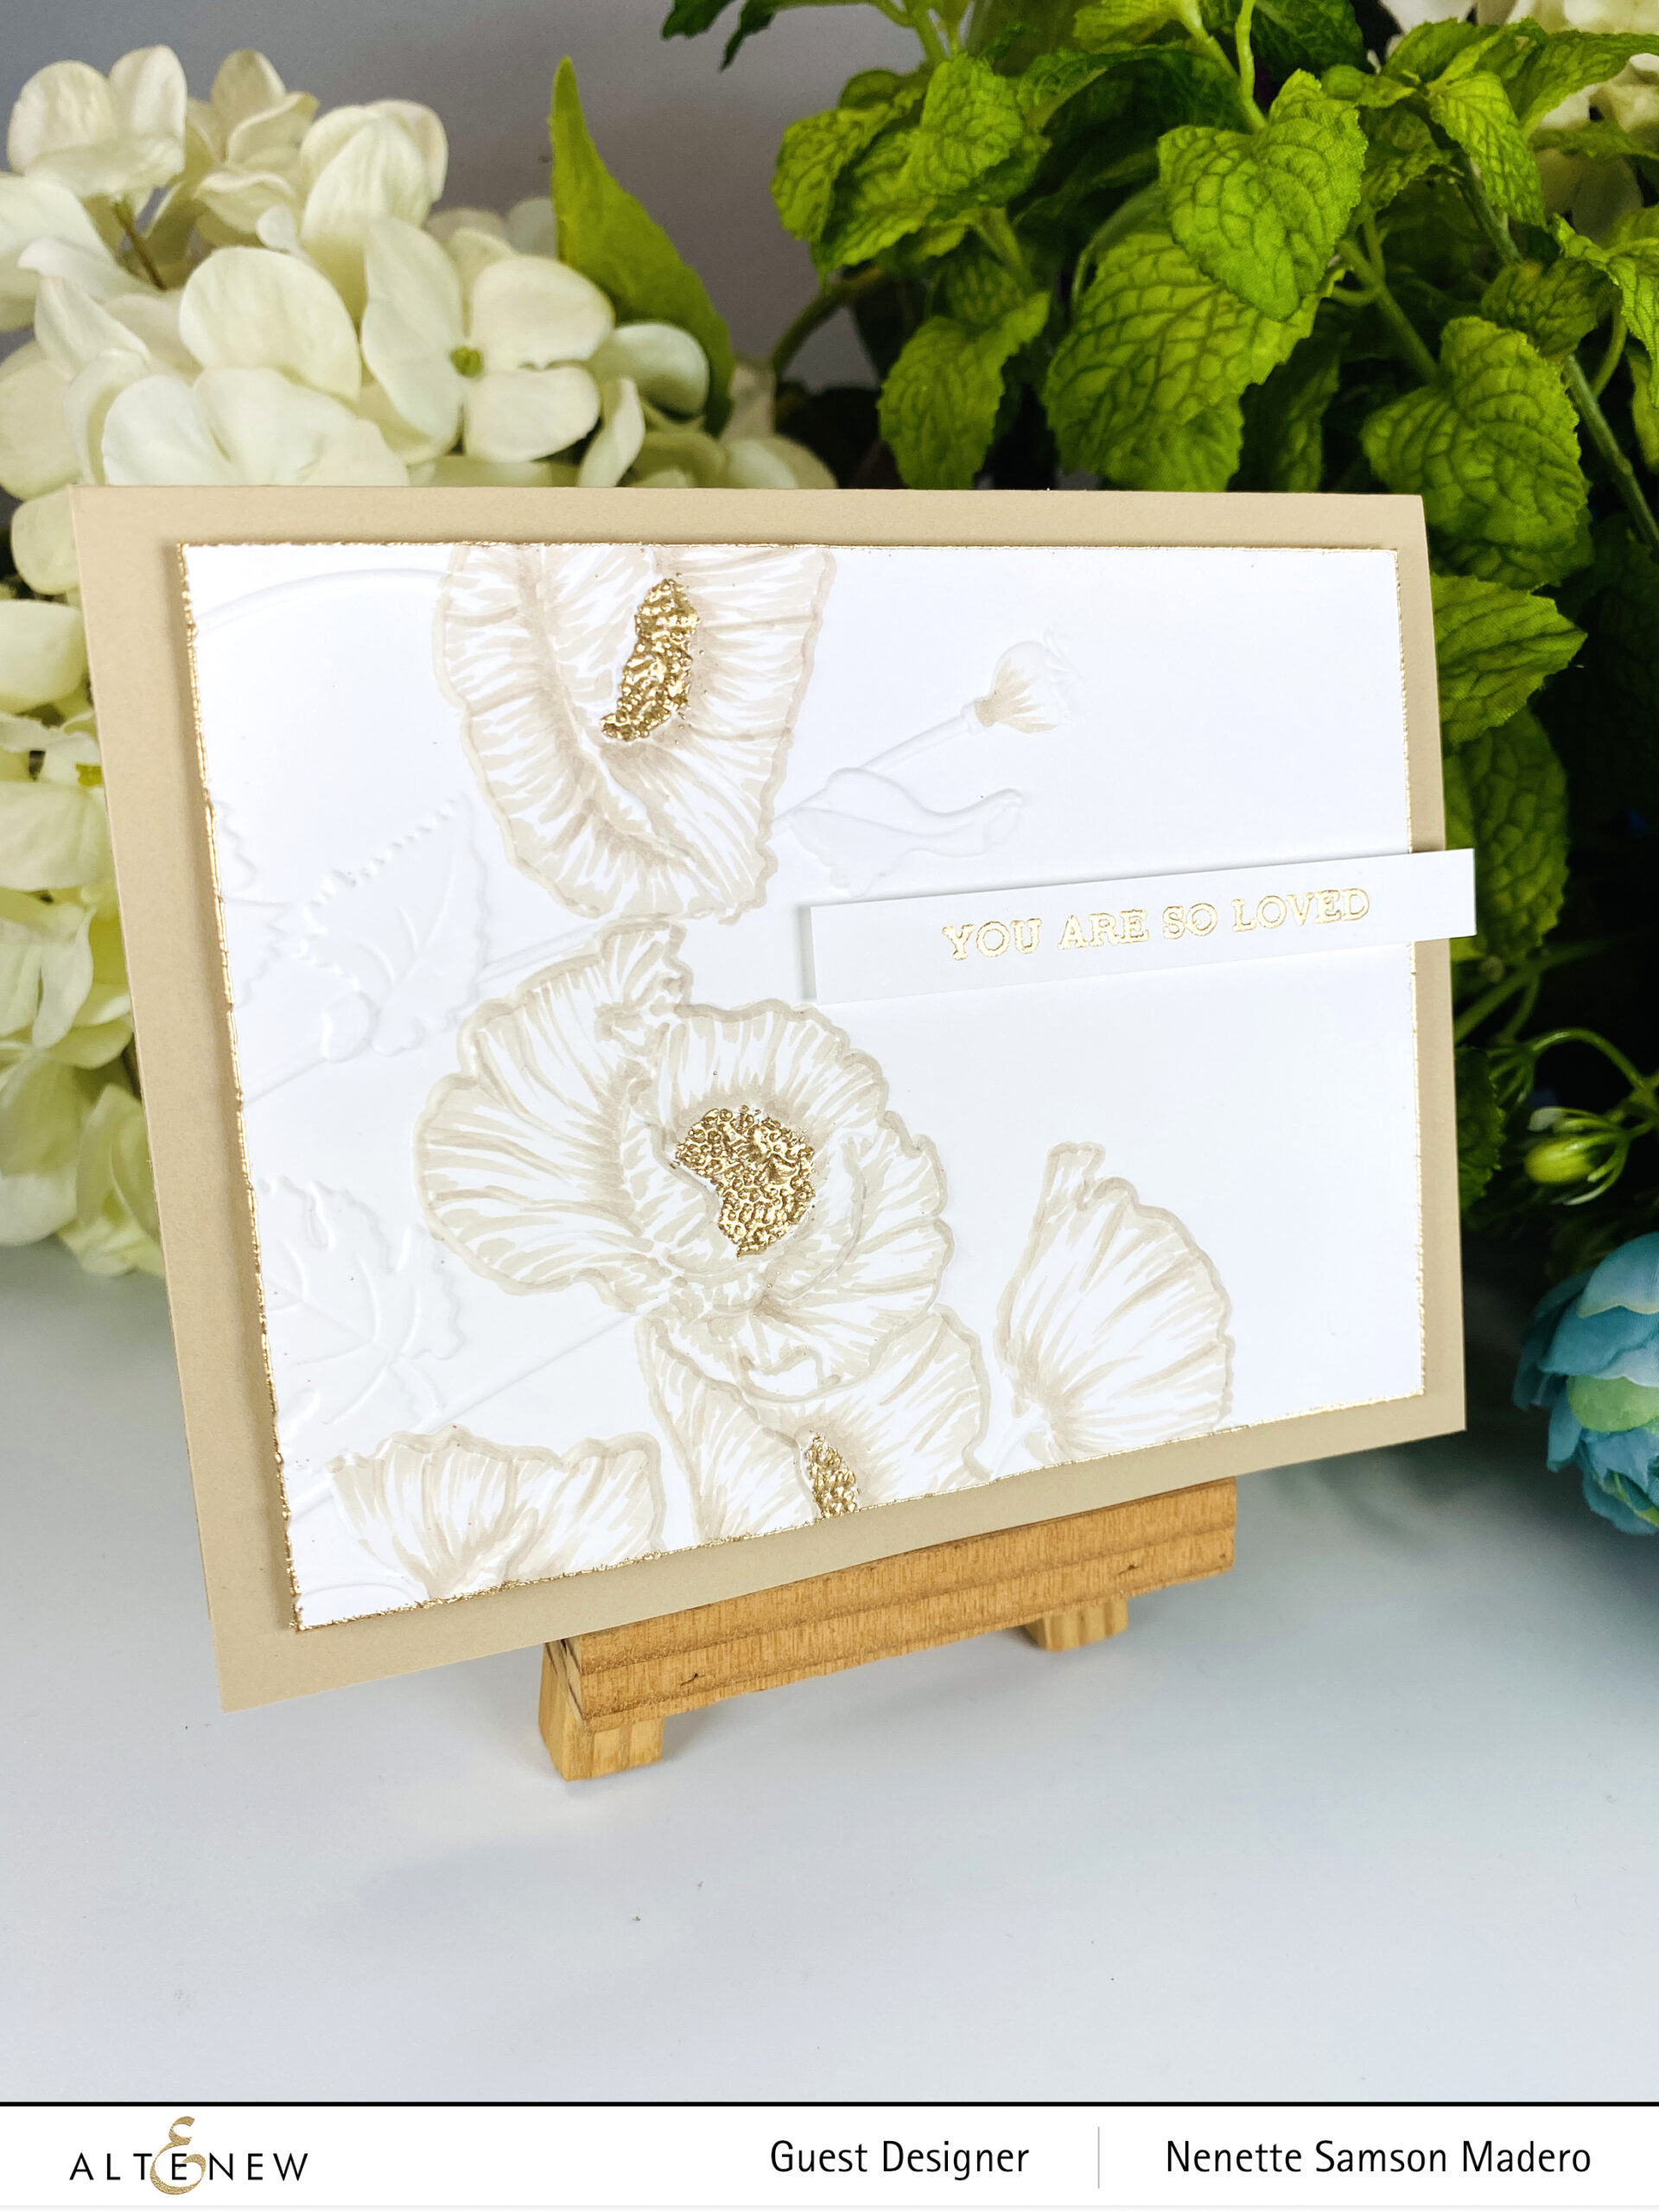
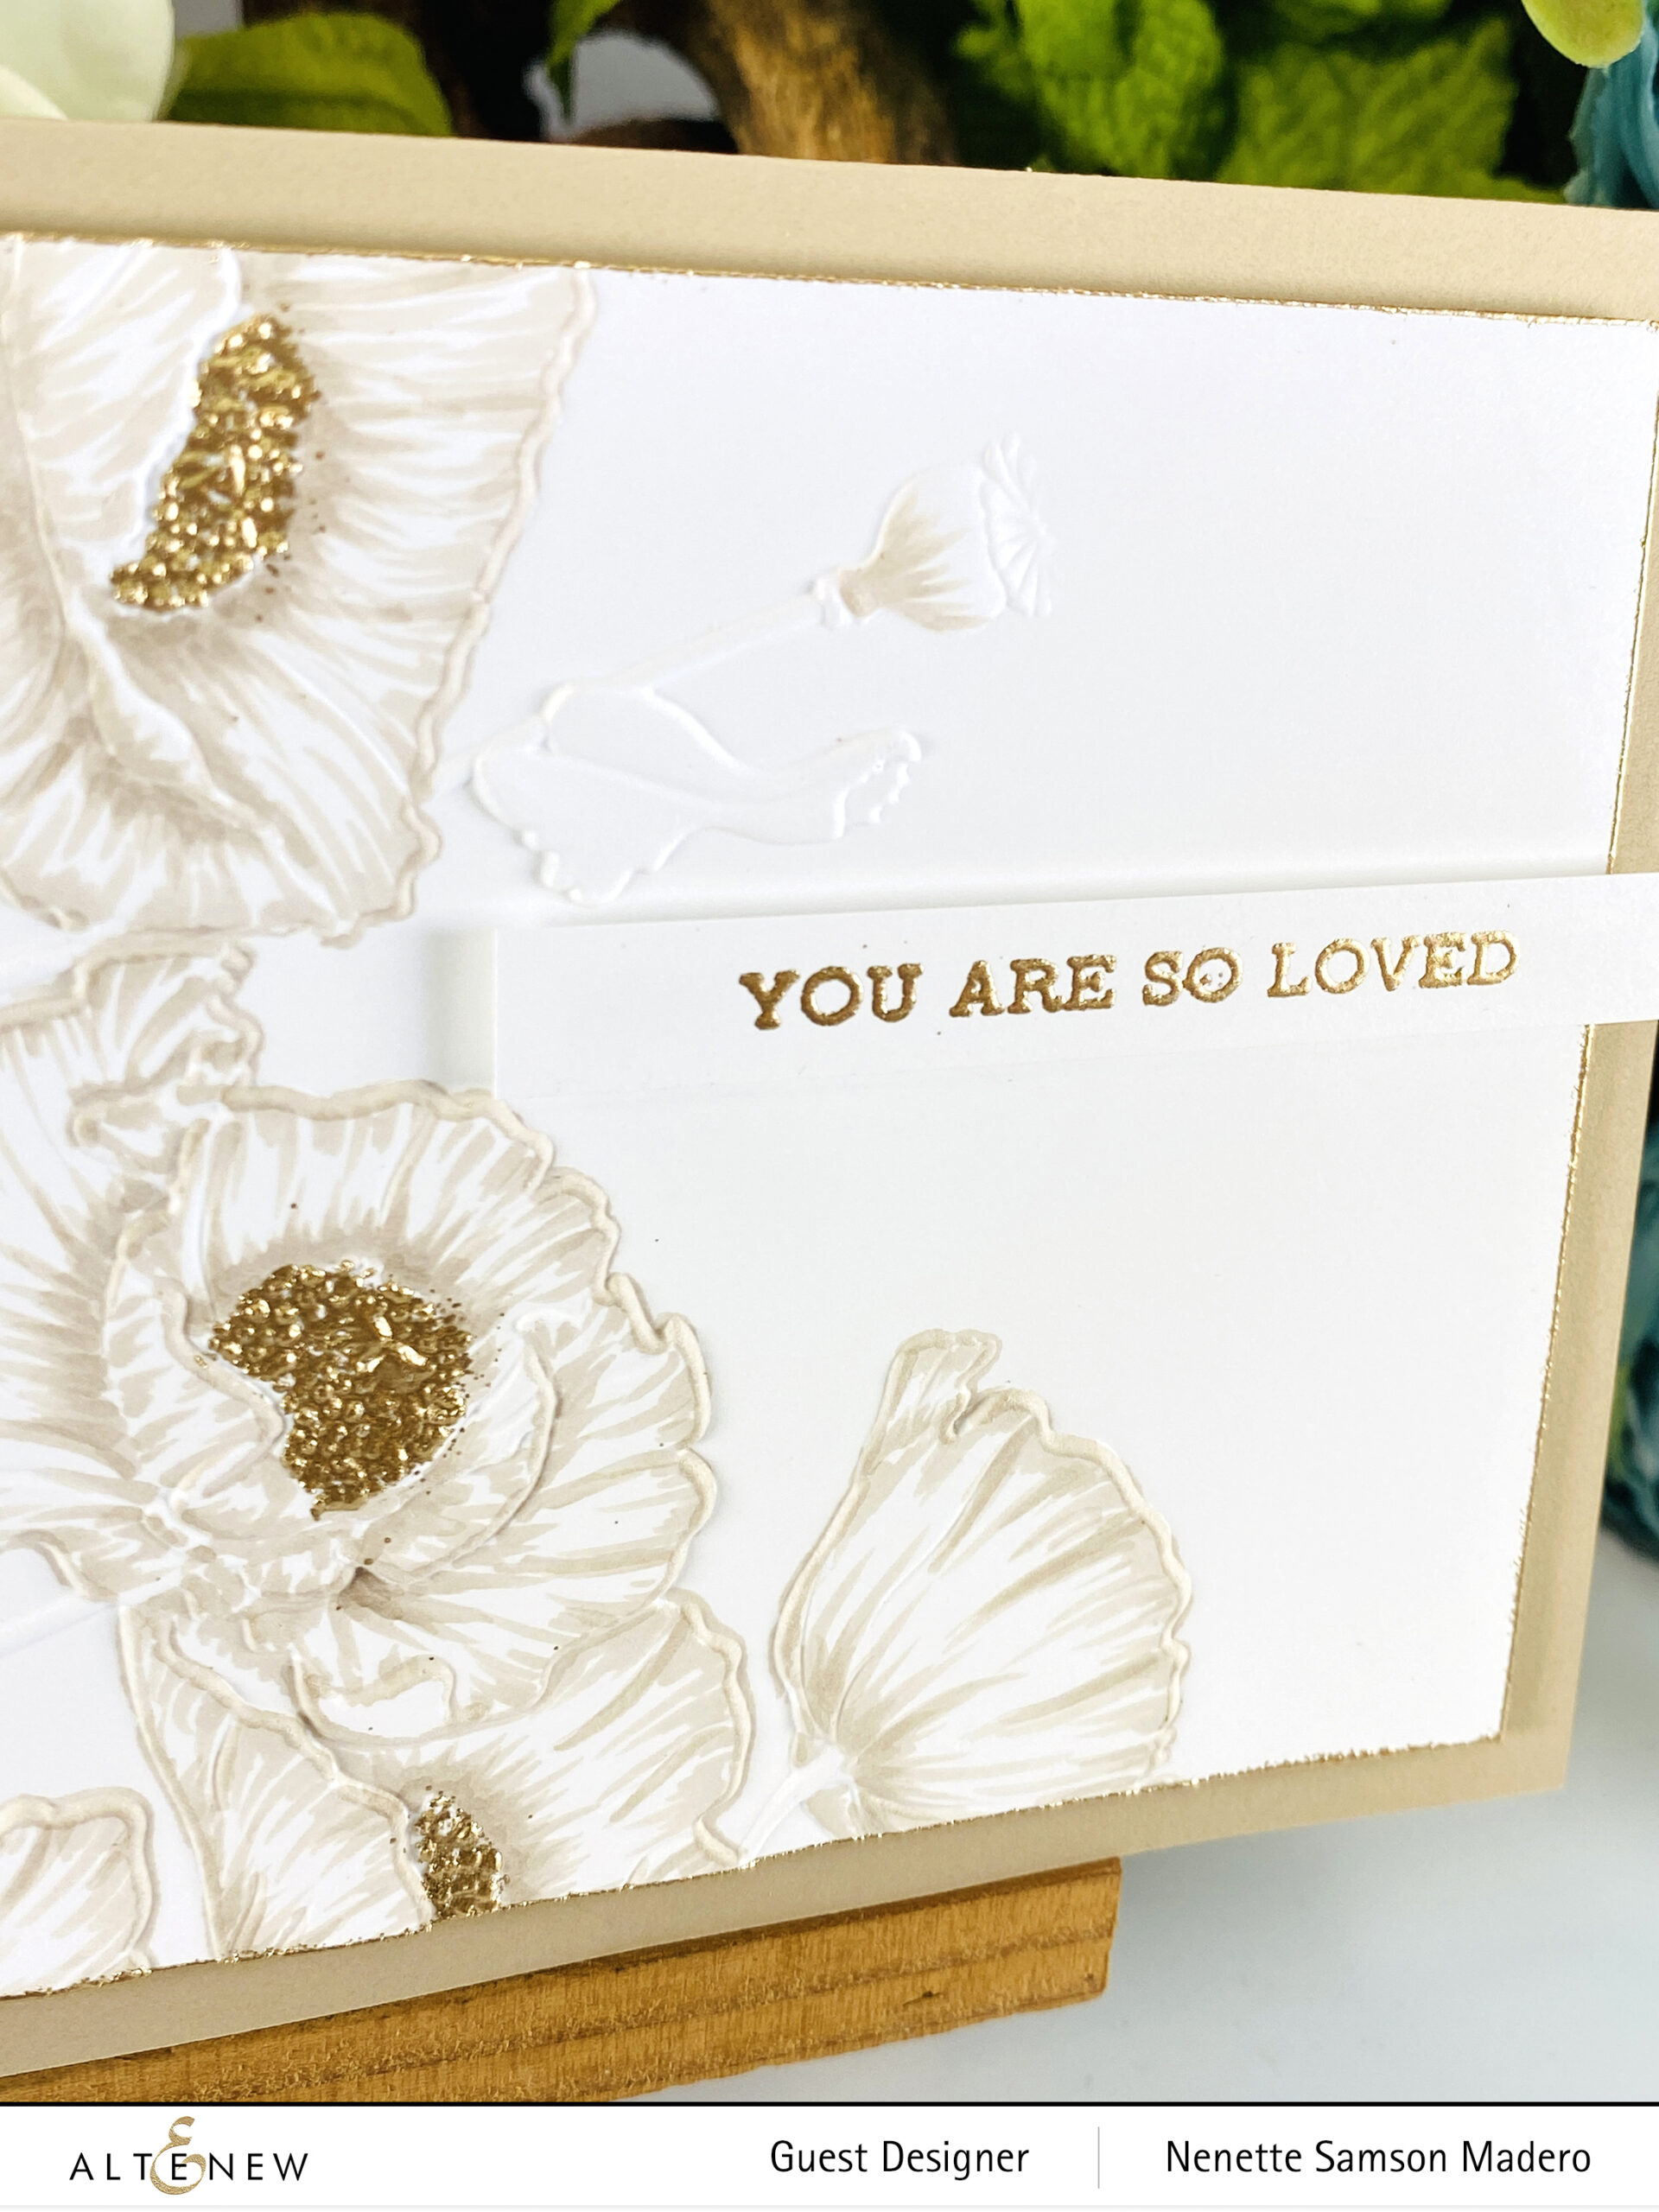
Hello, crafty friends! Welcome to my blog! Thanks so much, Susan Busada, for sending everyone over! For the complete details of this hop, make sure to drop by the Altenew blog. The Altenew Educators were asked to create clean and simple cards for this hop. Below are some samples I made for this theme using white, beige, and black colors only. I just changed the design of the 3D embossing folder and repositioned the hot foiled circle and leaf die-cut to create the different focal points for these CAS cards.
I still struggle creating CAS cards (the constant urge to add more embellishments is real :-), but I love how quick and easy it is to mass-produce cards like these. Do any of you struggle creating CAS cards, too?
GIVEAWAYS
$130 in total prizes! Altenew is giving away a $20 gift certificate to 3 lucky winners and a $15 gift certificate to 4 winners! To win, please comment on the Altenew Card Blog and/or each designer’s blog post on the blog hop list below by 07/03/2022.
There’s MORE! Join our party! We have included an Inlinkz at the Altenew blog for you to enter your beautiful, Altenew “Clean and Simple” creations.
We will pick one of our favorite handmade creations from those who joined the linky party, and they will receive a $10 Altenew gift certificate!
Altenew will draw five random winners from the comments left on each blog hop stop and announce the winners on the Altenew Winners Page on 07/04/2022.
Next up: Irina Fonina. Make sure to leave a comment below to get a chance to win a prize from Altenew! If you like what you see, I would greatly appreciate it if you could follow me on Instagram and YouTube. Links are posted below. Thanks so much for dropping by, and happy crafting!
Hello, everyone! Welcome to my blog. Thanks, Emily Midgett, for sending everyone over. For the complete details of this hop, make sure to drop by the Altenew Card Blog. You can find the new collection here.
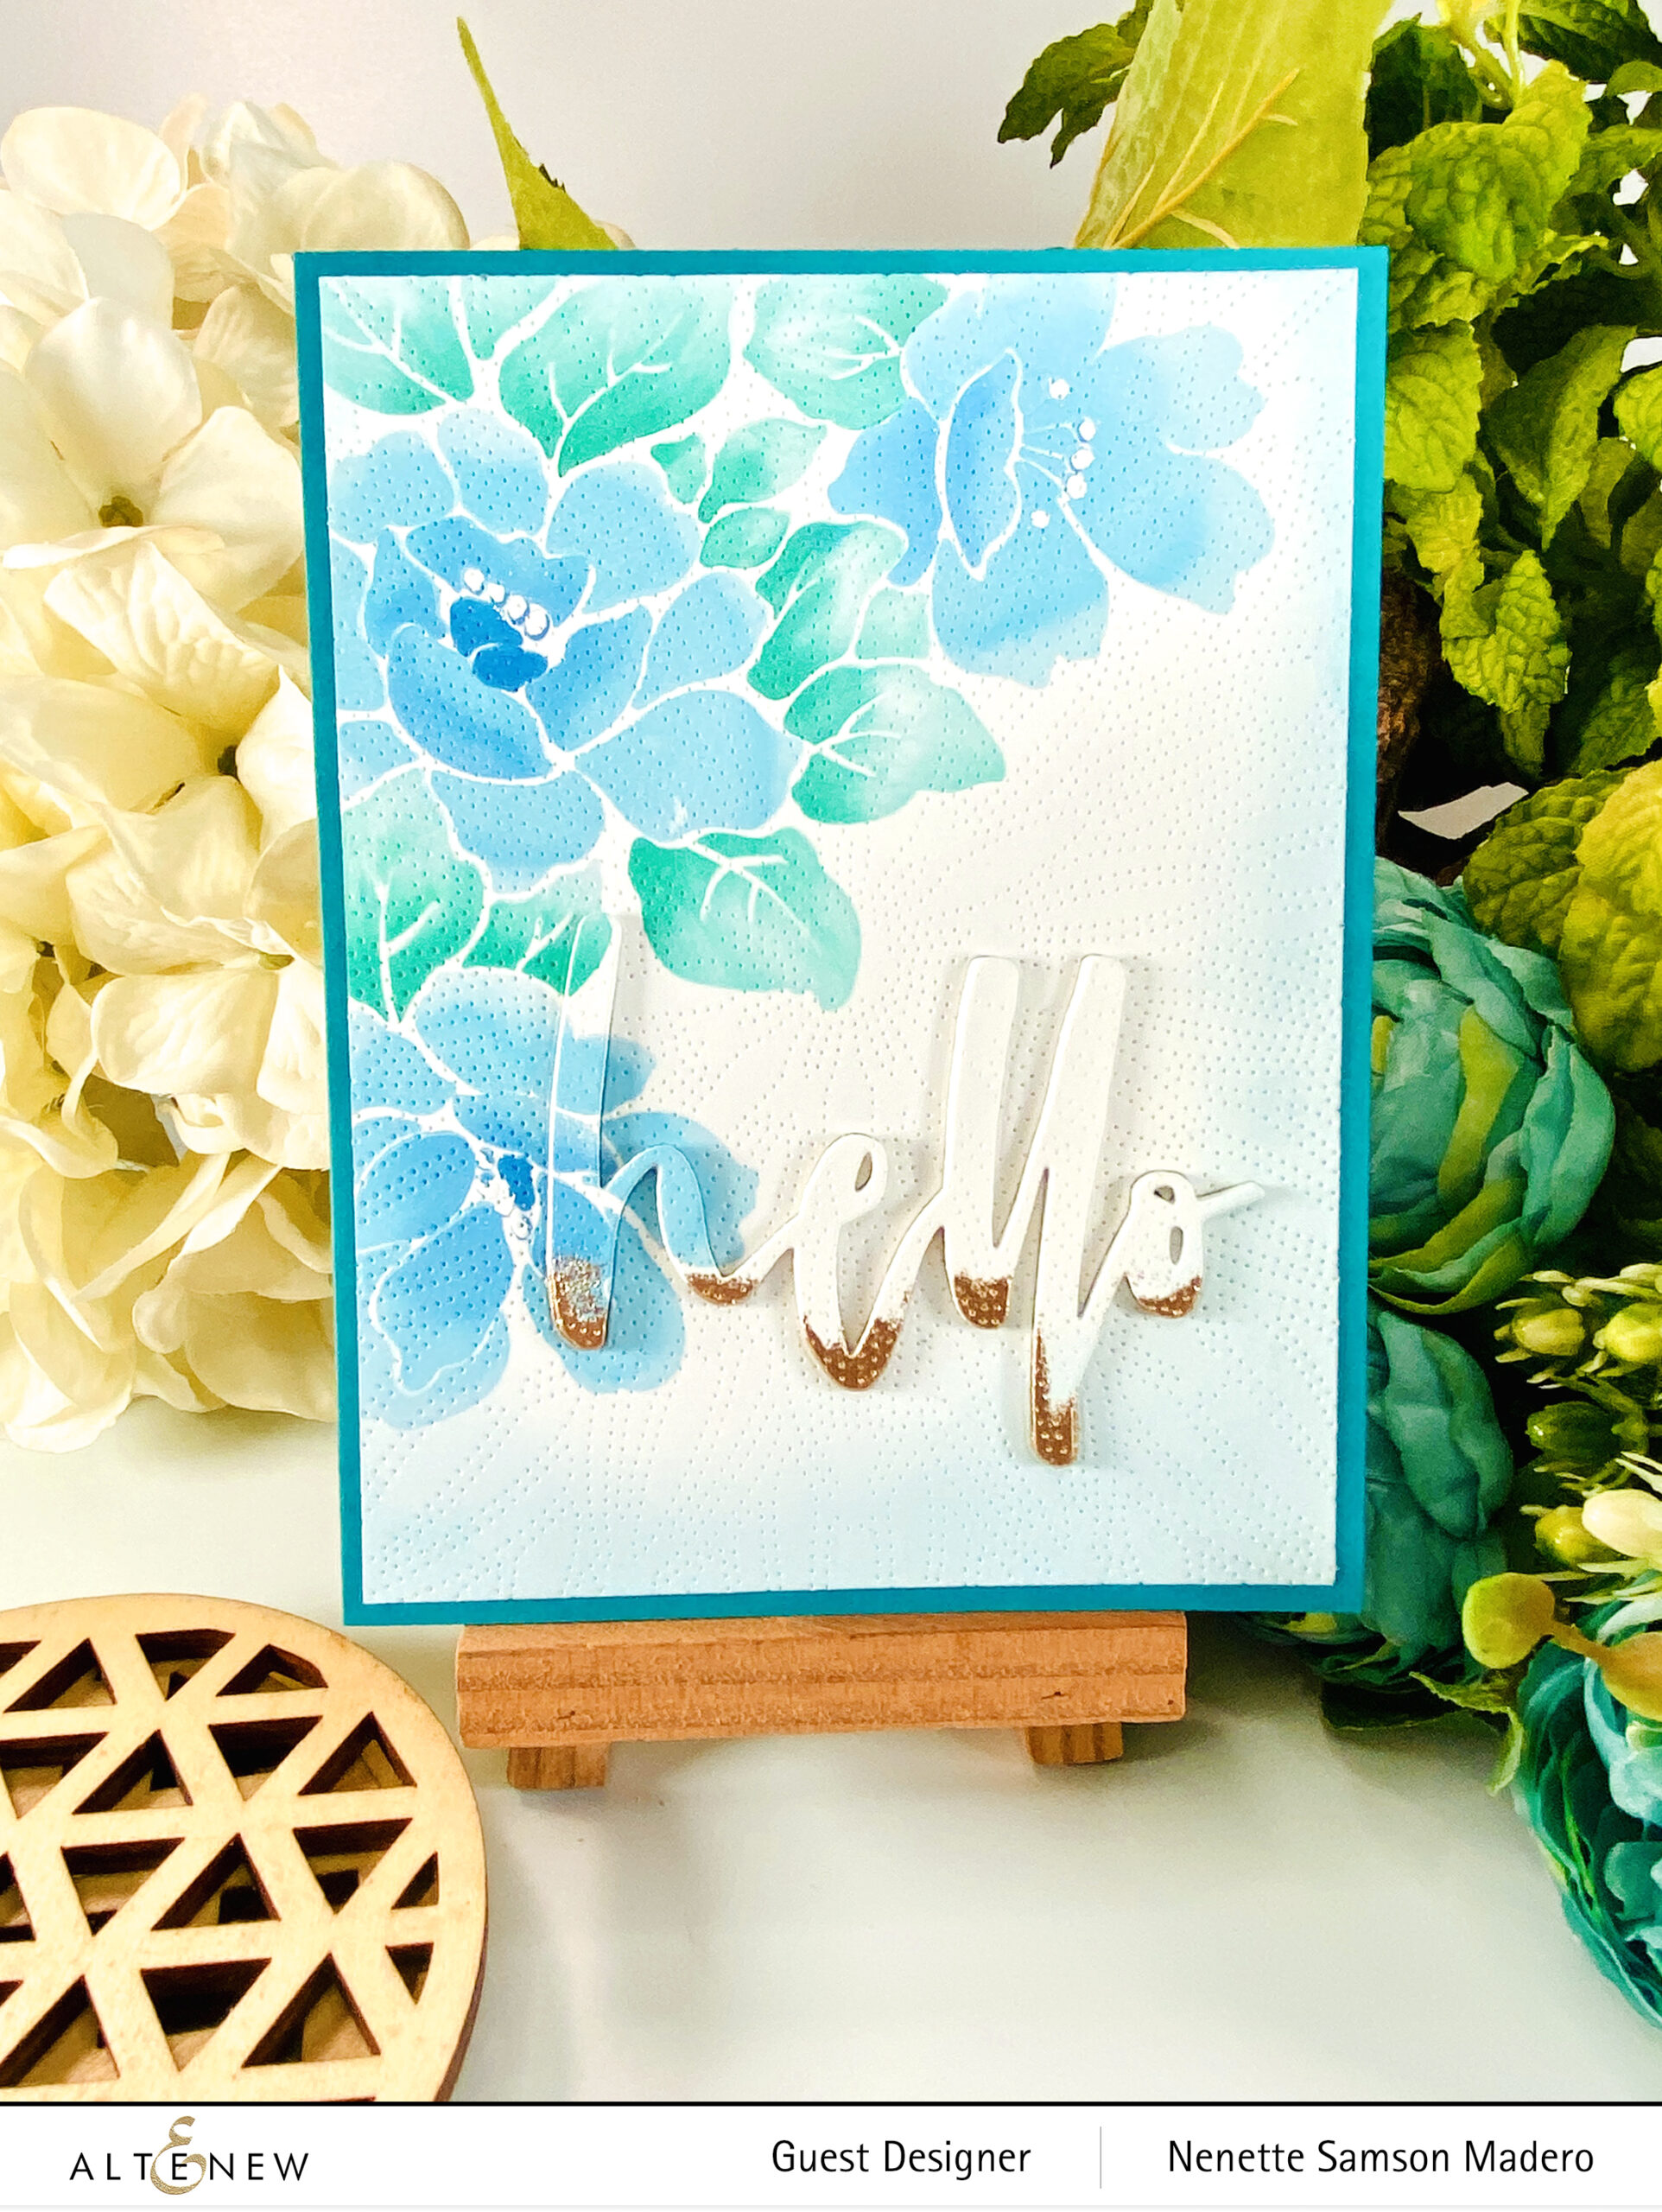
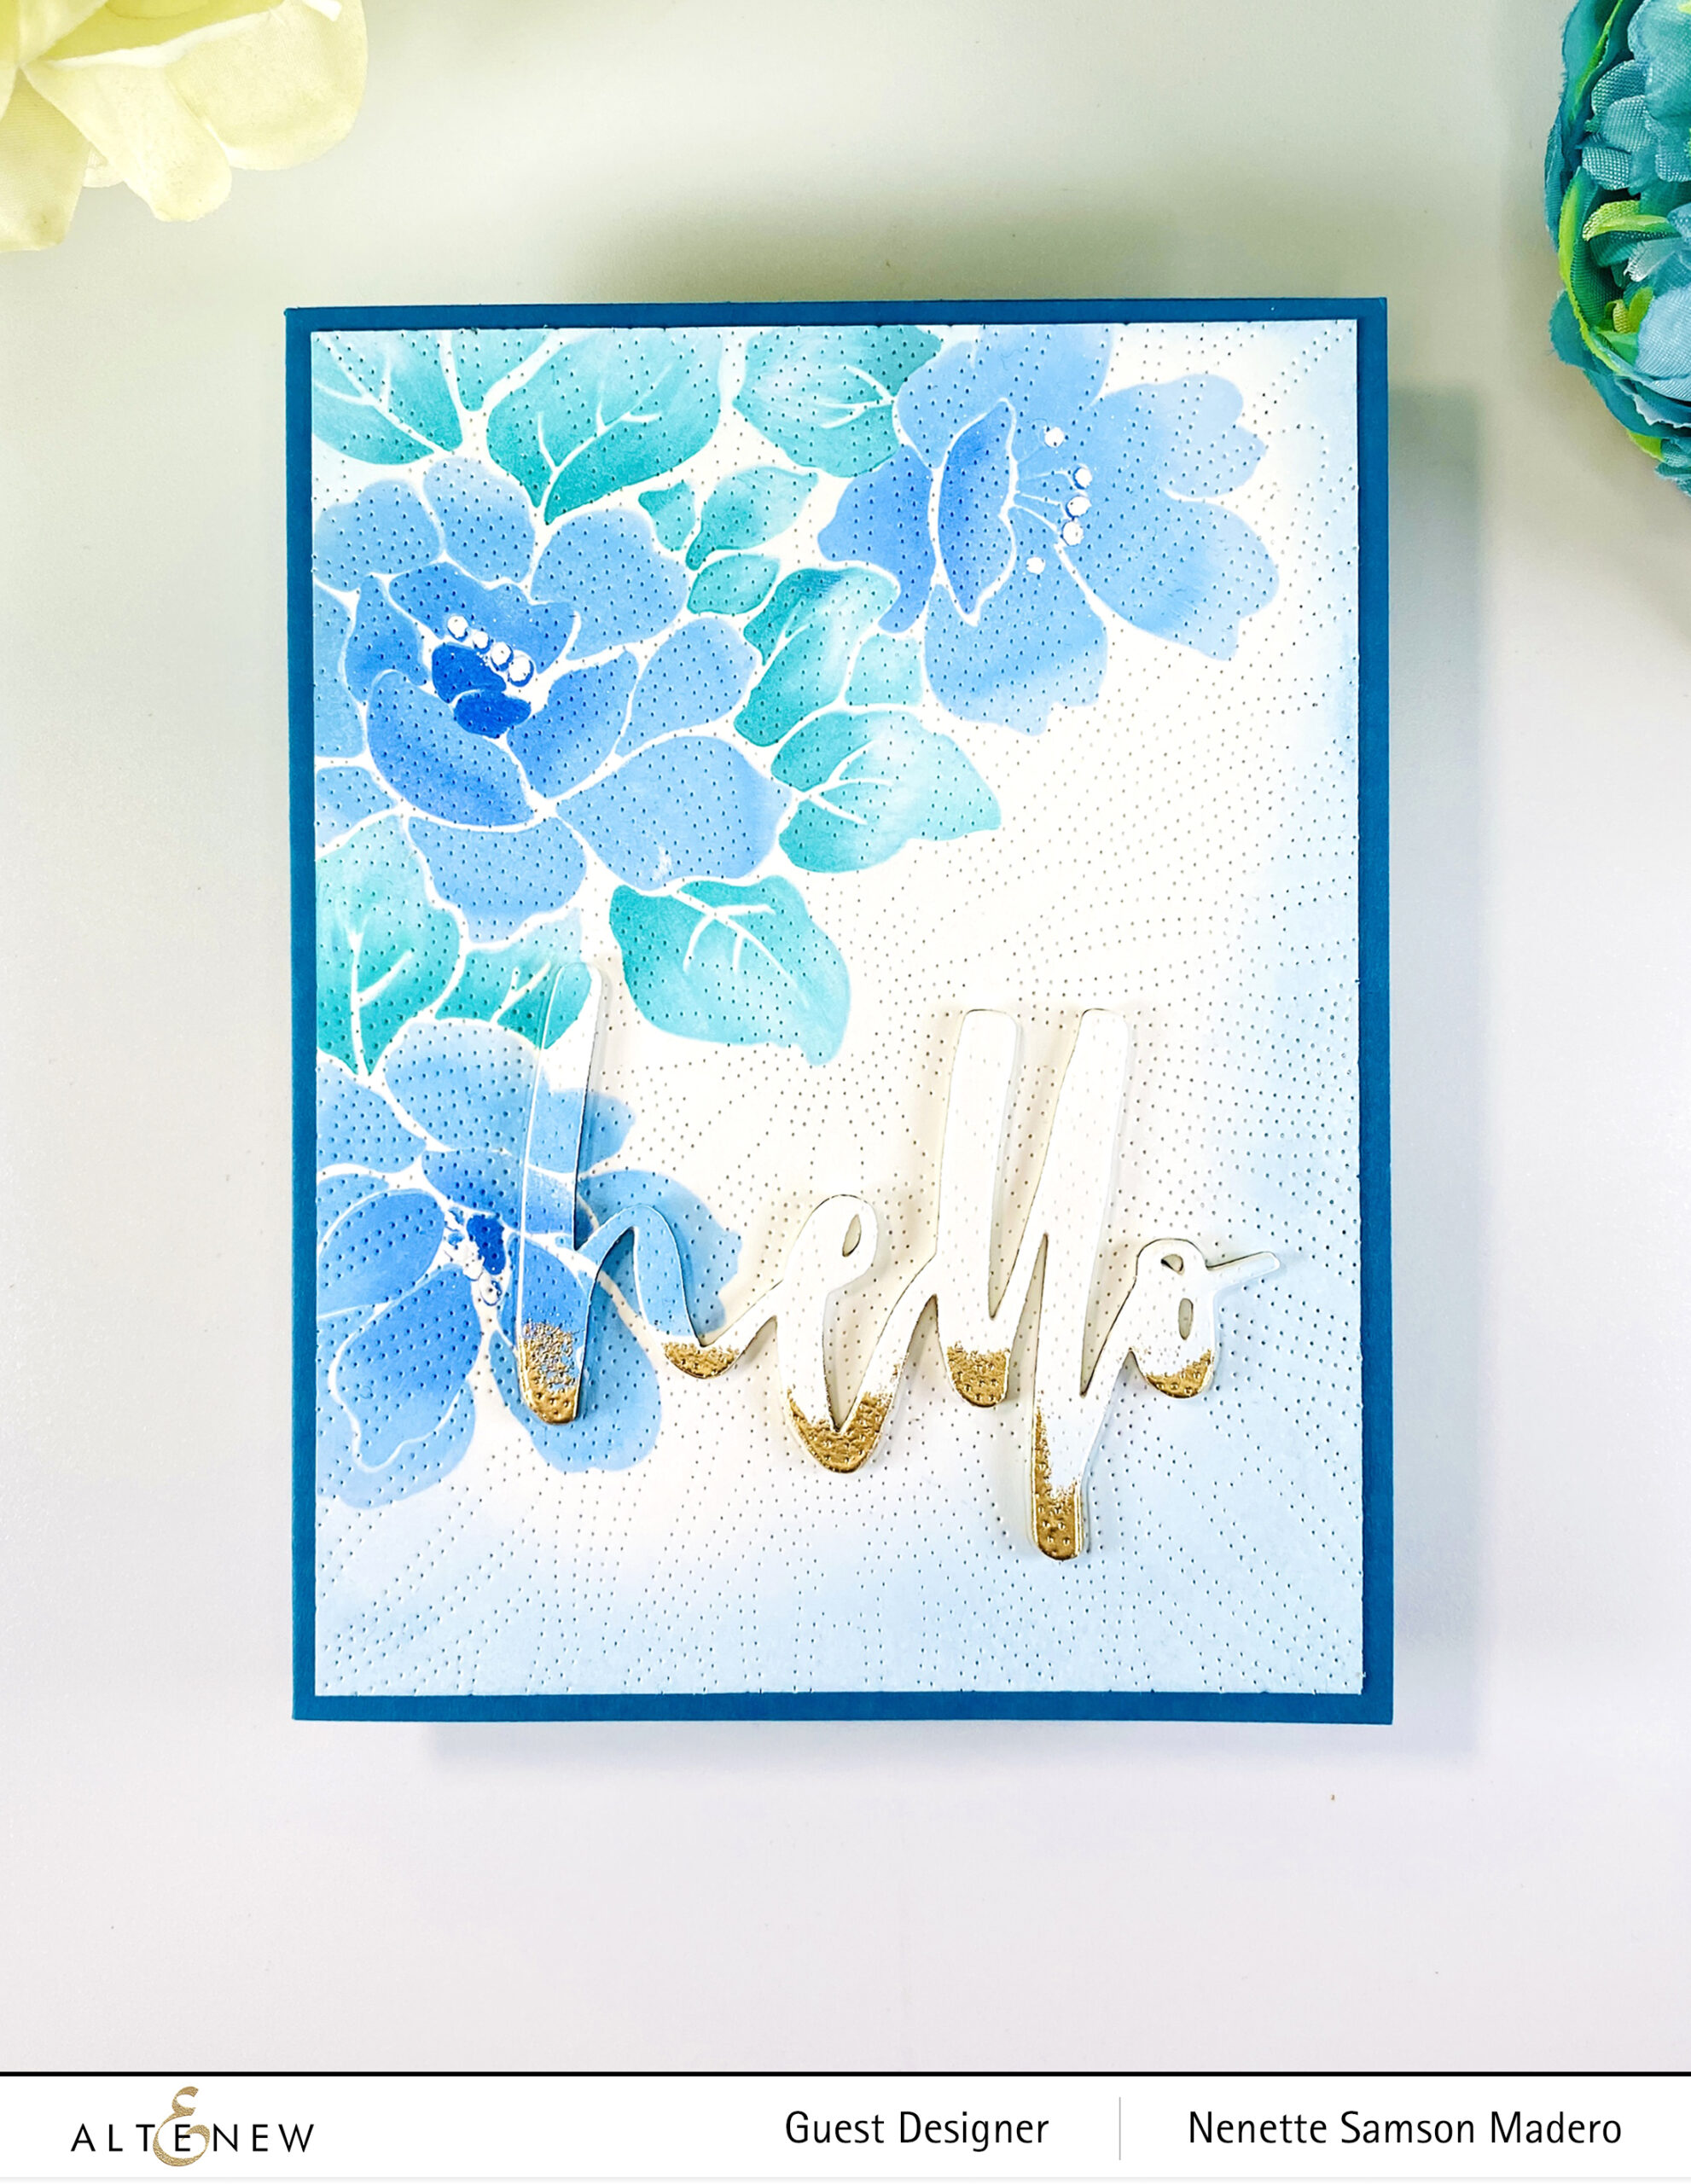
This is an excellent mix of dies, hot foil plates, coordinating stencils, and embossing folders. The following are eight cards I made using some of the latest releases.
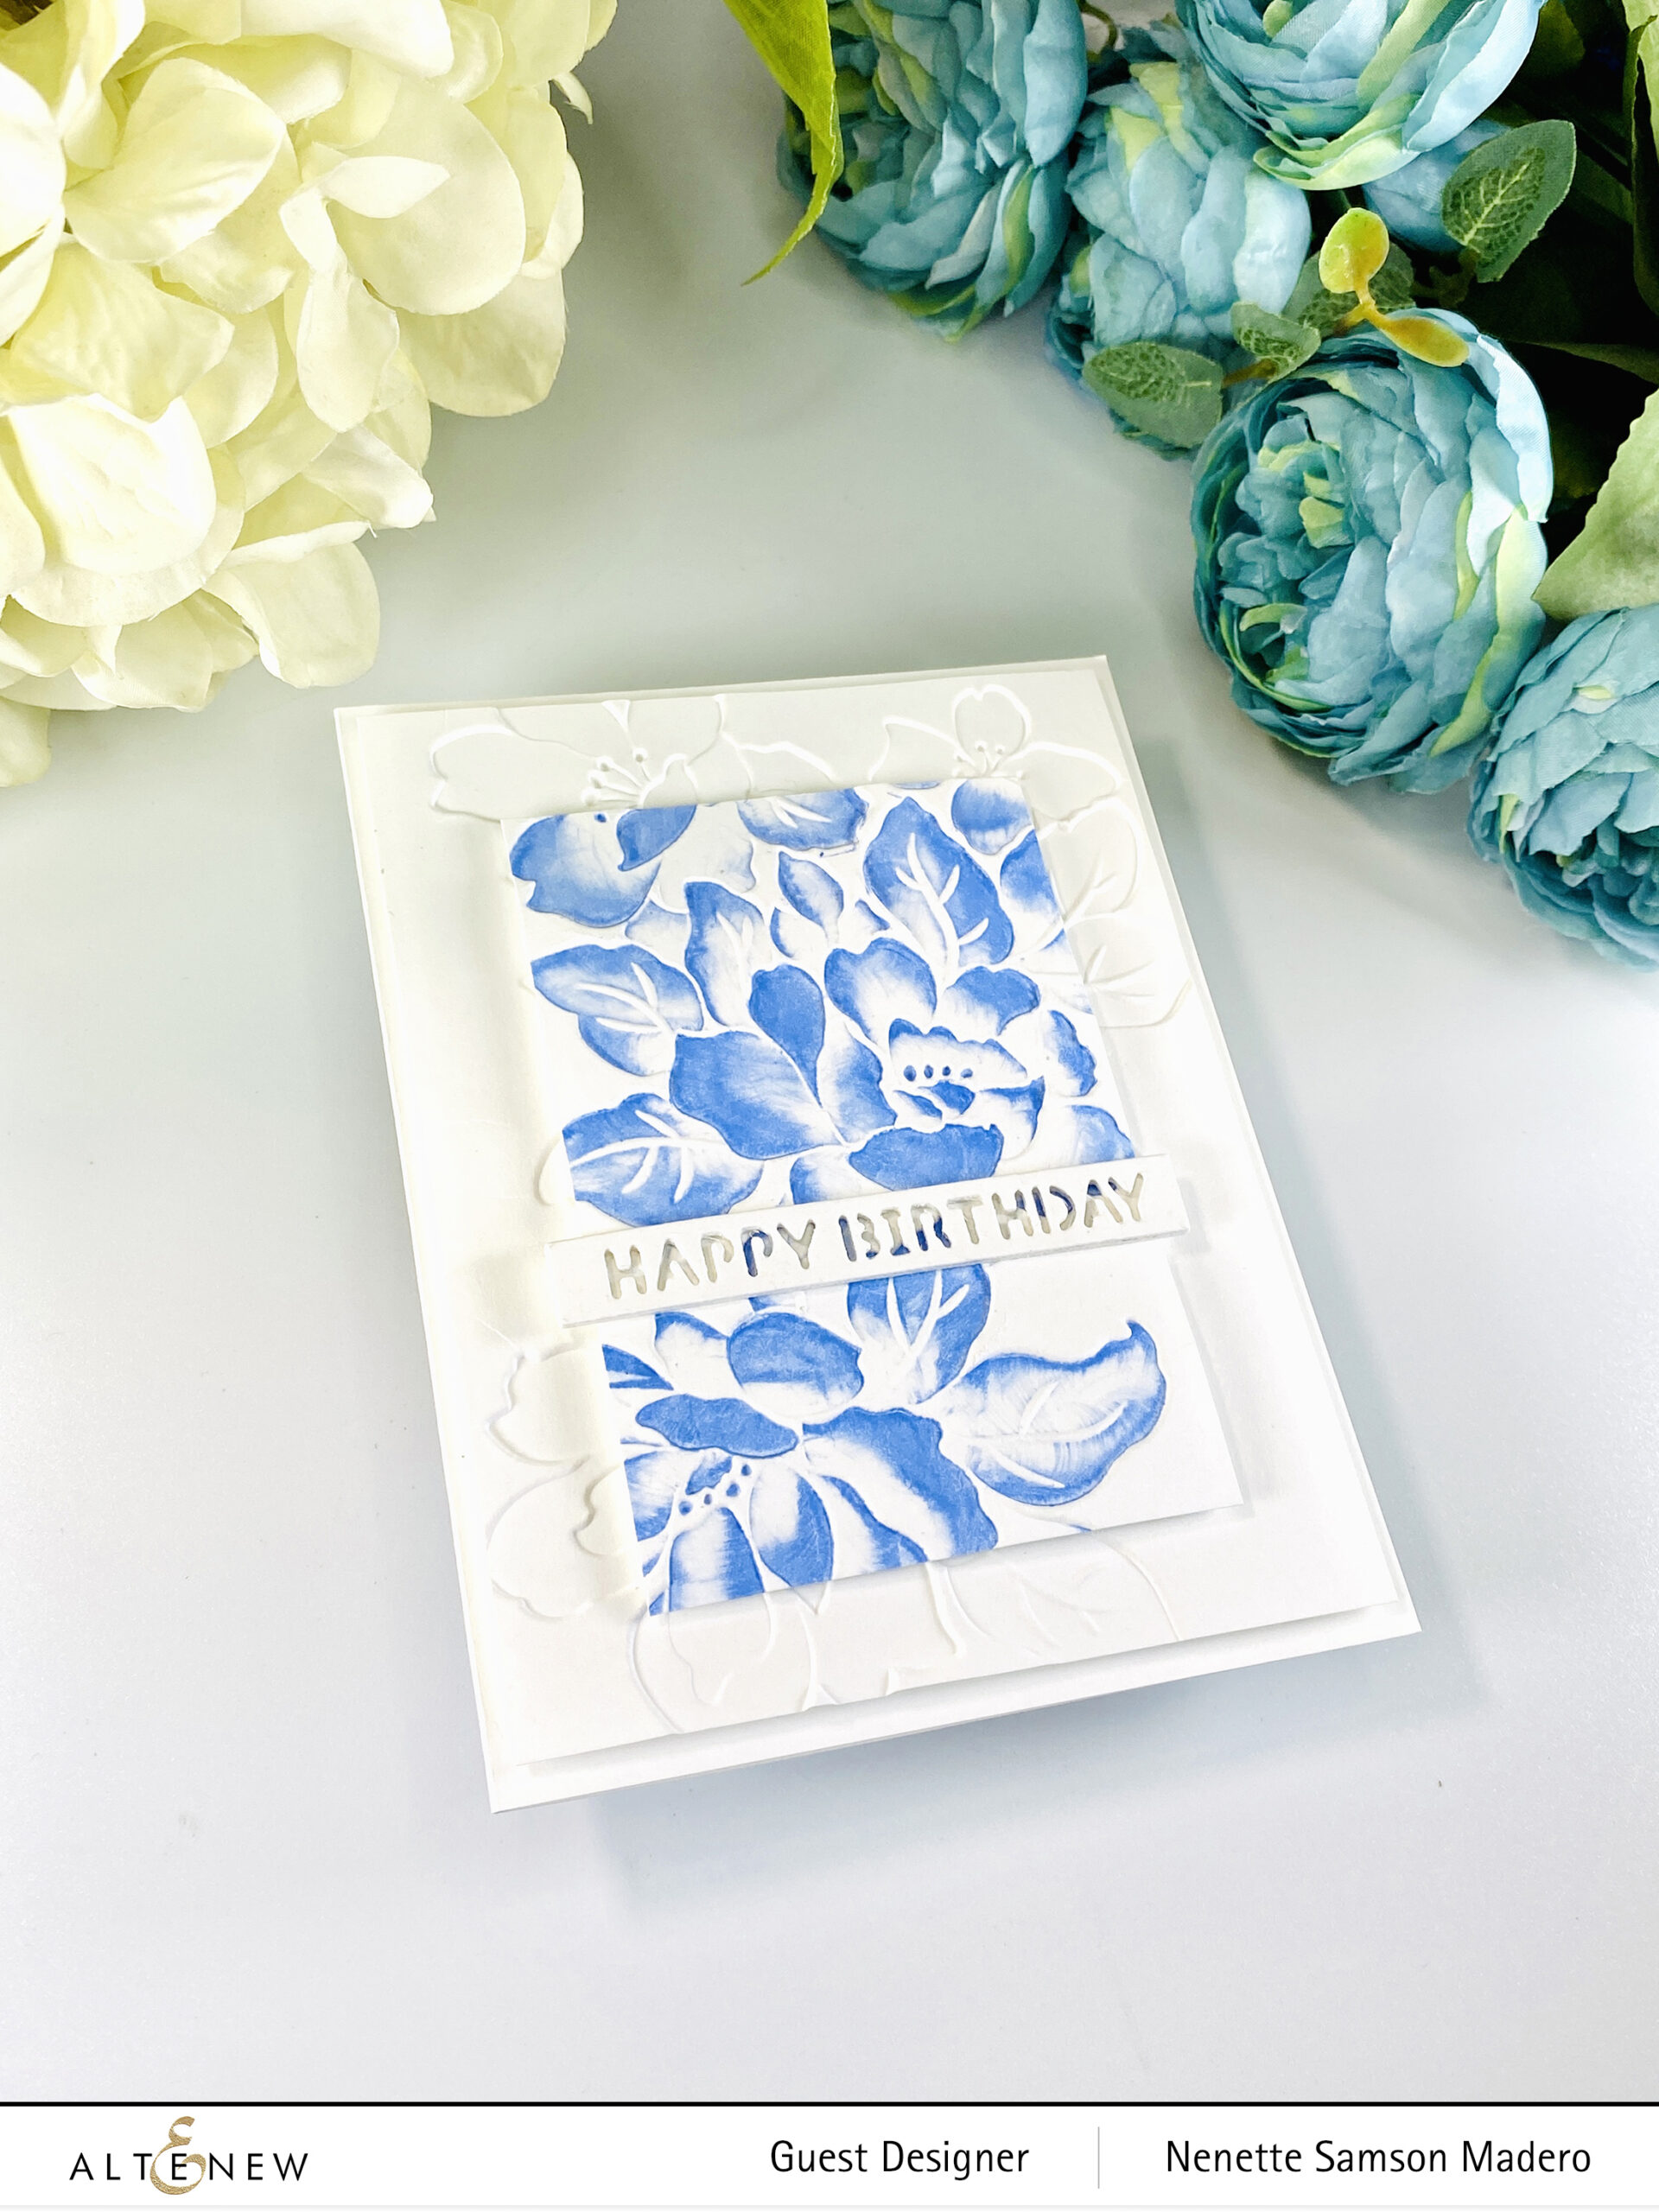
SENDING BIRTHDAY HUGS
STEPS:
Hot foil the Delightful Flowers image with Polished Brass on light blue cardstock. Fussy cut.
Assemble the card using foam squares and adhesive.
It’s pretty tricky to photograph the shimmer of the hot foil, so here’s a closer look. Knowing that I can use a regular thin die to hot foil the image has made me so excited!!! I wanted to keep this card simple to allow the shiny elements to take the spotlight.
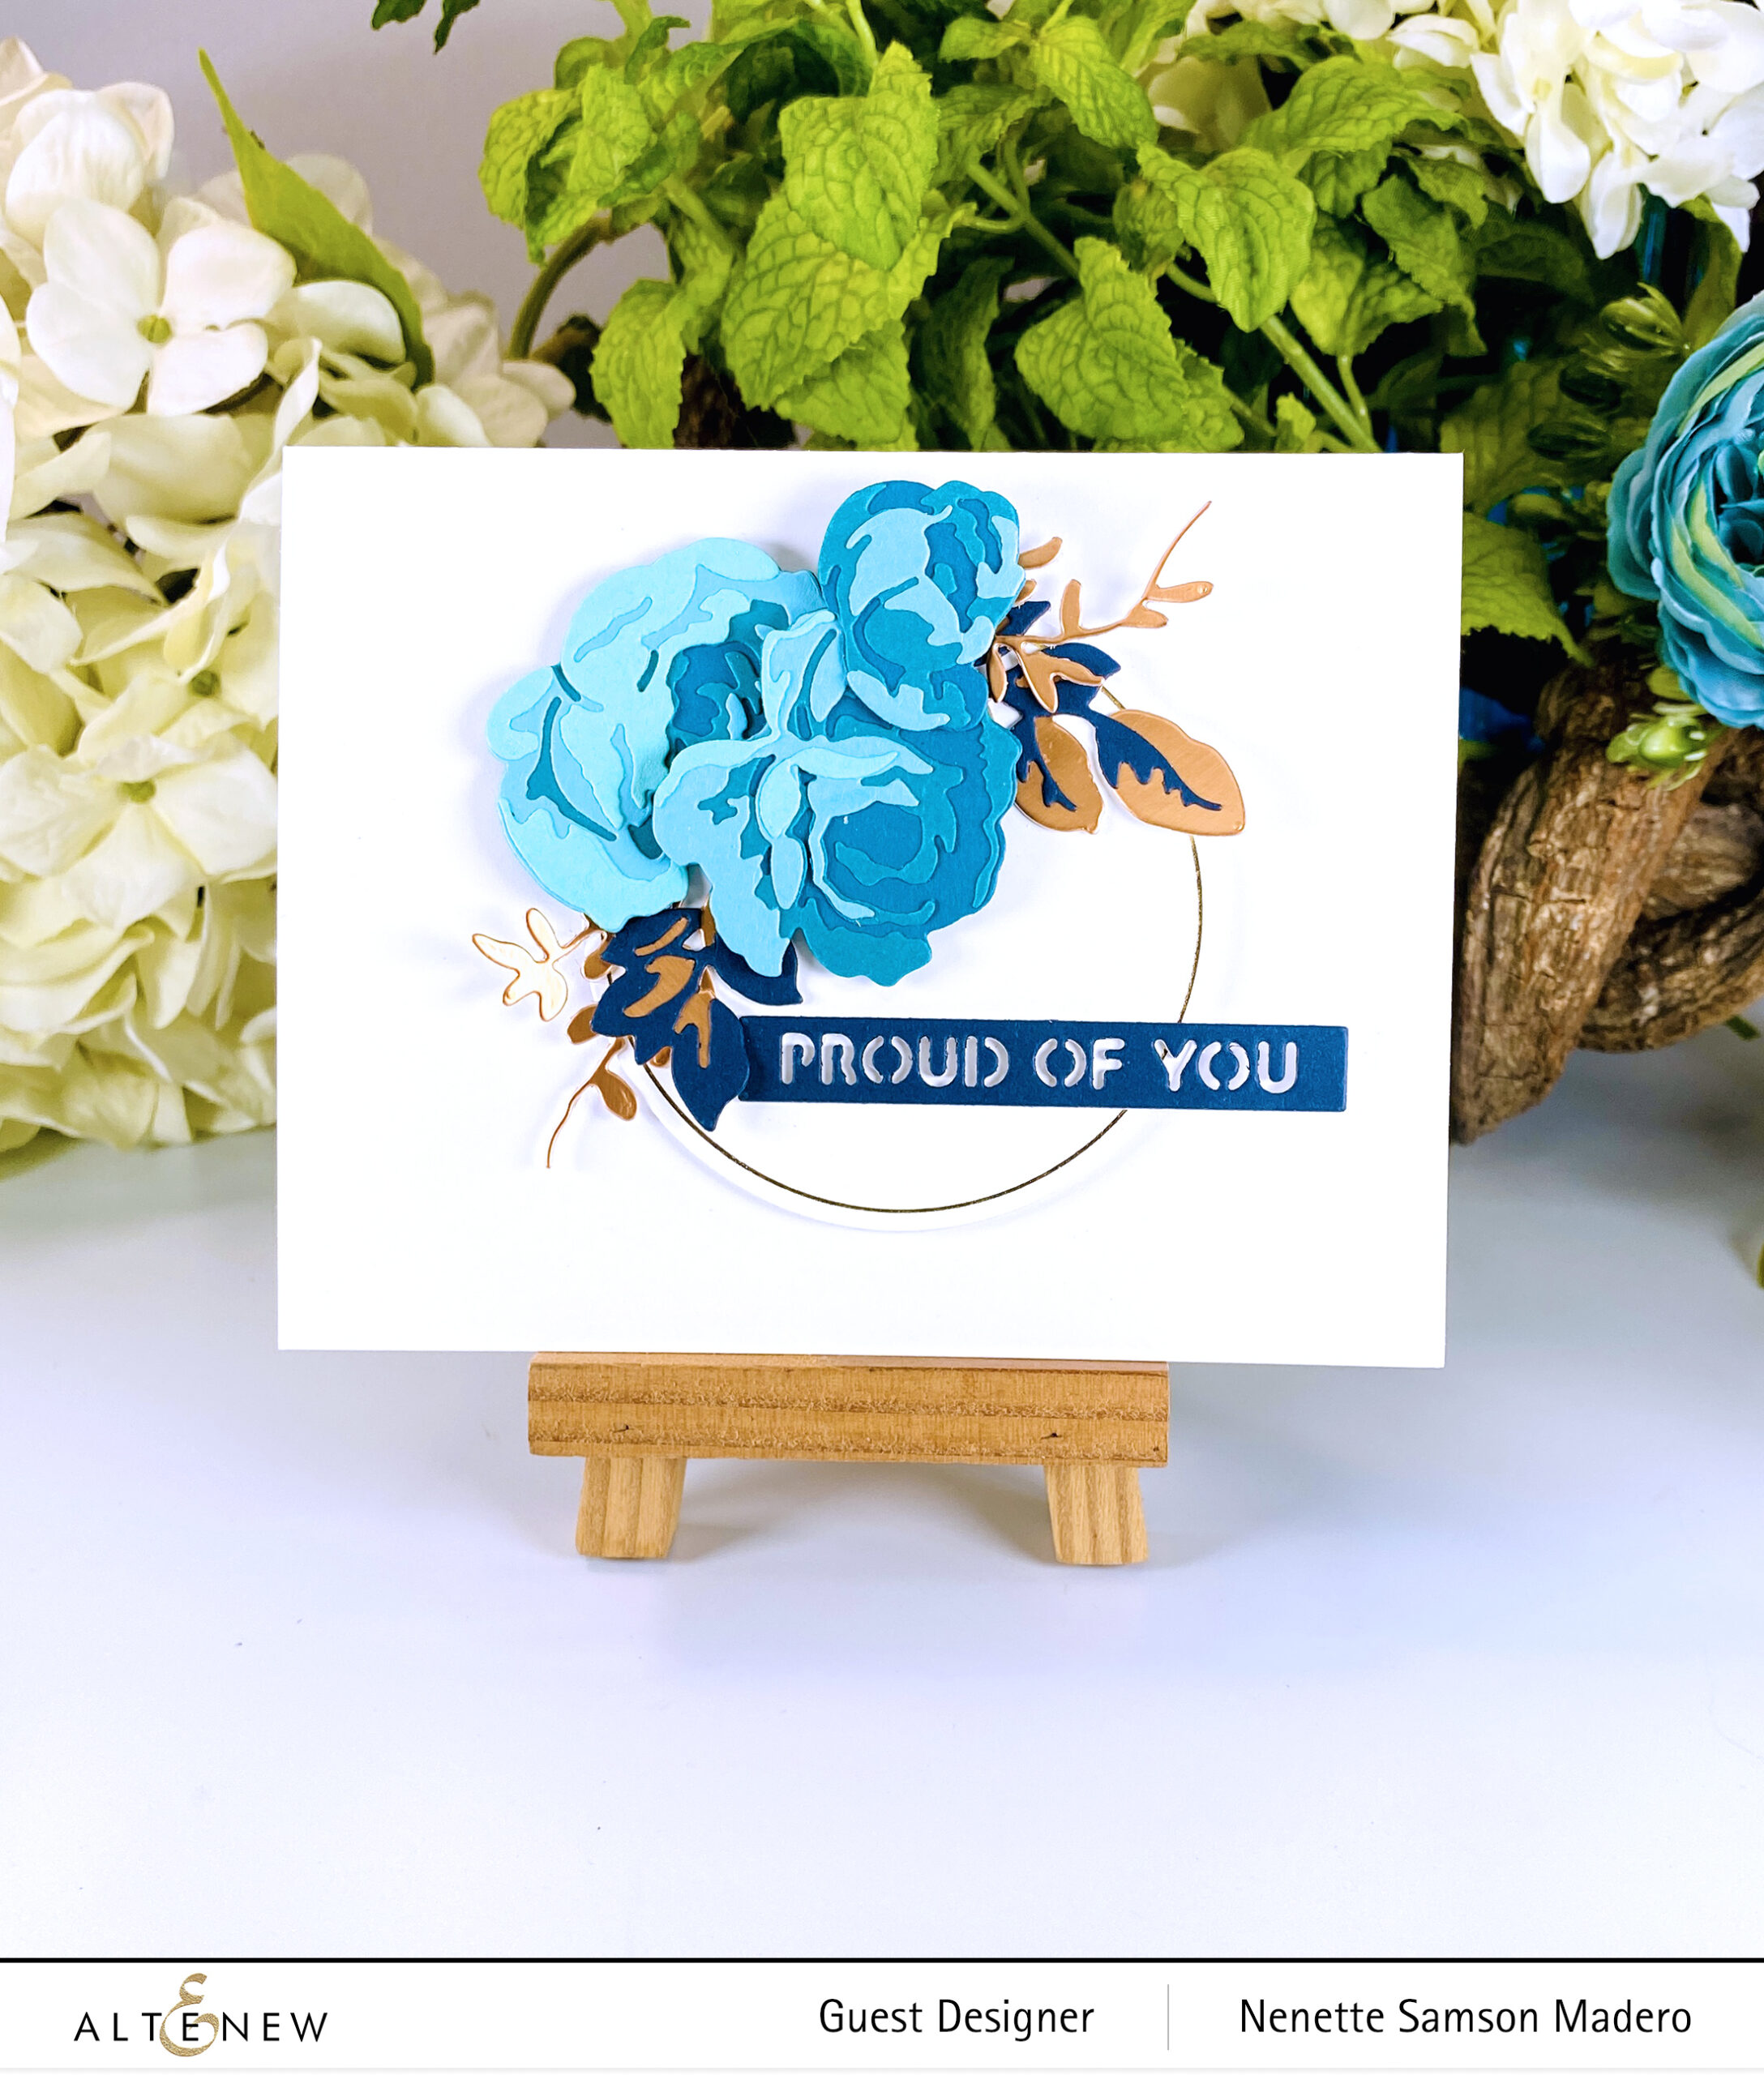
I love that all the elements from this card were from dies. The thin gold circle gives it a classy look. I also kept the white space all over to emphasize the floral arrangement.
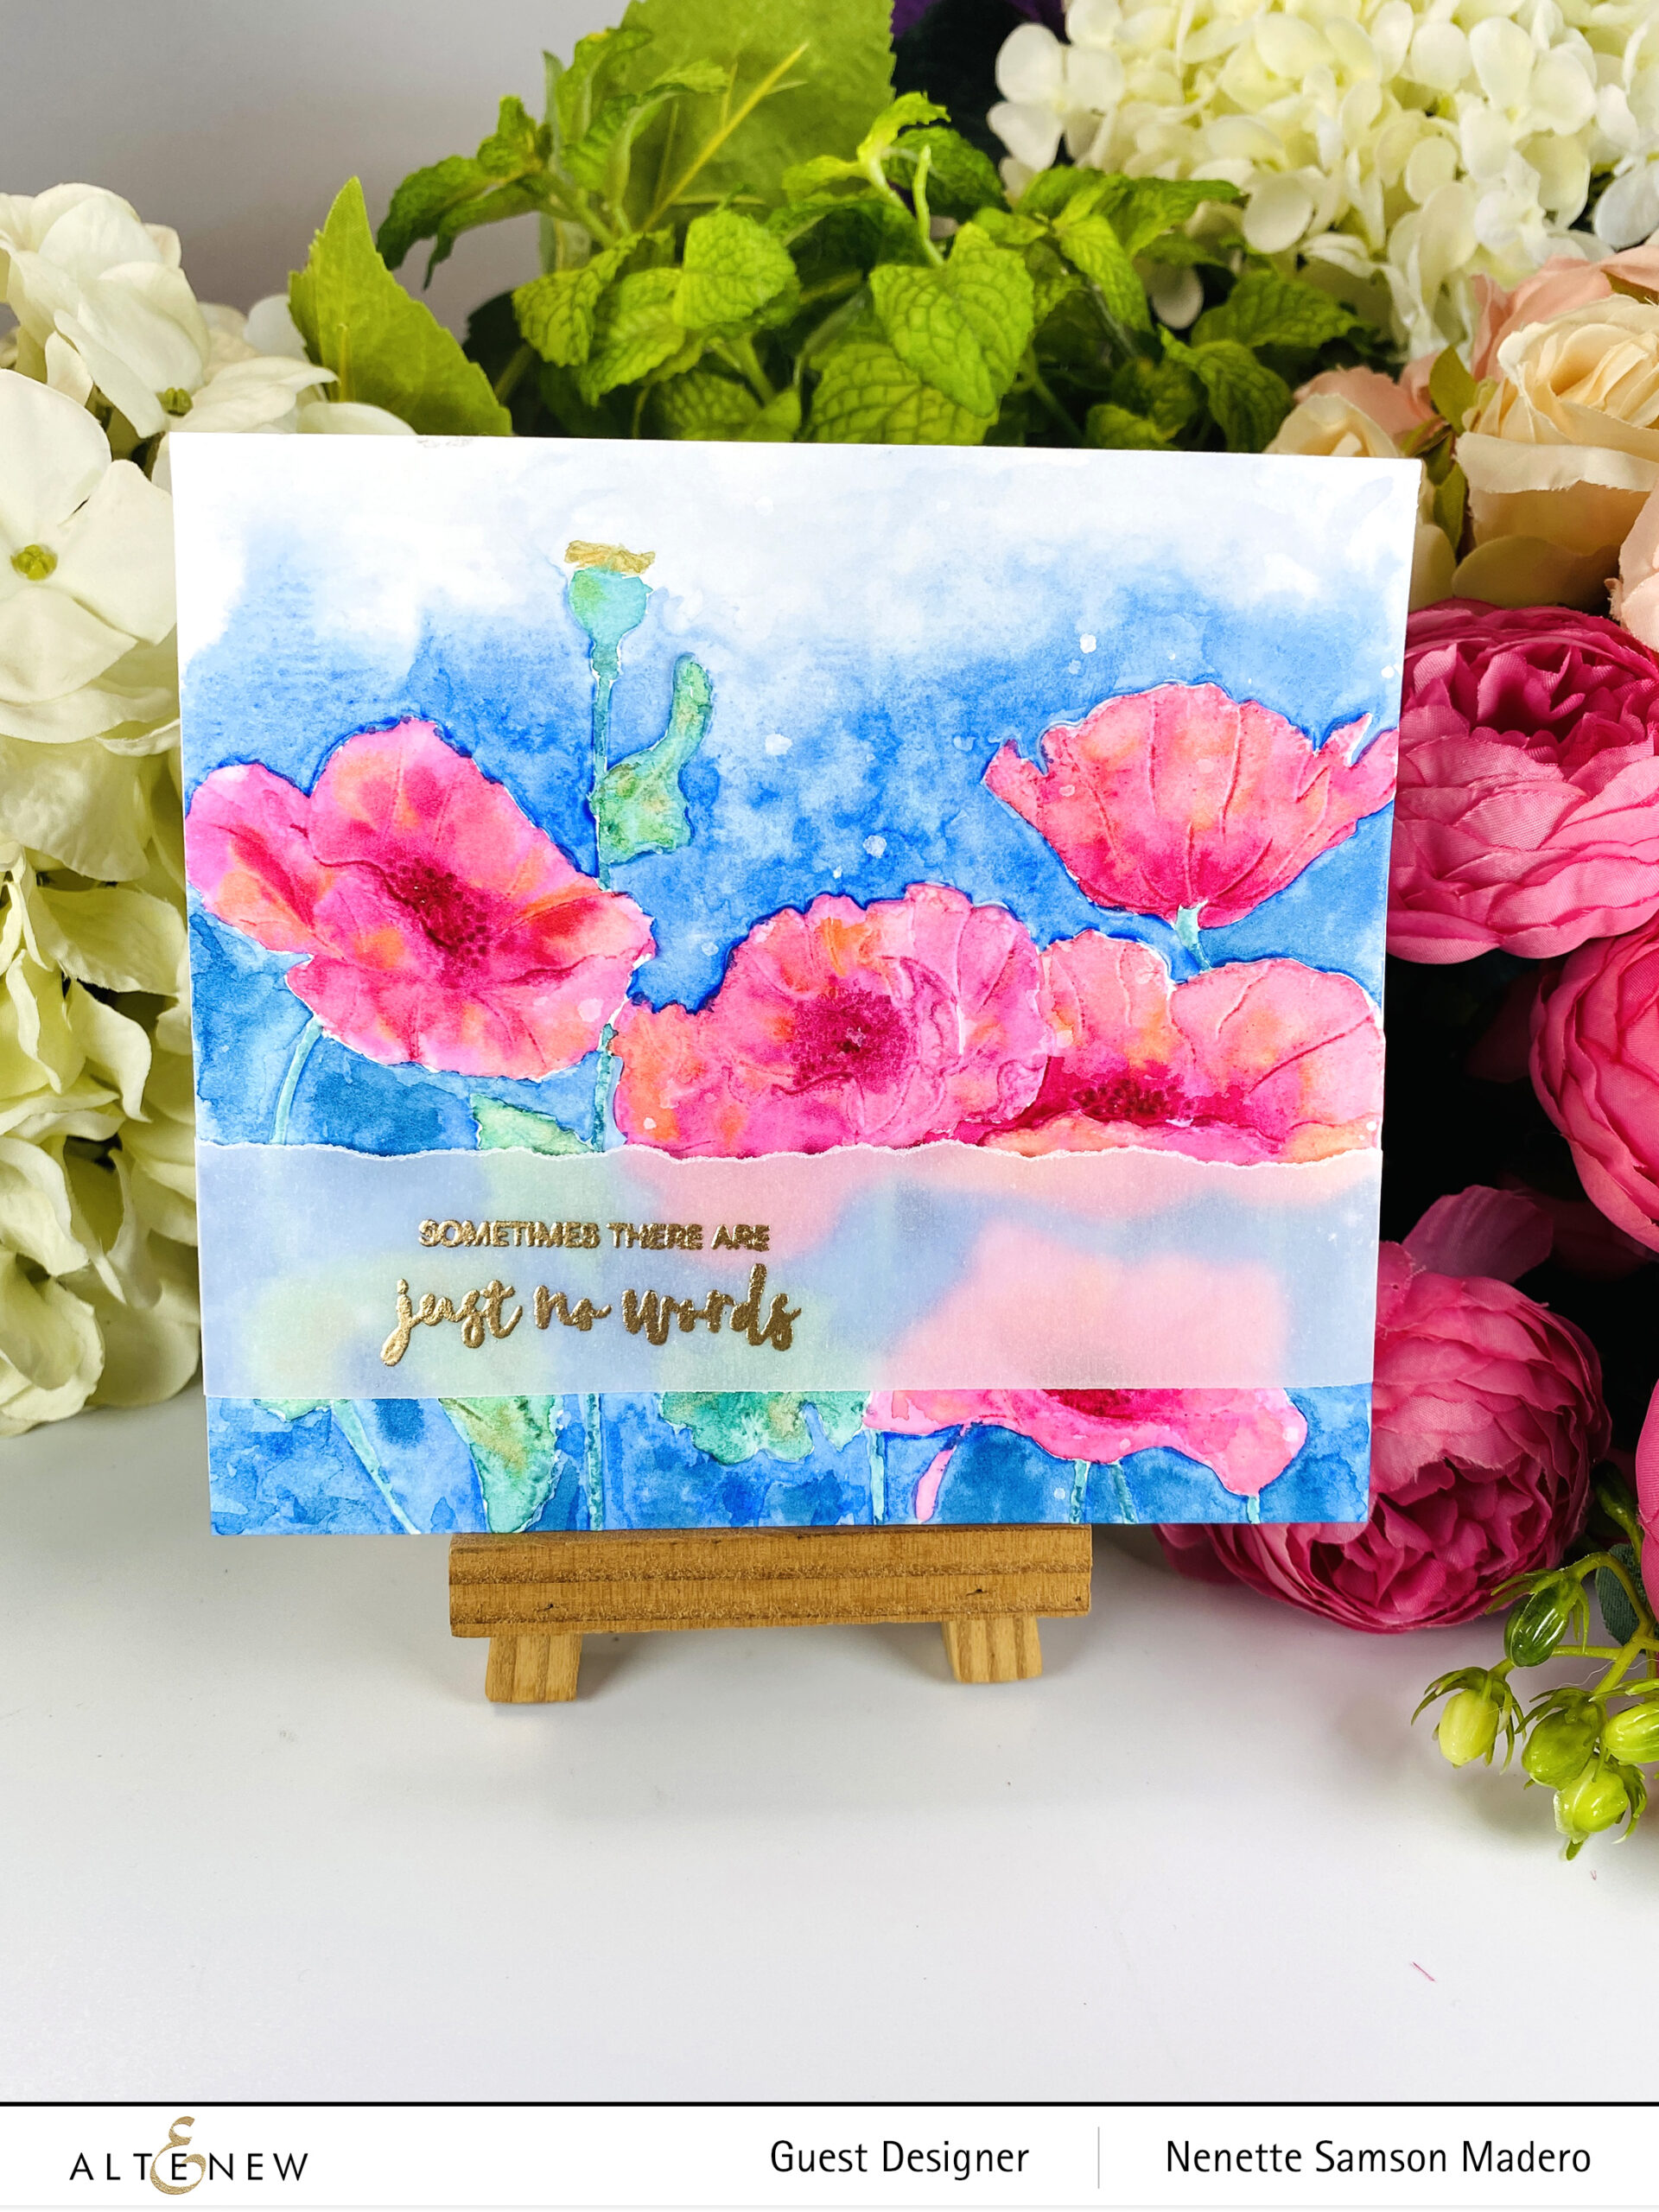
I used the embossed images as a guide on where to add the color. But since I wanted it to be a loosely colored panel, I didn’t mind if the edges were not as crisp or if the colors merged. Just make sure to mist the watercolor paper before embossing. Misting the paper will prevent cracking and give it a more crisp look.
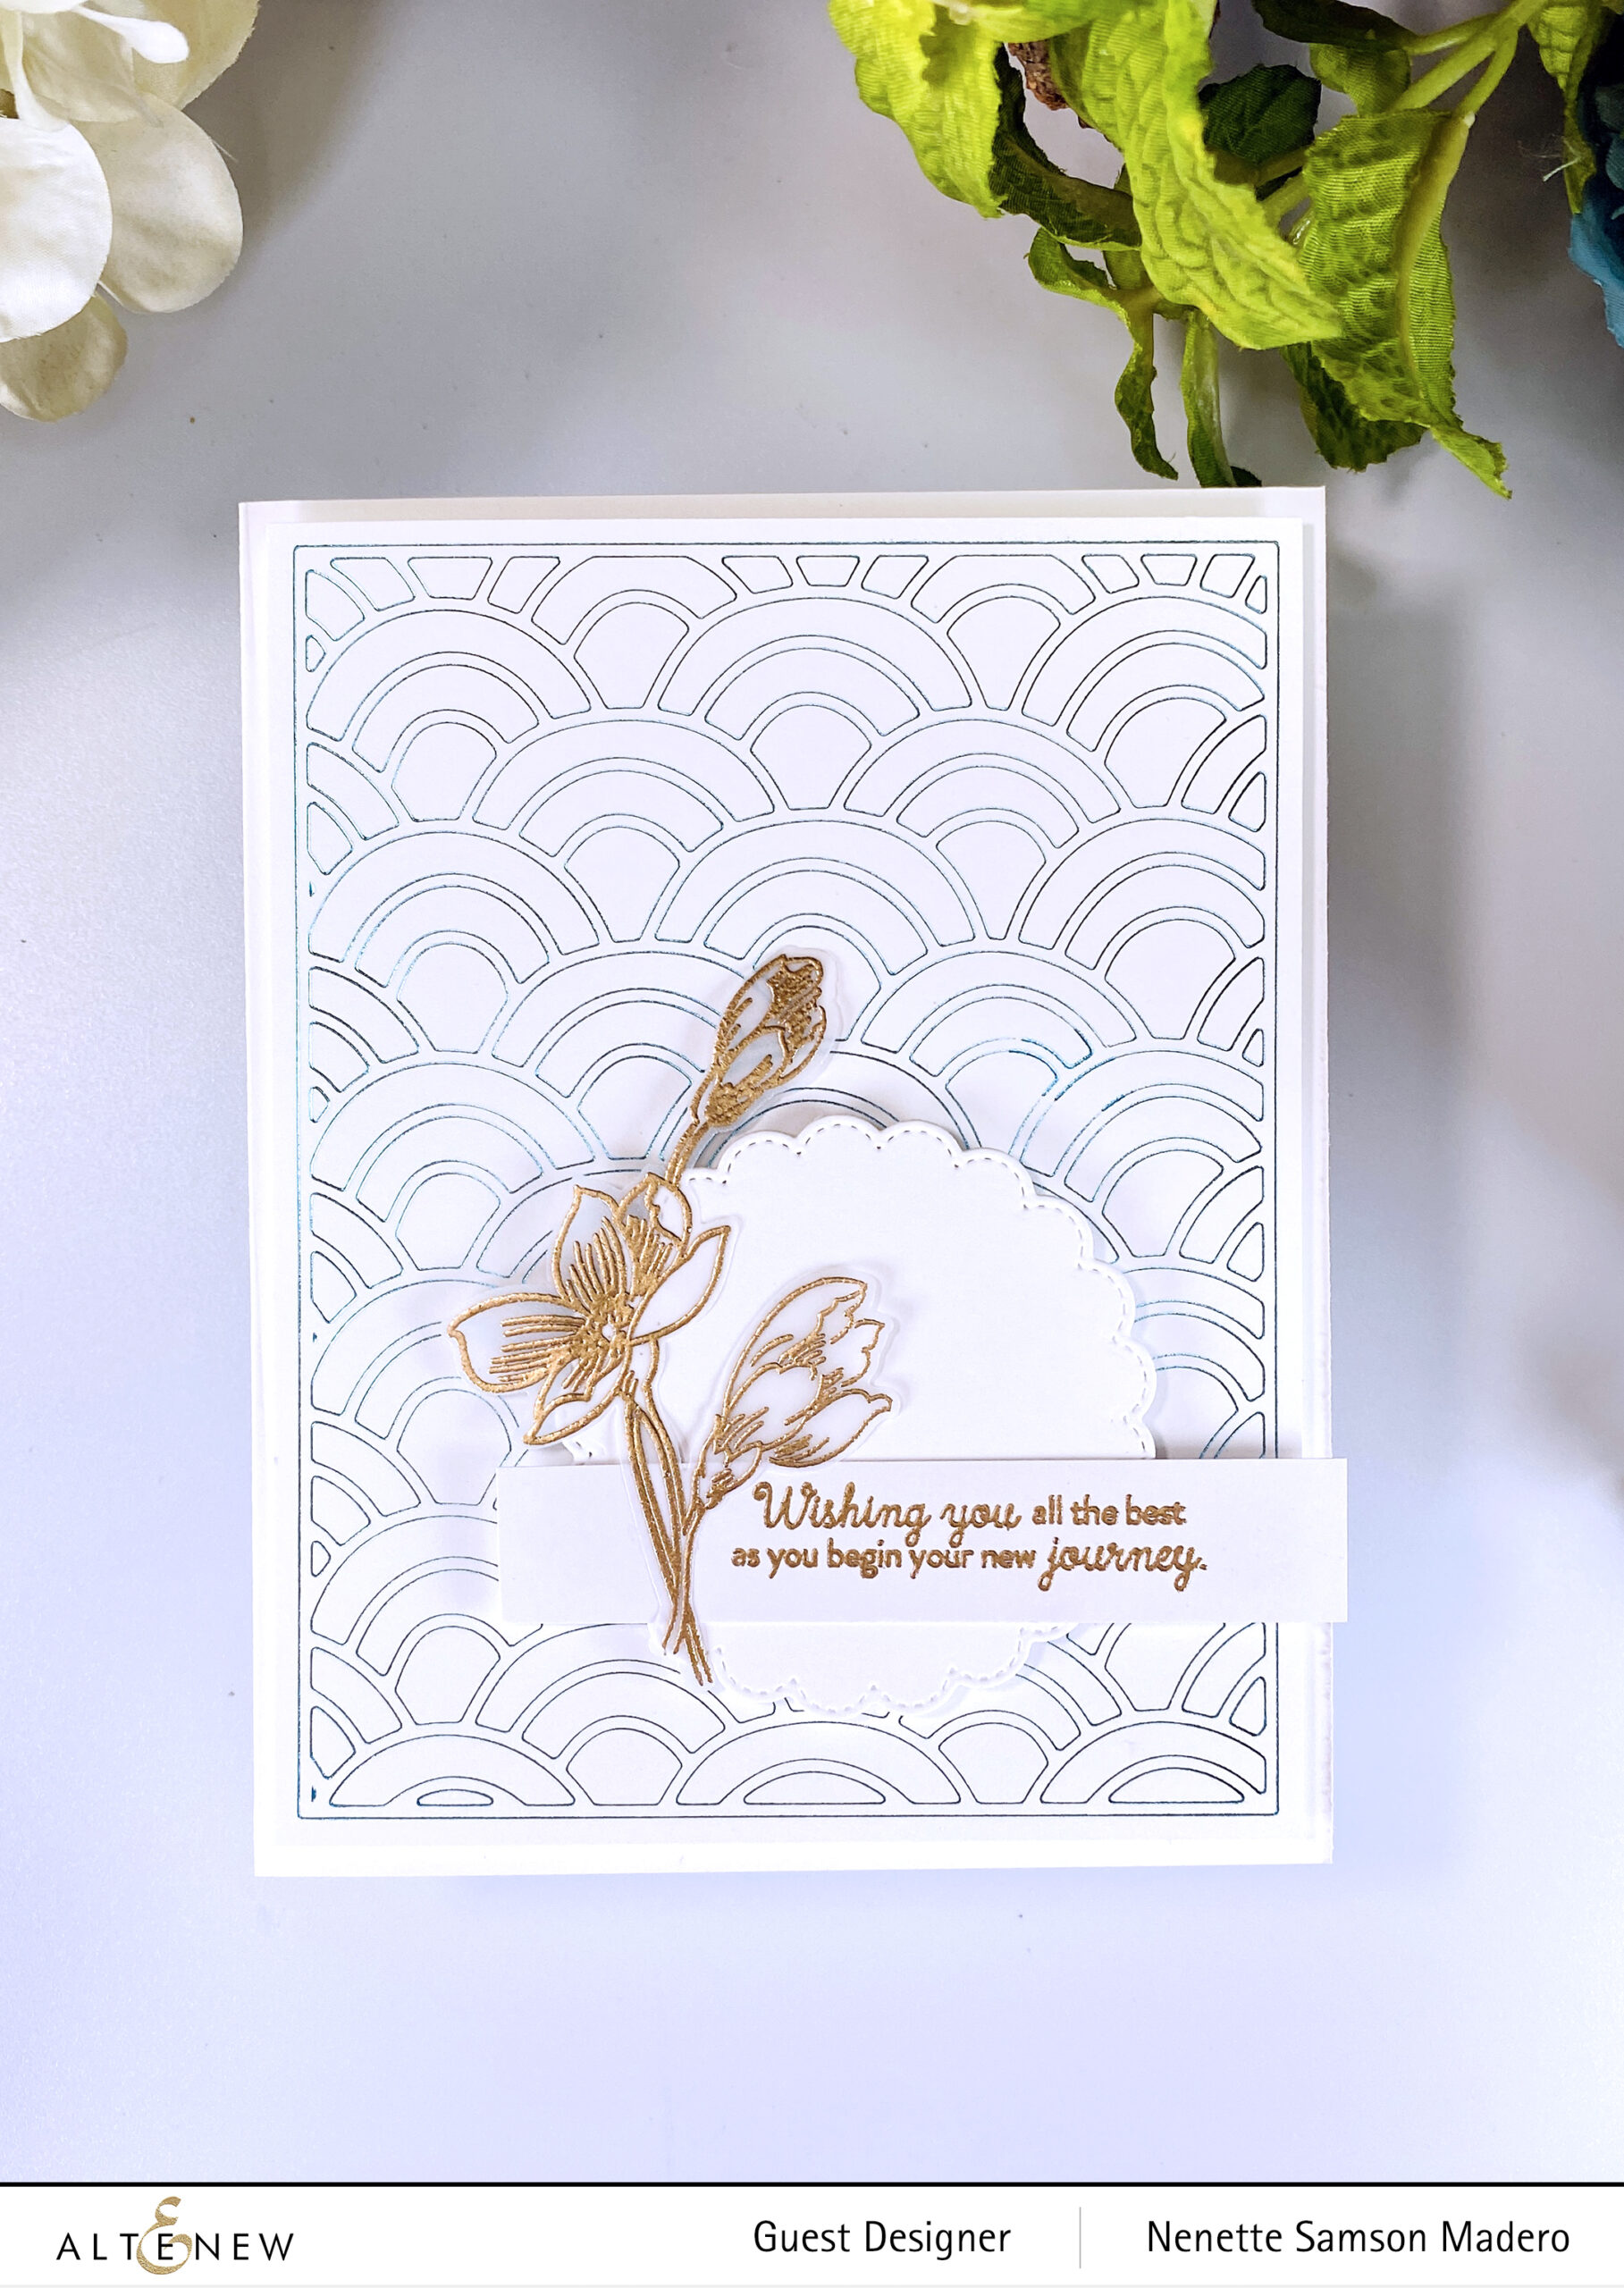
I wanted to create a CAS card using this beautiful Peaceful Poppies 3D embossing folder and keep the coloring simple and muted. The embossed centers give the card a nice contrast.
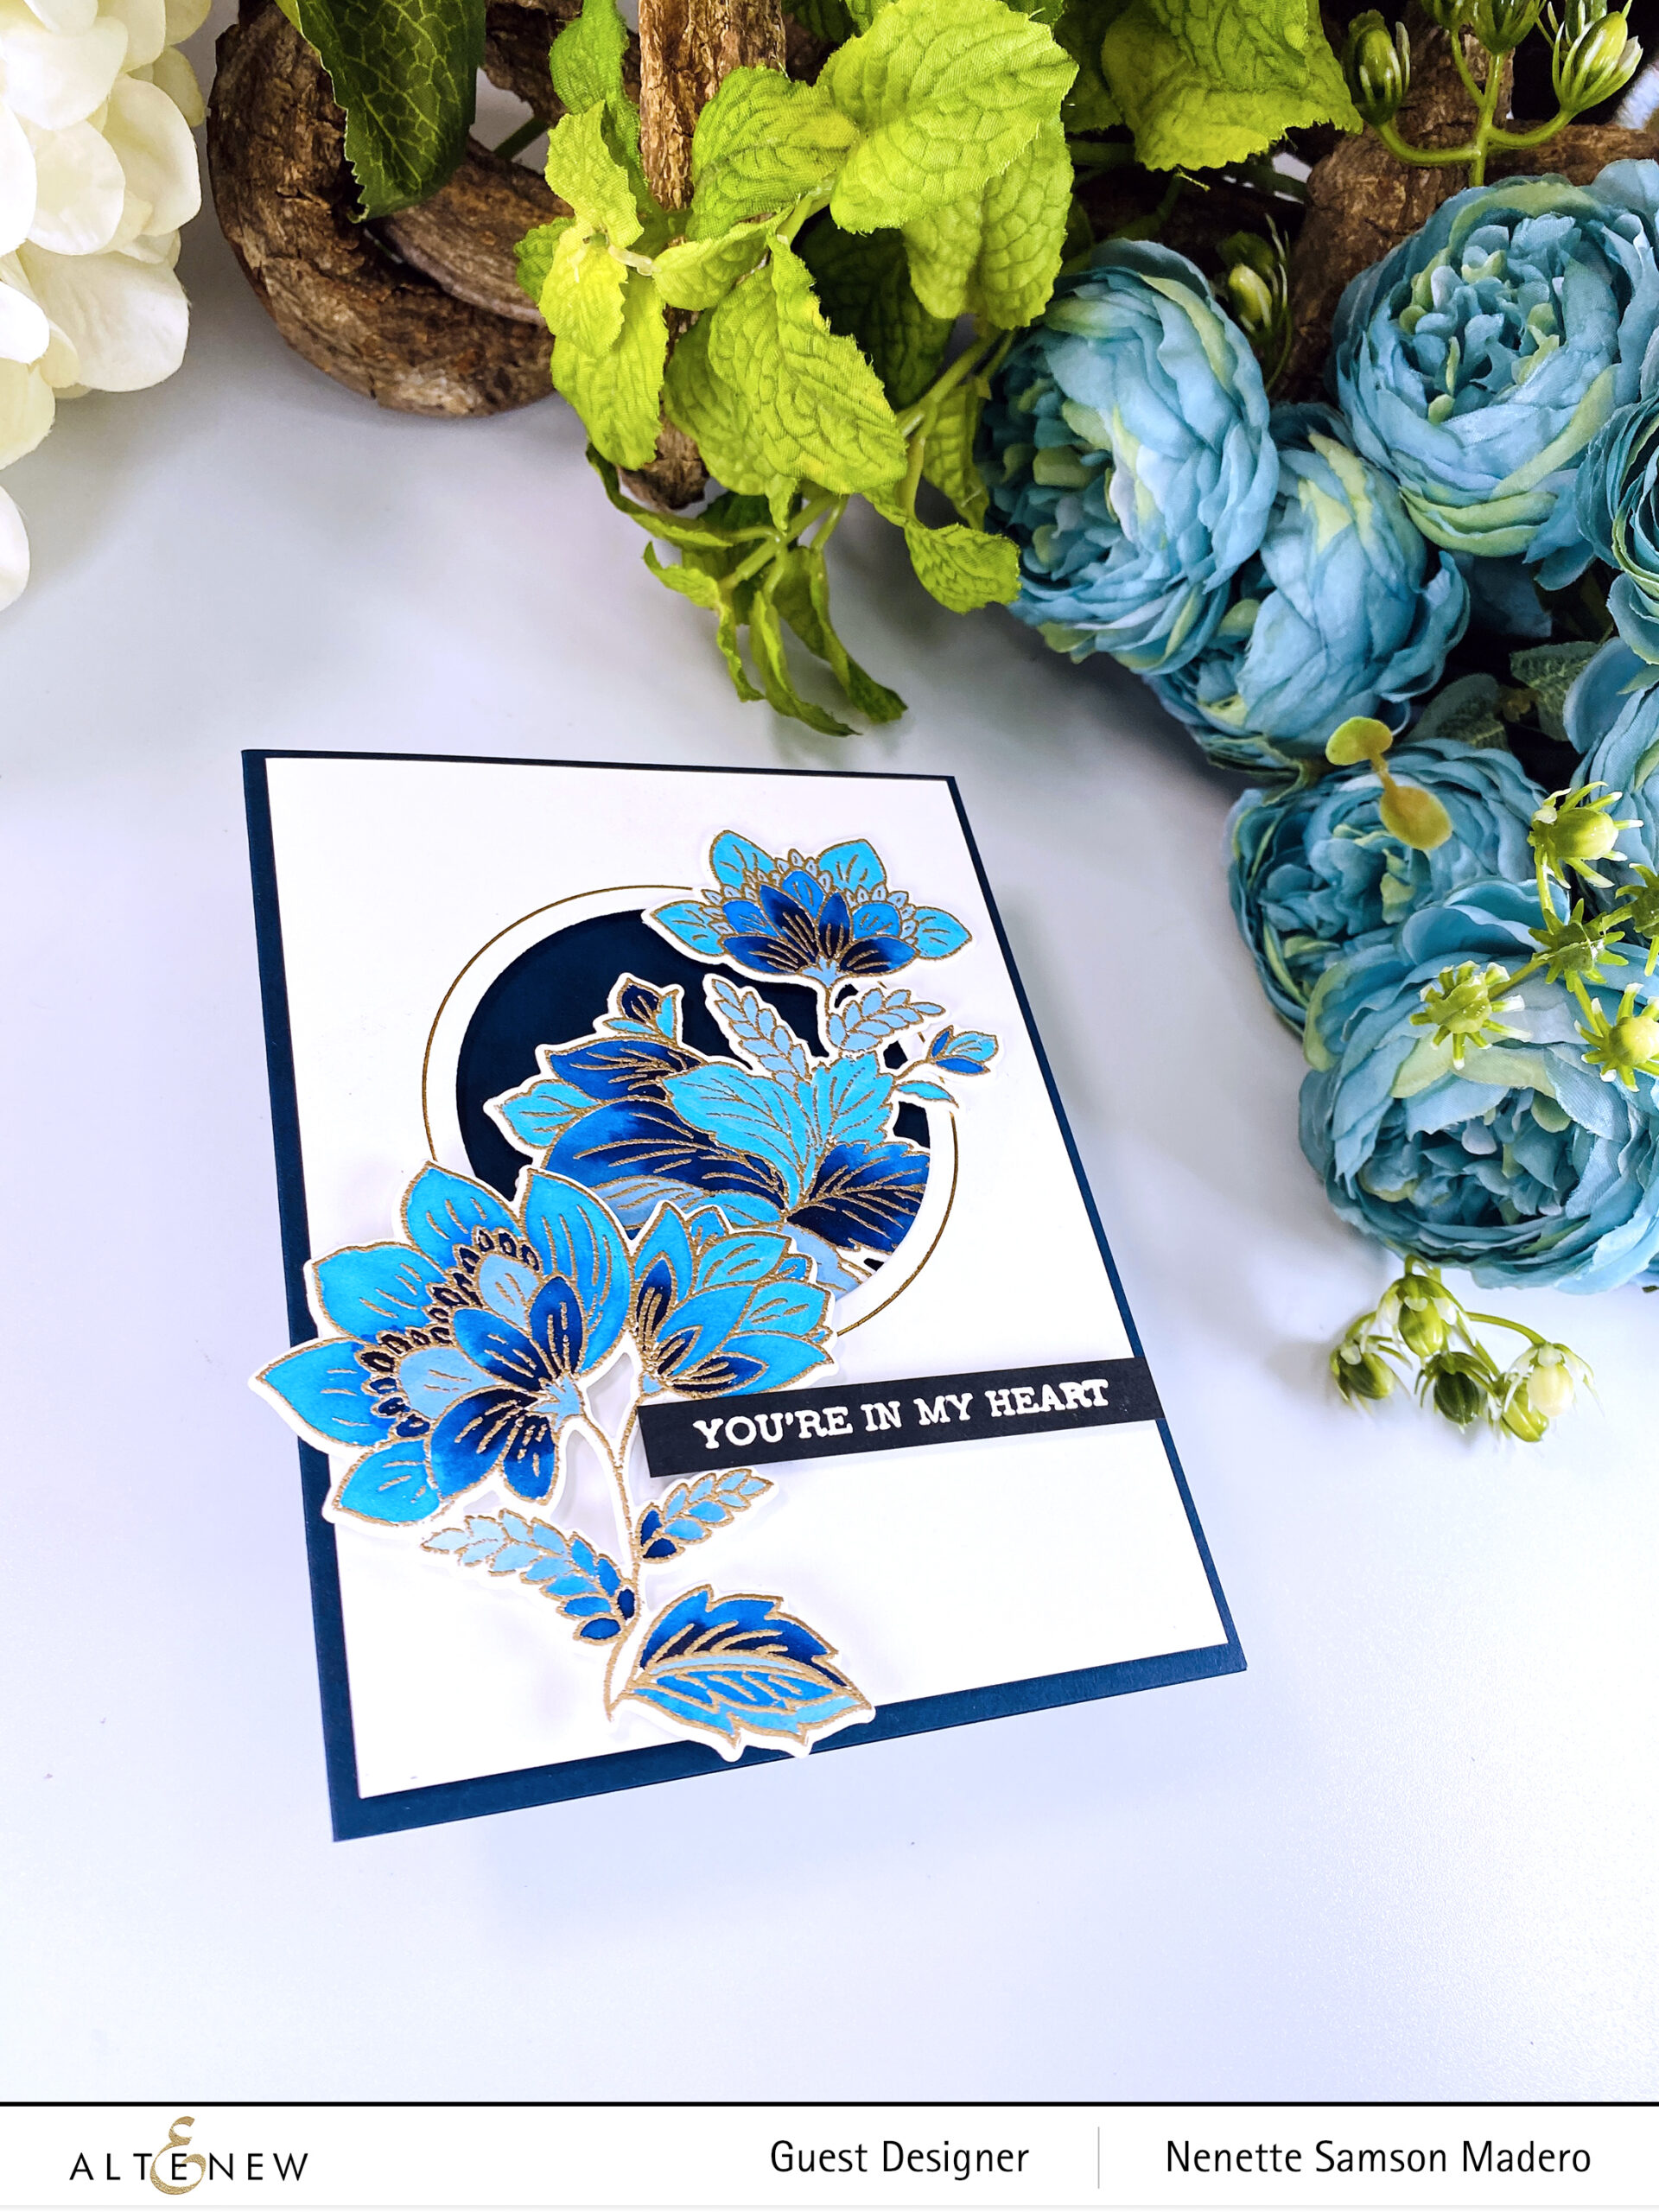
The Persian Motifs Stamp is one of my all-time favorite stamp sets. I love how beautiful the images are and how many different ways you can color them! The circle hot foil plate gives the card an elegant finish.
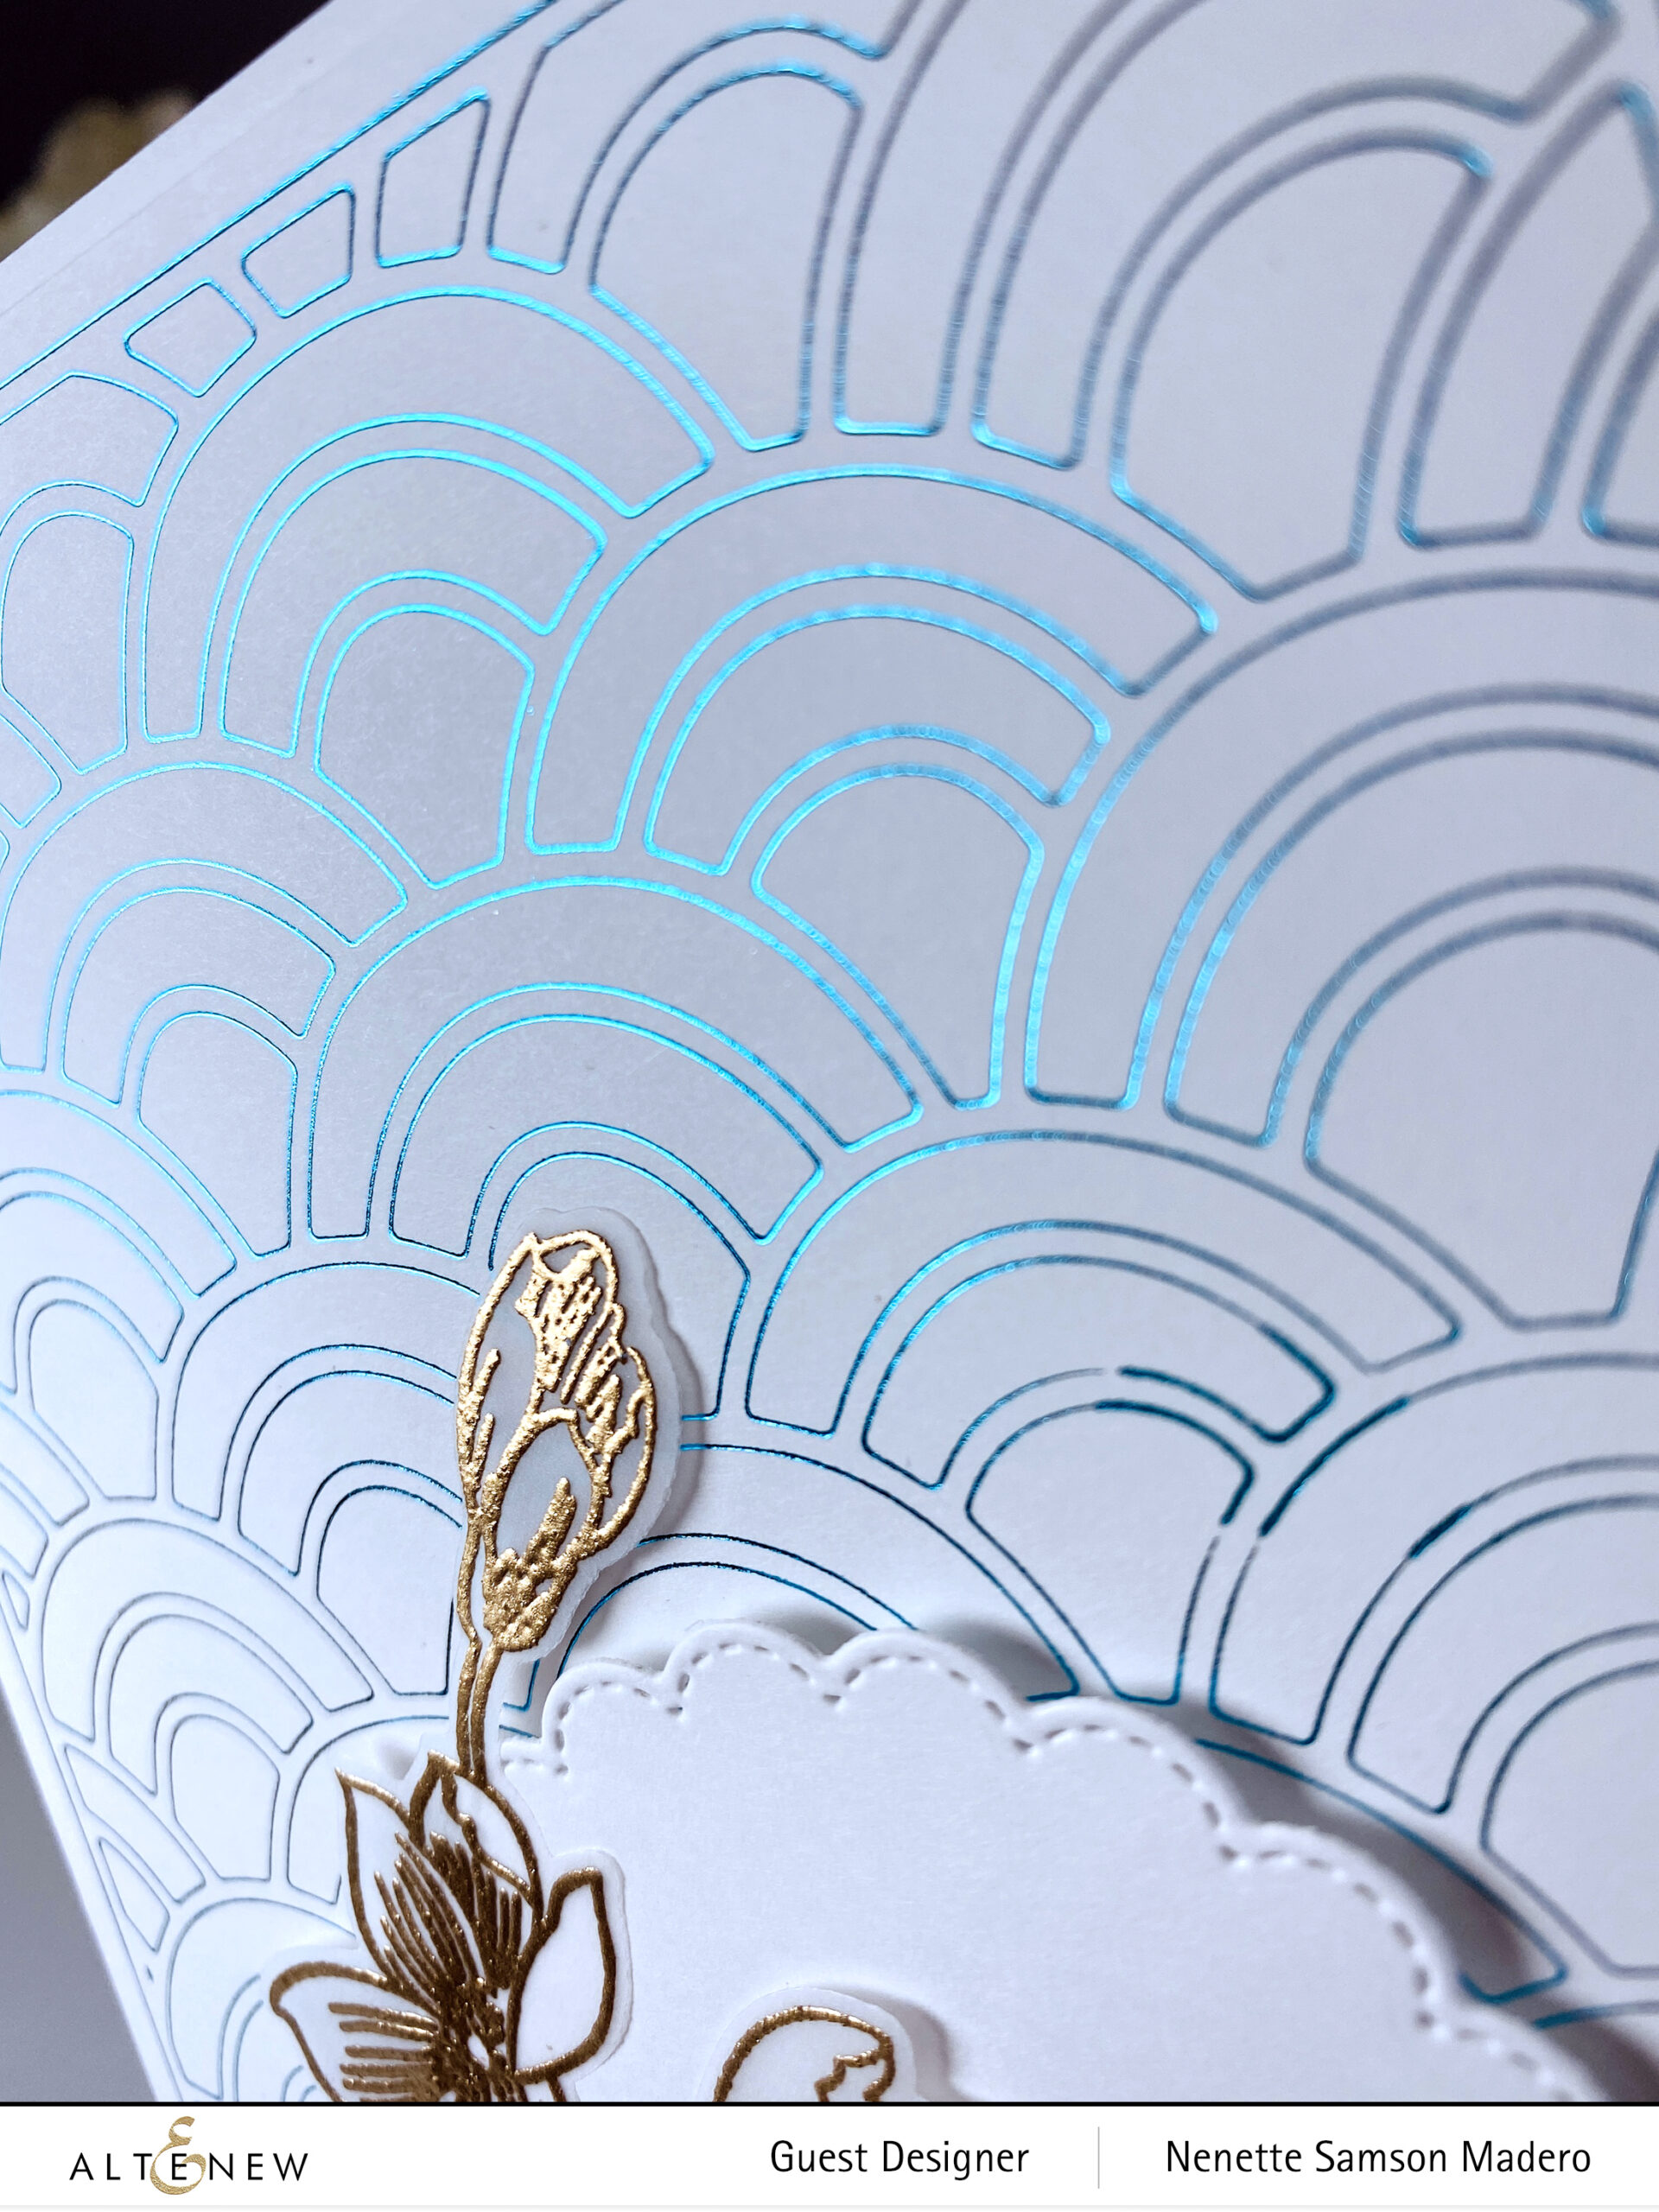
I have a newfound appreciation for white space. It draws attention to where it’s needed most and adds a visual rest. White space doesn’t necessarily have to be white– it can be any color or pattern as long as there’s nothing on it. (Thanks for this info, Cathy Z.!)
GIVEAWAYS
$300 in total prizes! To celebrate this release, Altenew is giving away a $50 gift certificate to 2 lucky winners and a $25 gift certificate to 8 winners! Please leave a comment on the Altenew Card Blog and/or each designer’s blog post on the blog hop list below by 06/27/2022 for a chance to win.
Altenew will draw ten random winners from the comments left on each stop of this blog hop and announce the winners on the Altenew Winners Page on 06/29/2022.
Next up: Reiko Tsuchida. (Due to strict restrictions in Japan, you might not be able to leave comments on her blog.) Thank you so much for dropping by! Please don’t forget to leave a comment to get a chance to win a prize from Altenew. If you liked what you saw, I hope you can give me a follow on my Youtube and Instagram channels (links are located below). Thanks for dropping by, and happy crafting! 💕
Hello, my friends! Welcome to my blog! Thanks to Therese Calvird for sending everyone over. I’m so excited for this Marvelous Monthly Series Release blog hop!!! For the complete details, make sure to drop by the Altenew Card Blog. You can find the full release here.
I created some cards using the products from this release. I hope you’ll like them!
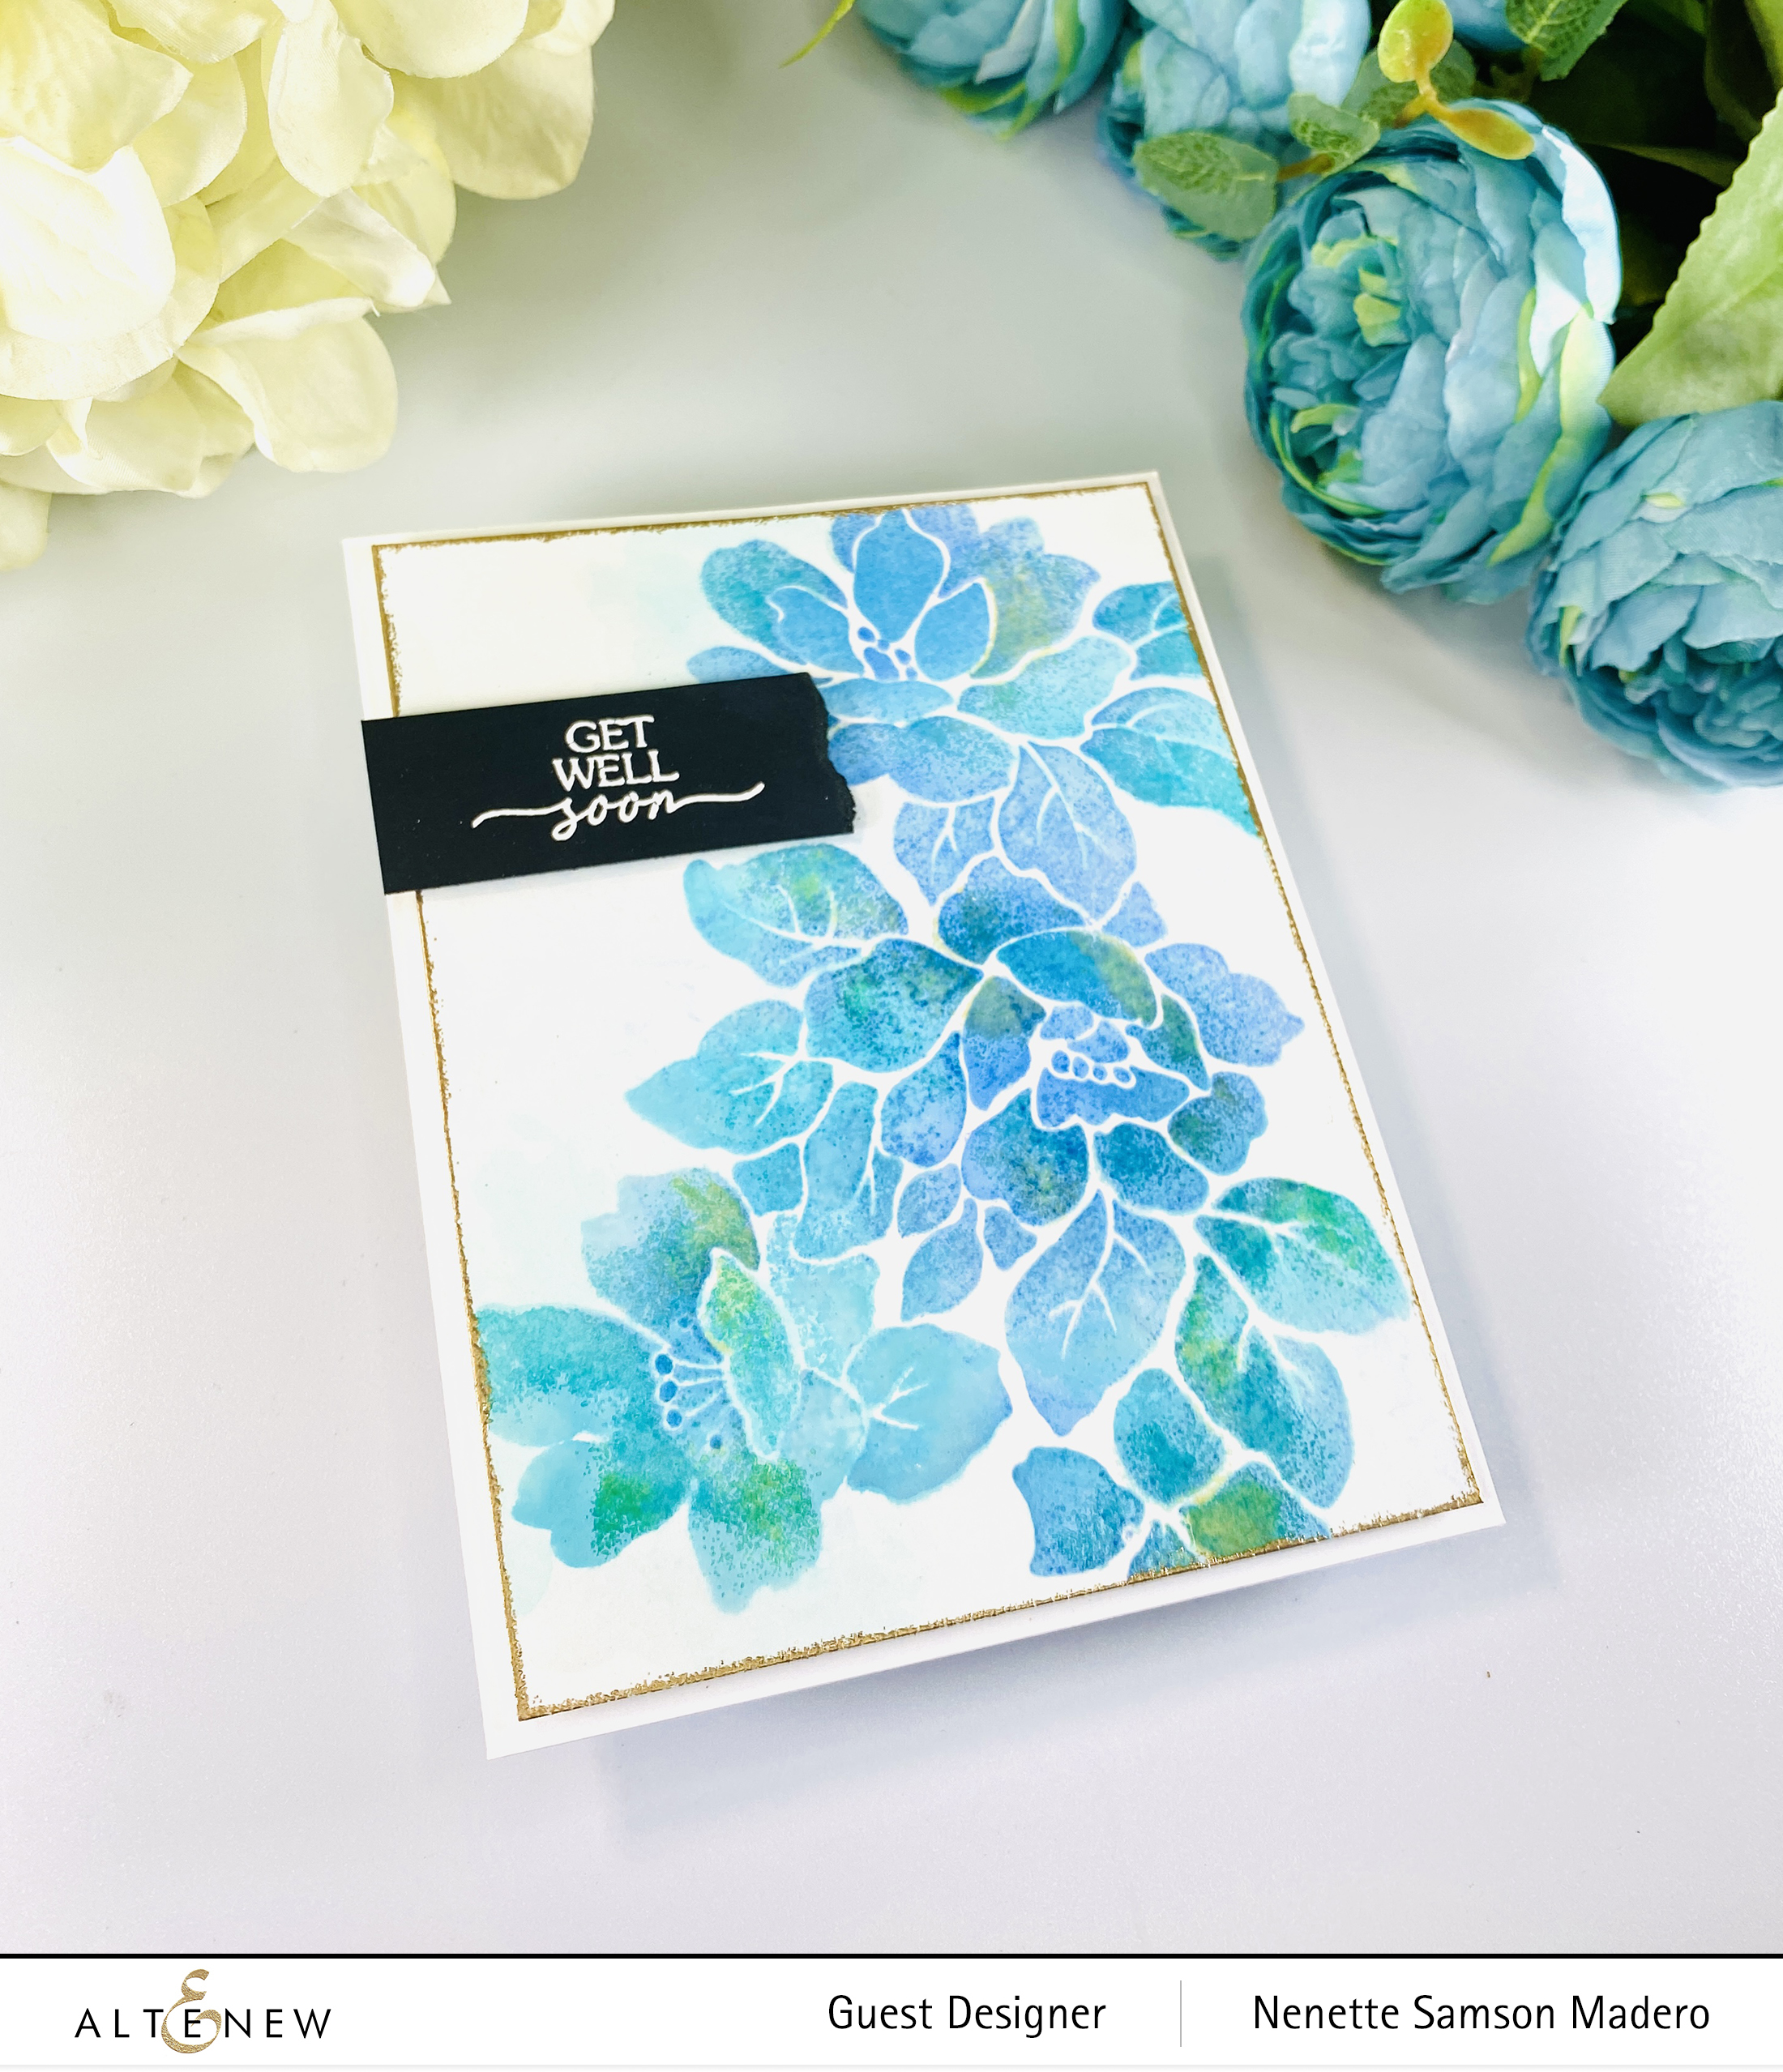
GET WELL SOON
STEPS:
Stamp the image from the Silk Art Stamp set using dye inks. With a spray bottle, add some water to the image.
Using the stencils, add Versamark ink to some parts of the stamped images.
Sprinkle Distress Glazes (Antique Linen and Salvaged Patina) on certain areas them emboss to create a mottled effect and for added contrast.
Emboss the edges using Rose Gold embossing powder to create a frame.
Color the flowers with Alcohol Markers: Cosmic Berry, Purple Wine, Puffy Heart, and Rose Quartz. Start with the lightest pink. Make sure to use a flicking motion when coloring the petals.
Follow the layering based on the images on the insert card.
Die-cut plain cardstock using the Fine Frames Cover die. Add Versamark Ink and emboss using Rose Gold embossing powder.
Stamp the sentiment on the vellum and tear the edges.
Assemble the card.
TIP: Always start with the lightest watercolor first, then work your way to a darker shade. While the image is still wet, use the fine tip of the watercolor brush to add some stipples for added texture.
GIVEAWAYS
$300 in total prizes! To celebrate this release, Altenew is giving away a $50 gift certificate to 2 lucky winners and a $25 gift certificate to 8 winners! Please leave a comment on the Altenew Card Blog and/or each designer’s blog post on the blog hop list below by 06/18/2022 for a chance to win.
Altenew will draw ten random winners from the comments left on each stop of this blog hop and announce the winners on the Altenew Winners Page on 06/20/2022.
Next up is my talented friend and mentor, Virginia Lu. I hope you liked the card samples I made for this marvelous release. It would mean so much to me if you could follow me on Instagram and YouTube if you liked what you saw here in my blog. The links are located below. Please don’t forget to leave a comment to get a chance to win a prize from Altenew! Thank you so much for dropping by, and I hope to hear from you again soon! Happy crafting!!!


")


")


")